Purchase
Odoo Purchase management is the best solution for your organization to manage all the purchase activities. Purchase management is a very important aspect when concerning a company. This module will be a helping hand for the smooth running of all the operations such as purchase quotation, product arrangement, purchase order, voucher operations, price management, and many more aspects of the purchase operations of the company. In addition, this module can easily manage vendors, vendor bills, stock management, quality checks, and other aspects.
The Odoo Purchase management module can be integrated with all other modules in the Odoo platform such as Sales, Inventory, Invoicing, Repairs, and many more.
First, we can discuss the Product management of the purchase module.
Product Management
The Odoo platform offers you an efficient product management tool that will allow you to define the products, product variants, and all other aspects related to the product. The product menu in the purchase management module can be accessed from the product tab available in the home dashboard of this module.
Now let us discuss how to create a product on the platform.
Product creation
By selecting the product menu in the home dashboard you will be depicted with a product window as shown below.
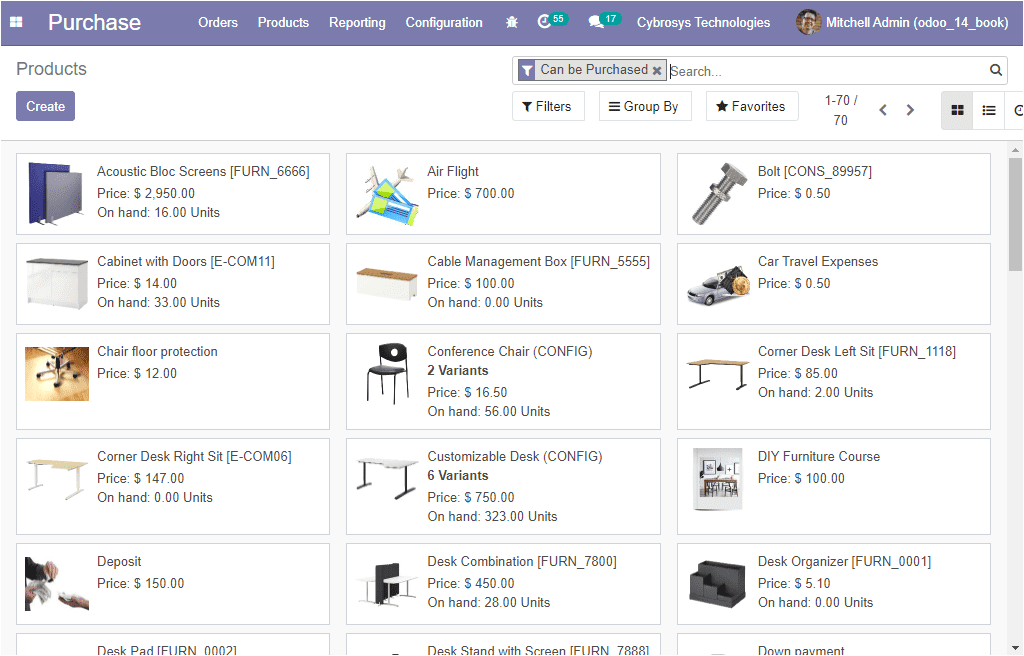
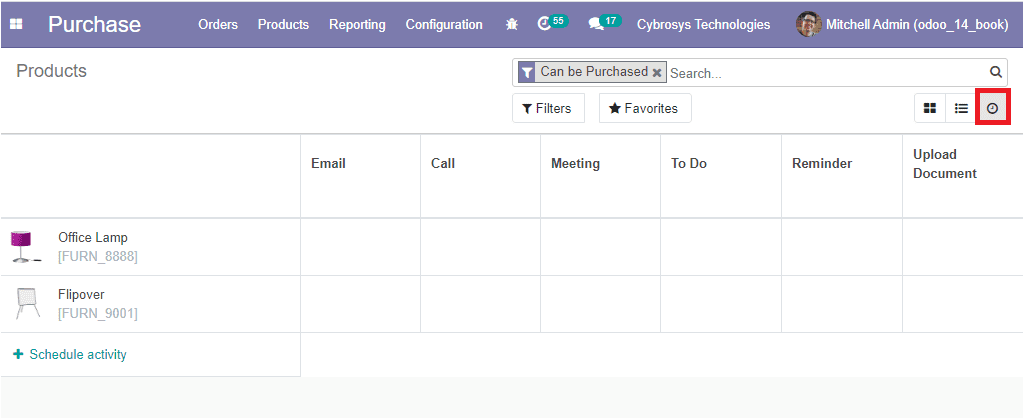
In this window, you can view all the products described on the platform. All the default, as well as customizable options such as filters, group by, and favorite search, are available as in all other menus in the platform. Moreover, this list of products can be viewed in both List and Kanban view. In addition, you also have the Activity view. The activity view is used to display an overview of all activities related to the respective product. In this window, the activities will be shown in a table where the rows are used to record activities and columns mark the different activities. The image of the View activity window is depicted below.
Now back in the product window, you can create a new product in the platform by selecting the Create icon available on the top left corner of the window. The image of the creation window is depicted below.
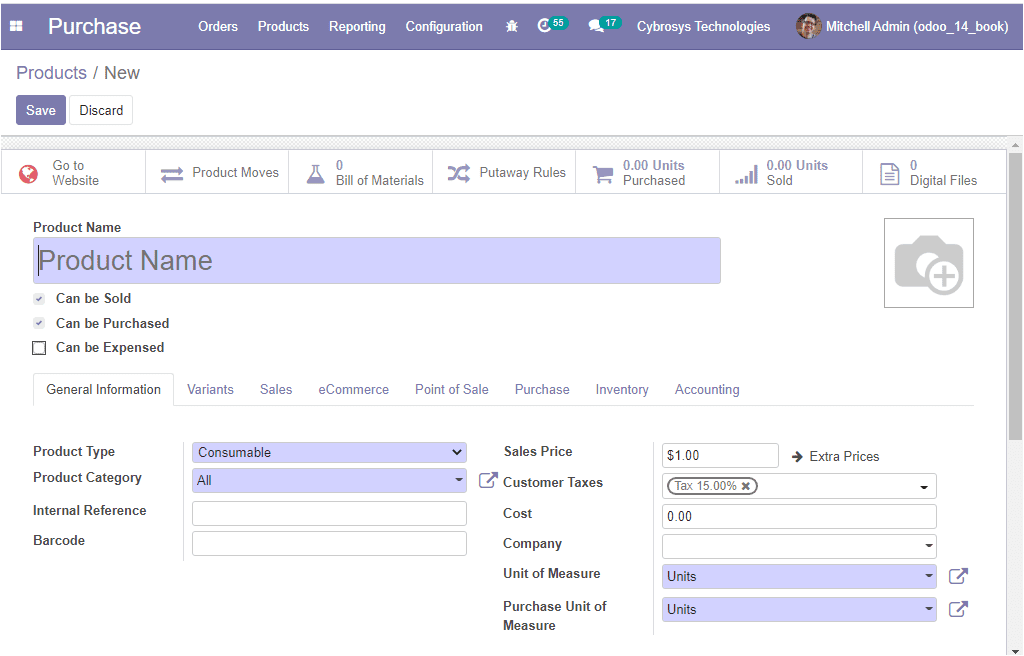
In this product creation window, you can provide a name to the product first. Then you can specify whether the product can be sold, purchased, or it can be selected at an expense. In addition, you can view the smart buttons available which will allow you to go to the company website, the product moves menu, the bill of materials menu if it is a manufactured product, put away rules defined, units purchased menu, units sold menu, Digital files menu. Additionally, you can provide an image of the product in the allotted space.
Under the General Information tab, you can define the Product Type as consumable, storable, or service product. The Product Category can be allocated using the dropdown menu available. You also have the provision to create a new one using this dropdown option. The Internal Reference field can be specified as per the company specifications. Additionally, the platform supports the barcode operation that can be effectively established on the product by defining it in the product menu.
The Sales Price is the price at which the product is sold to customers can be provided along with the extra prices allocated and the default Customer Taxes used when selling the product. The Cost of purchase can be specified in accordance with the vendor bill. Moreover, the company can be mentioned if the platform is operating with multi companies. Apart from these options, you can also define the default Unit of Measure used for all stock operations along with the Purchase Unit of Measure. It must be in the same category as the default unit of measure.
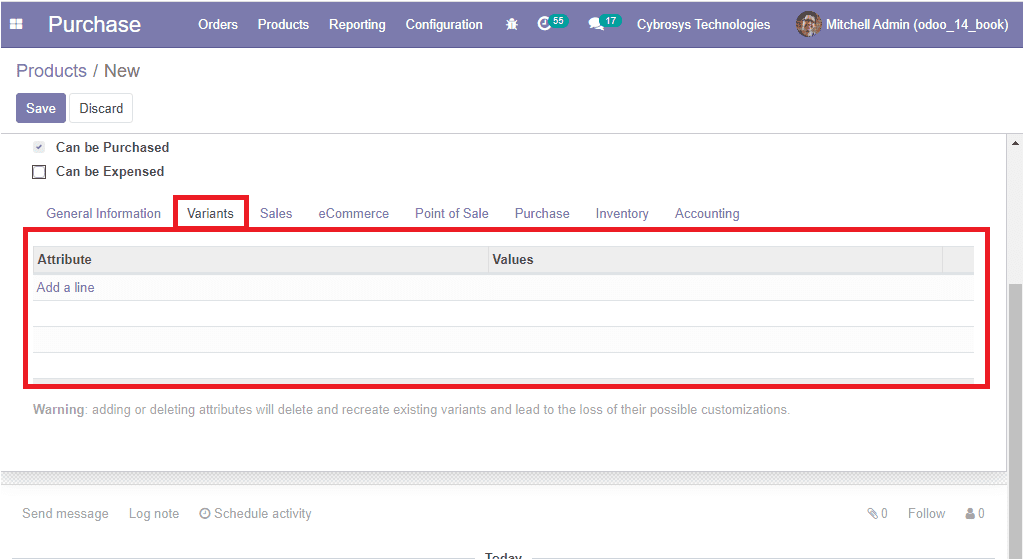
Under the Variants menu, the product variants for the respective product can be allocated. This can be done by selecting the Add a line option available.
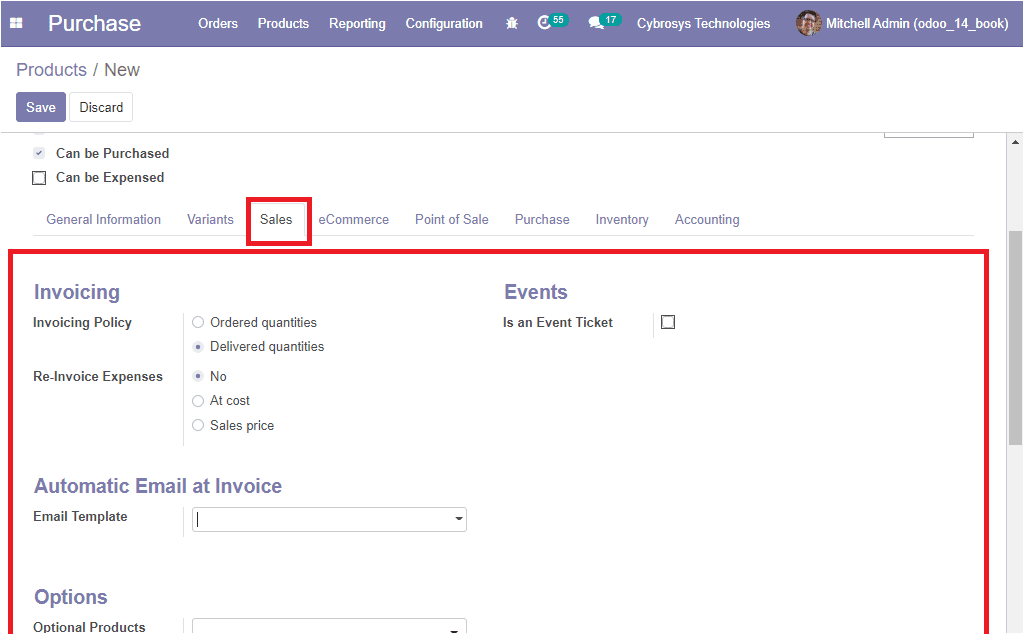
In the Sales tab of the product creation window, you can mention the Invoicing policy on which the product should be invoiced based on the ordered quantity or the delivered quantity. Also, the Re Invoice Expenses can be described in accordance with the company policy. With this option, a validated expense can be reinvoiced to a customer at its cost or sales price. Moreover, you can specify the Email Template for sending a product-specific email once the invoice is validated. The Optional product can also be mentioned based on the requirements and it can be suggested whenever the customer views add to cart. Additionally, a description of the product that you want to communicate to your customers can be described in the Sales Description box available. This description will be copied to every sale order, delivery order, and customer invoice.
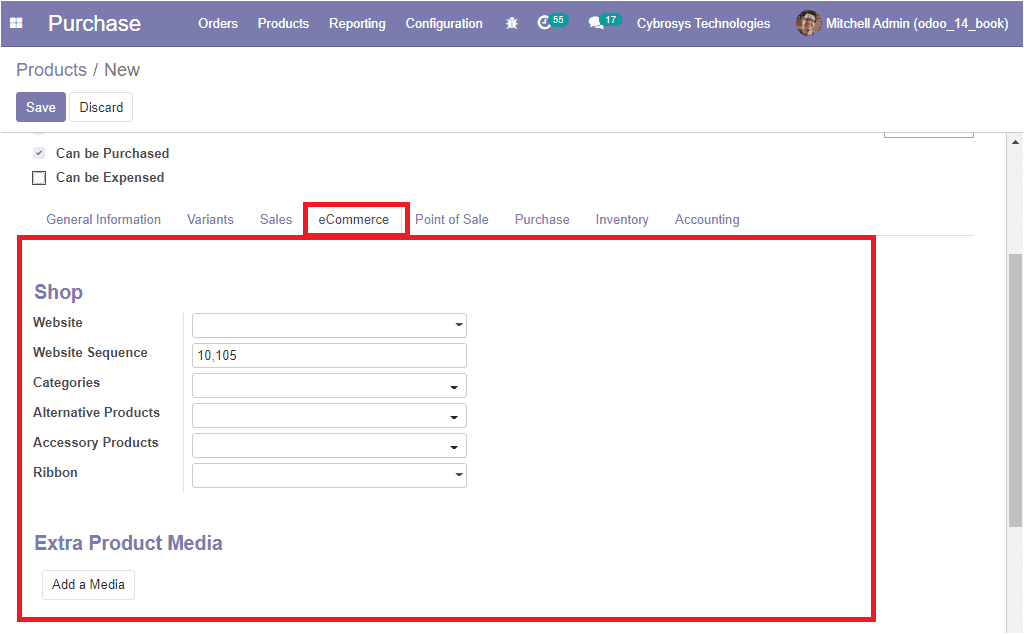
The eCommerce description of the product can be made under the eCommerce tab of the product creation window. Under this menu, you can describe the website information if the platform is operating on a multi-website option. Then you can allocate the Website Sequence along with the Categories of operation. Moreover, Alternative Products and Accessory Products can be mentioned.
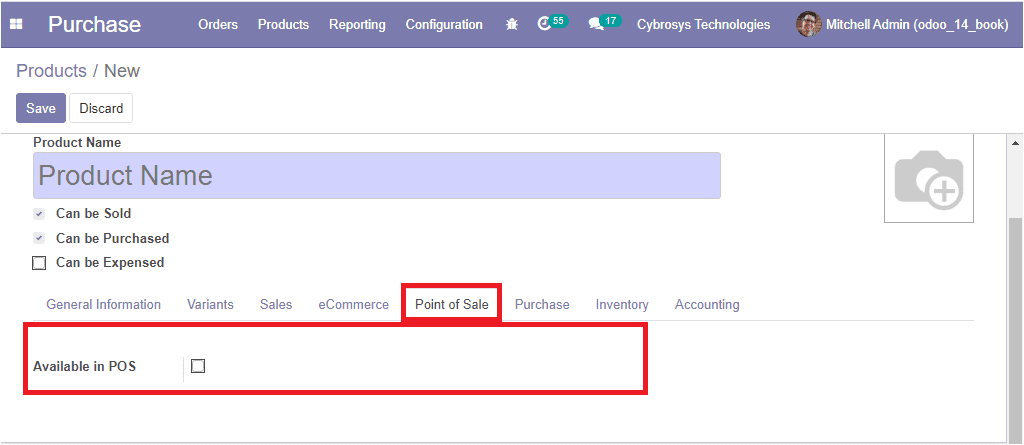
Under the Point of Sale tab, you can enable the option Available in POS for appearing the product in the point of sale.
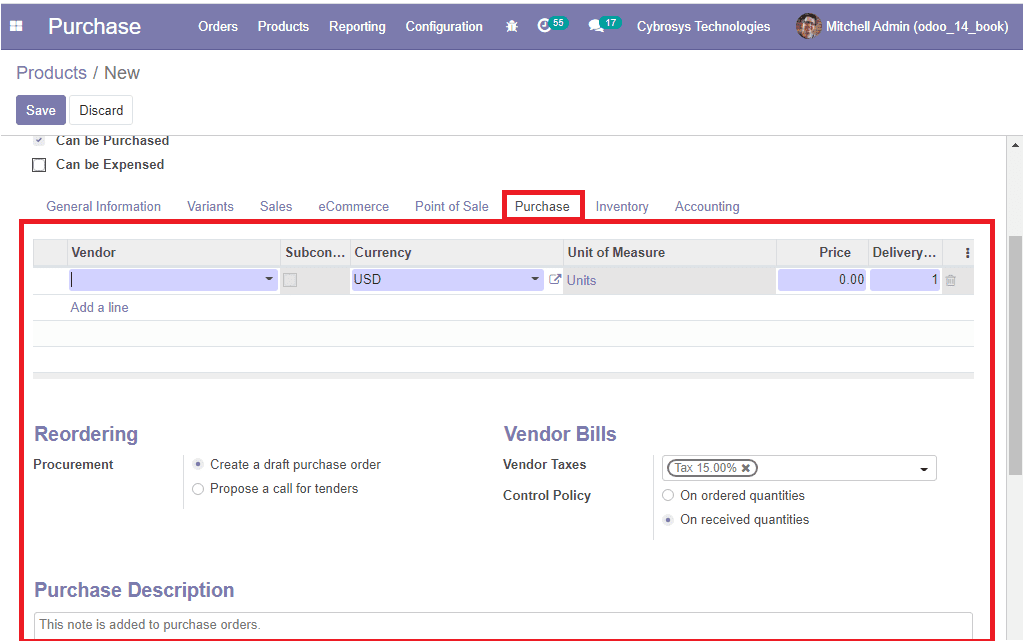
In the Purchase tab of the Odoo product creation window, you can provide various purchase details. First, you can mention the Vendor information. This can be described by selecting the Add a line option available in the menu. Under the Procurement field, you have two options.
- 1. Create a draft purchase order: Based on your product configuration, the system will create a draft purchase order.
- 2. Propose a call for tenders: If the purchase requisition module is installed and this option is selected, the system will create a draft call for tender.
The vendor bill description can also be described with the fields such as Vendor taxes and the Control policy of the bill generation in the platform. Additionally, you can provide a custom-made purchase description of this particular product.
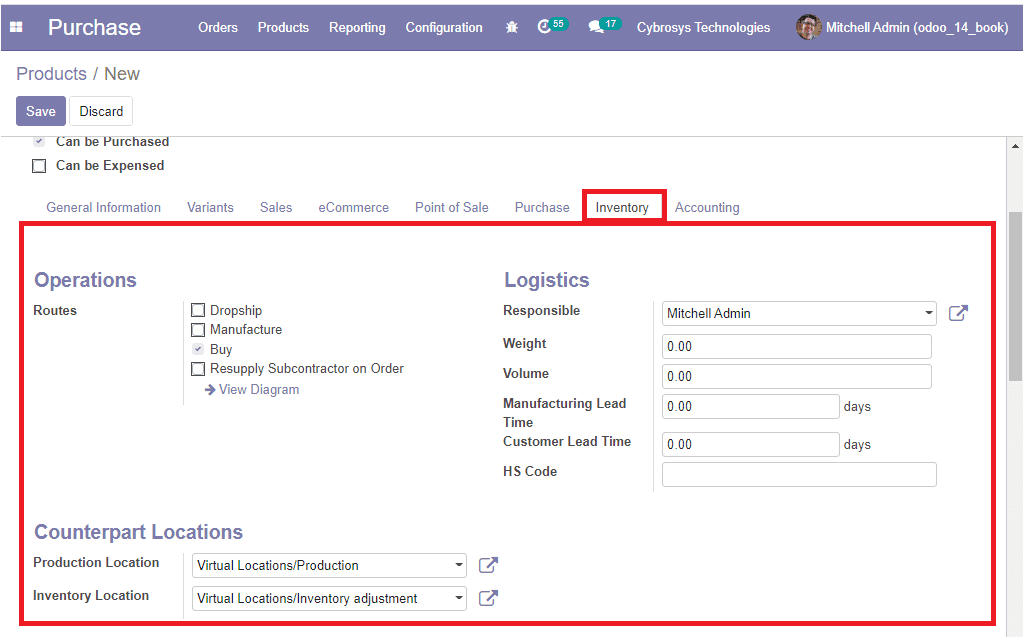
Now let us move to the Inventory tab of the product creation window. Under this tab, all the inventory aspects of the particular product can be allocated. The Route operations of the product can be allocated. The logistics operations needed for the respective inventory operation can be mentioned such as the Responsible person and he/she will be responsible for the next activities related to logistic operations for this product. The Weight and Volume of the product can be allocated along with the Manufacturing Lead Time and Customer Lead Time. In addition, under the counterpart locations you can define the Product Location and Inventory Location.
Moreover, you can give the different ways to package the same product under the Packaging menu. This can be done by selecting the Add a line option available.
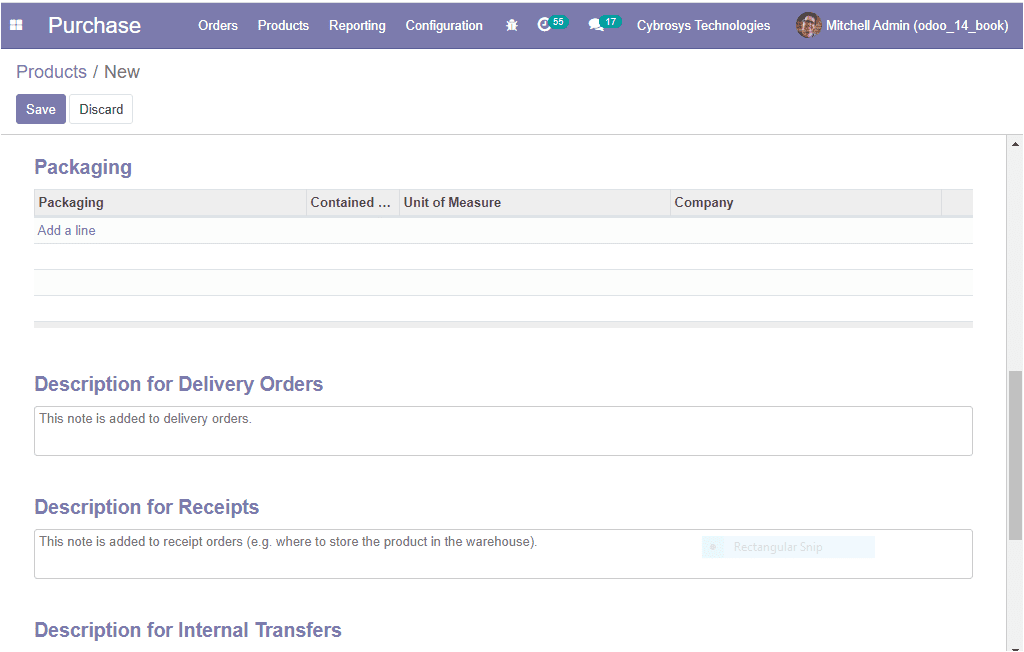
On selecting the Add a line option, you will be depicted with a pop-up window as depicted below where you can provide the package type, quantity of products contained in the package along with the barcode, and company details.
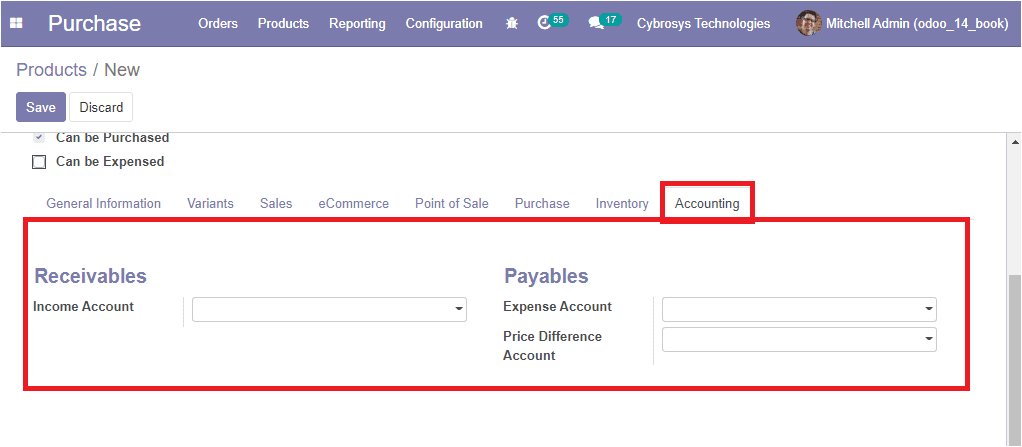
At last, the Accounting details of the respective product can be defined under the Accounting tab available in the platform. Here the financial operations of the product can be described both in terms of receivable and payable aspects.
So far we were discussing the Product window and how to create products in the Odoo Purchase module and now let us discuss the Product Category window of the purchase module.
Product category
In the Odoo platform, all the products described are allocated to a product category for its easy operation. The product categories window in the platform can be accessed from the configuration tab of the Odoo purchase module. The image of the Product categories window is depicted below where you can view all the enlisted product categories.

The existing product categories can be modified by selecting the respective one and clicking on the Edit button. Then you can save the changes by selecting the Save icon available. You also have the provision to create new product categories by selecting the Create icon available on the top left corner of this window. The image of the window is depicted below.
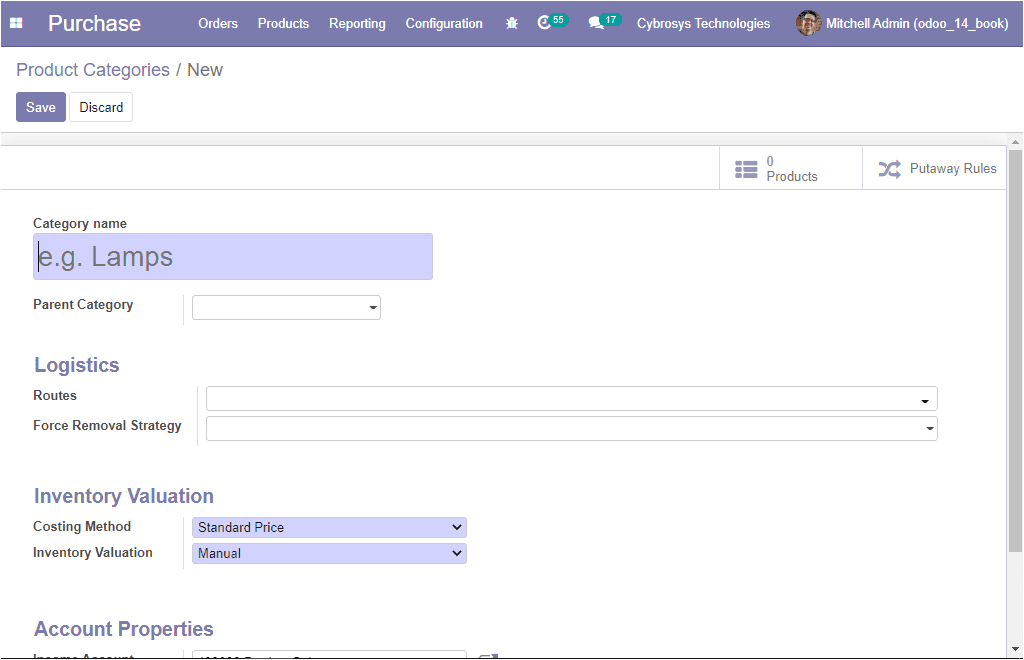
In this creation window, you can provide the product Category name along with the Parent Category name. In the Logistics menu, you can assign the routes of operation and the Force Removal Strategy. This will be used regardless of the source location for this product category. Moreover, the Inventory Valuation and Costing Method can be defined. The product to the respective category can be selected by clicking on the smart button Product accessible in the window. In addition, the Putaway rules of operation can also be defined by selecting the Putaway Rules menu.
As we clear on the configuration of Product Categories and now let us move on to discuss the Vendor management in the Odoo Purchase module.
Vendor Management
The Odoo Purchase module allows effective vendor management which helps organizations to manage costs and take away the risk factors associated with vendors. The Vendors described in the platform can be accessed by selecting the Orders tab of the module. For that, you can go to Purchase -> Orders -> Vendors . The image of the window is depicted below.
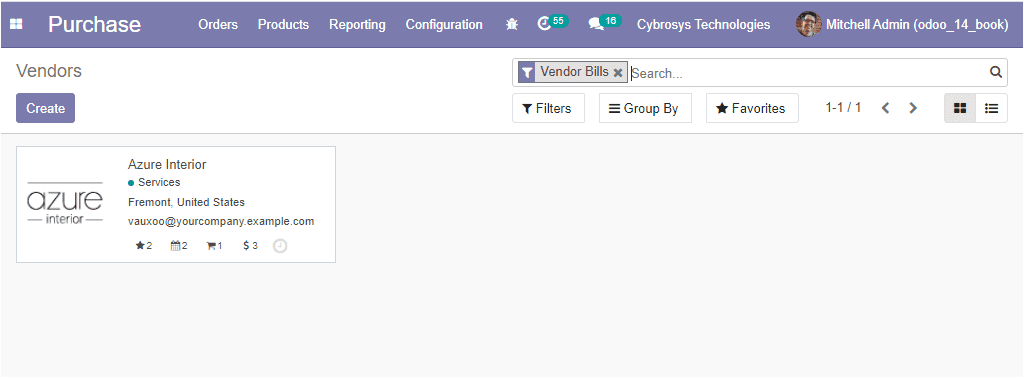
In this window, you can view the list of vendors described in the platform along with their details. This menu can be viewed in both Kanban and List view. Moreover, the data available in the window can be filtered, sorted out using the various customizable options available. It is also possible to create new vendors using this window. This can be done by selecting the Create icon available. The image of the creation window is depicted below.
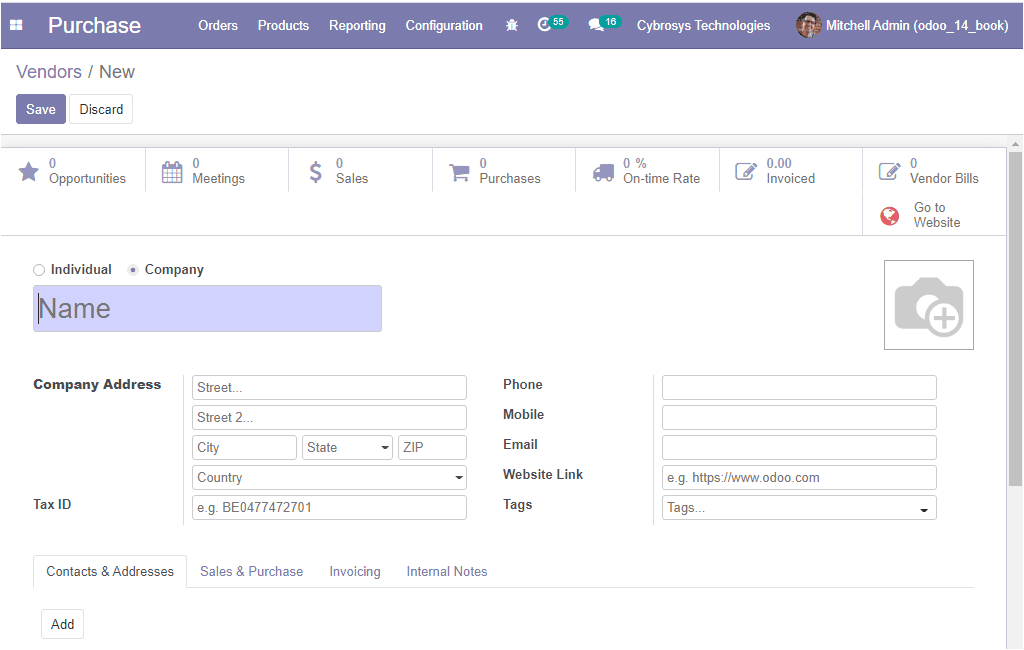
In this vendor creation form, you can allocate the Vendor Name, and also mention it as an Individual or Company. Then you can provide the Company Address and the Tax Identification Number. After that, you can provide the contact details of the company such as Phone and Mobile number along with the Email ID. Additionally, you can describe the Website Link and the Tags
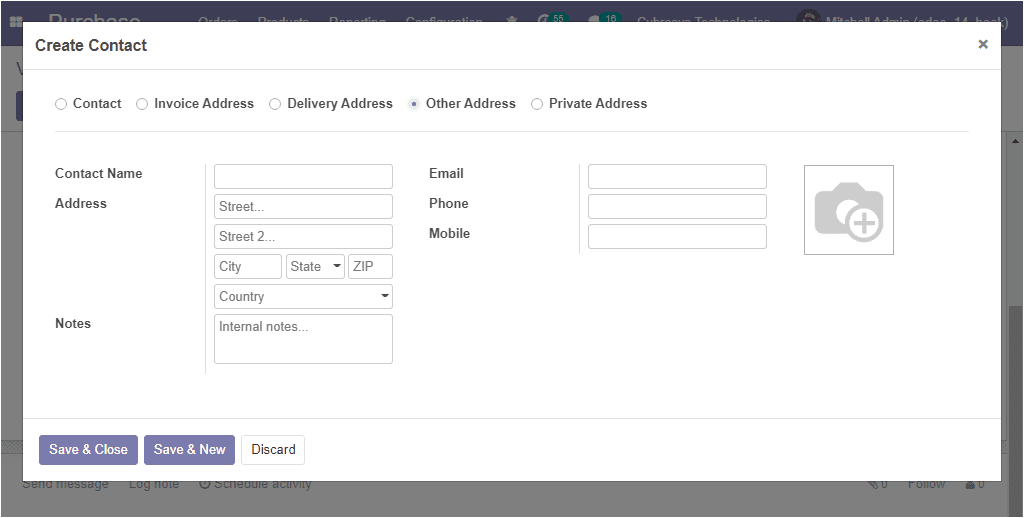
Under the Contacts & Addresses tab, you can add the respective address and the details by selecting the Add button.
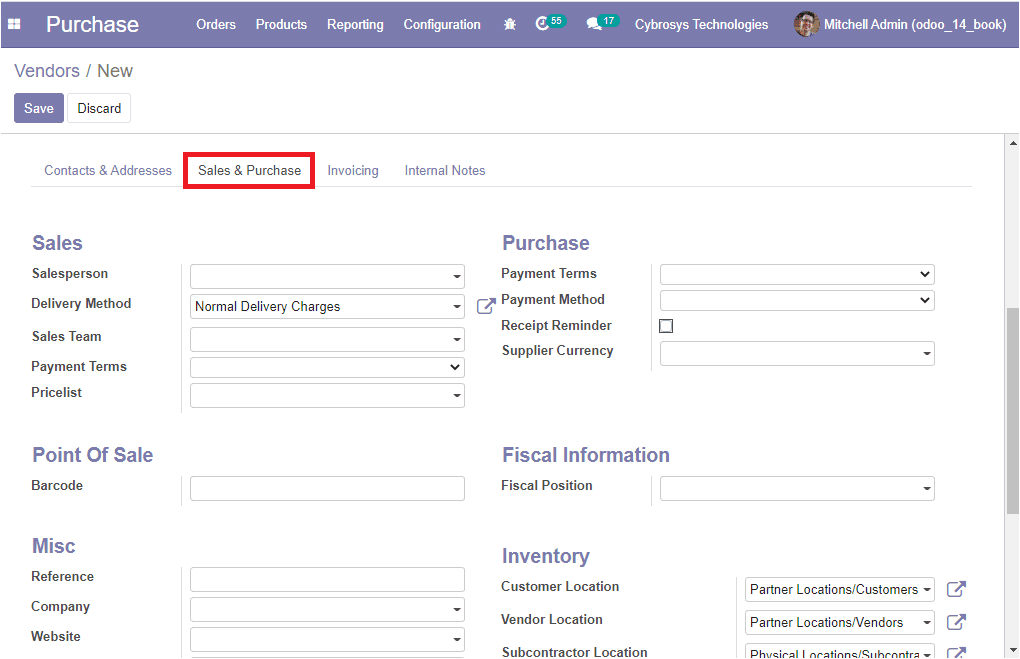
Now let us have a look at the Sales & Purchase tab of the vendor creation form. Here you can provide the sales details such as Salesperson, the internal user in charge of this contact. Allocate Delivery Method which is the default delivery method used in sales orders. Also, you can specify the Sales Team, Payment Terms, and Pricelist. Under the Purchase details, you can define the Payment Terms, Payment Methods, Receipt reminder, and the Supplier currency options of the module. Moreover, you can use a Barcode to identify this contact. This can be allocated under the Point of Sale operation. Additionally, the Fiscal position can be mentioned under Fiscal information. The Miscellaneous information such as Reference details, Company, Website and the Industry can be described. At last, the Inventory details such as Customer Location, Vendor Location, and Subcontractor location can be allocated.
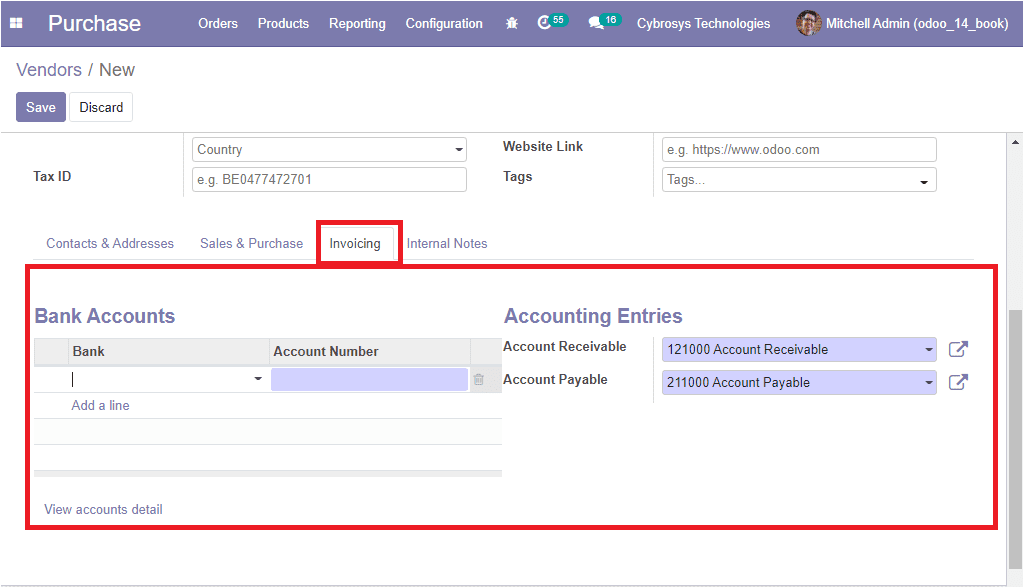
The invoicing aspect of the vendor can be defined under the Invoicing tab of the respective vendor. The bank account of the vendor along with the bank details and the account number can be described by selecting the Add a line option available. Also, the Accounting Entries operation for the Account Receivable and Account Payable chart of accounts can be allocated.
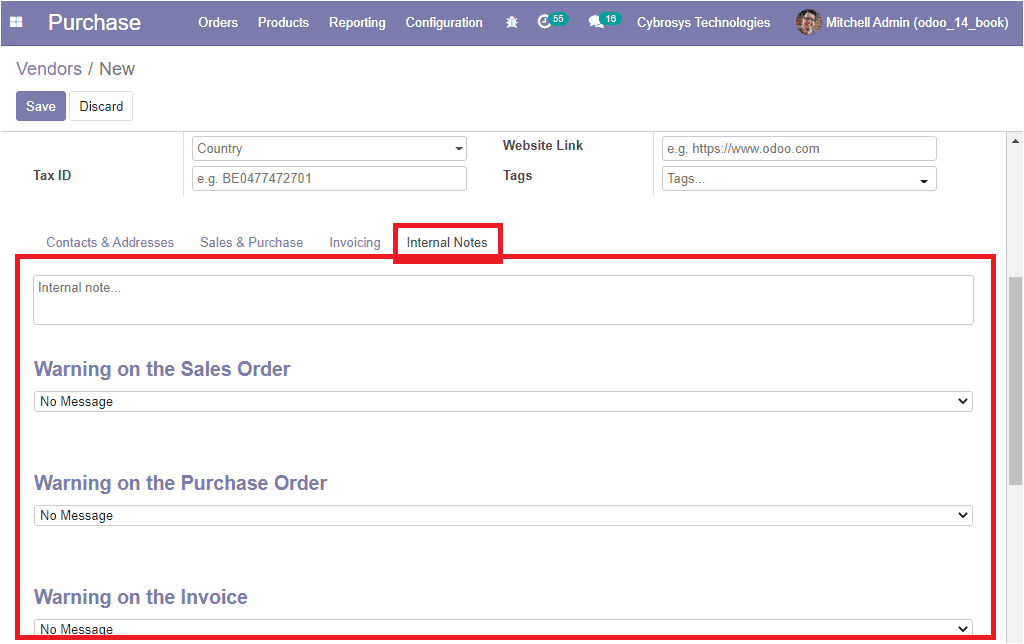
Under the Internal Notes menu of the vendor, you can provide a vendor description as Internal notes. Moreover, Odoo allows you to raise warnings on the Sales Order, Purchase Order, Invoice, and Picking. This warning lets you block messages or raises warnings on purchase orders based on a vendor or a product. If you have any issues with a vendor, you can raise warnings using this feature. You can also block a particular product by giving a blocking message.
Now let us move on to the Vendor Pricelists aspect of the module.
Vendor Pricelists
One of the important tasks for vendor management software is to set the pricelist for the different products available and are supplied by each vendor. In the Odoo purchase module, you can access the vendor pricelist menu from the configuration tab of the purchase module.
Purchase -> Configuration -> Vendor Pricelists.
The image of the Vendor Pricelists window is depicted below.
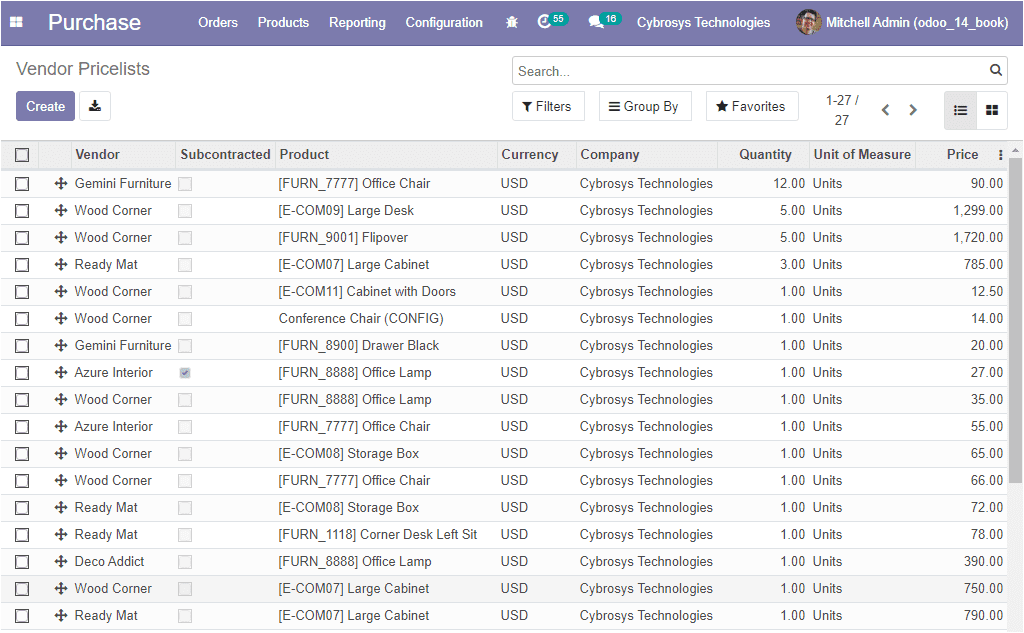
In this window, you can view a list of all the Pricelists described in the platform along with the details of the Vendor of this product, Product information, Currency, Company, Quantity, Unit of Measure, and the Price for purchasing the product. Moreover, the data in the window can be viewed in both List and Kanban view, and also the details can be filtered, sorted, and grouped on the basis of different conditions of operations.
You also have the provision to create a new vendor pricelists by selecting the Create icon available. The image of the creation window is depicted below.
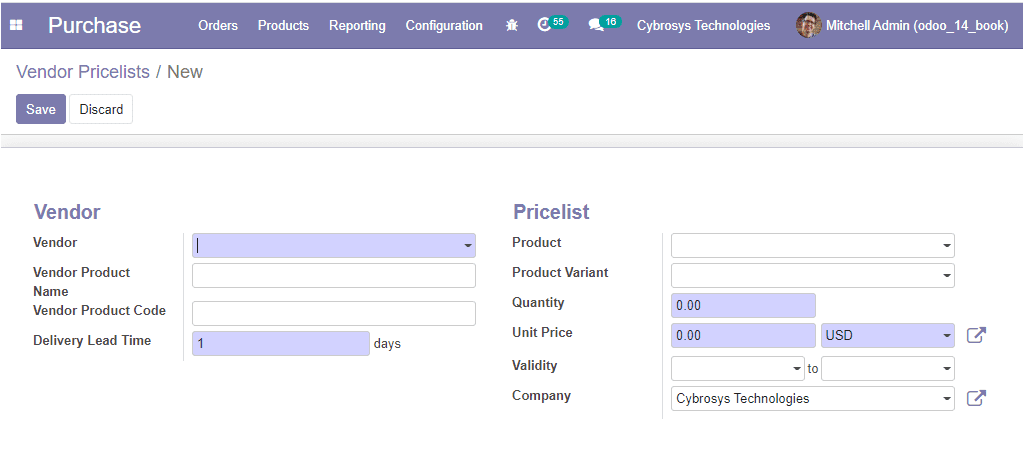
In this creation form, you can provide the Vendor details, allocate the Vendor Product Name along with Vendor Product Code. Moreover, you can assign the Delivery Lead Time. After that, you can define the Pricelist details such as Product, Product variant, Quantity, Unit Price, Validity, and Company. After providing the data, you can save the details by selecting the Save icon available.
As we are clear on Vendor Pricelists and now let us have a look at how to create requests for quotation and purchase order in this module.
Configurations
Creating request for quotation
Now let us discuss how to create a request for quotation on the platform. The request for quotation is the finest way to send the request for required products to your supplier. If the supplier is interested in your request and answered for your request, you can either accept or reject the offer. The request for quotation window can be accessed from the Orders menu of the Purchase module. The image of the window is depicted below.

In this window you can view all the requests for quotations described in the platform along with the Reference number, Vendor details, Company, Purchase representative, Order deadline, Next activity, Total amount, and Status. The window can be viewed in List, Kanban, and Pivot views. Moreover, the window can be filtered and grouped by using the default as well as customizable sorting options.
For creating a new RFQ, you can click on the create icon available on the top left corner of the window. The image of the window is depicted below.
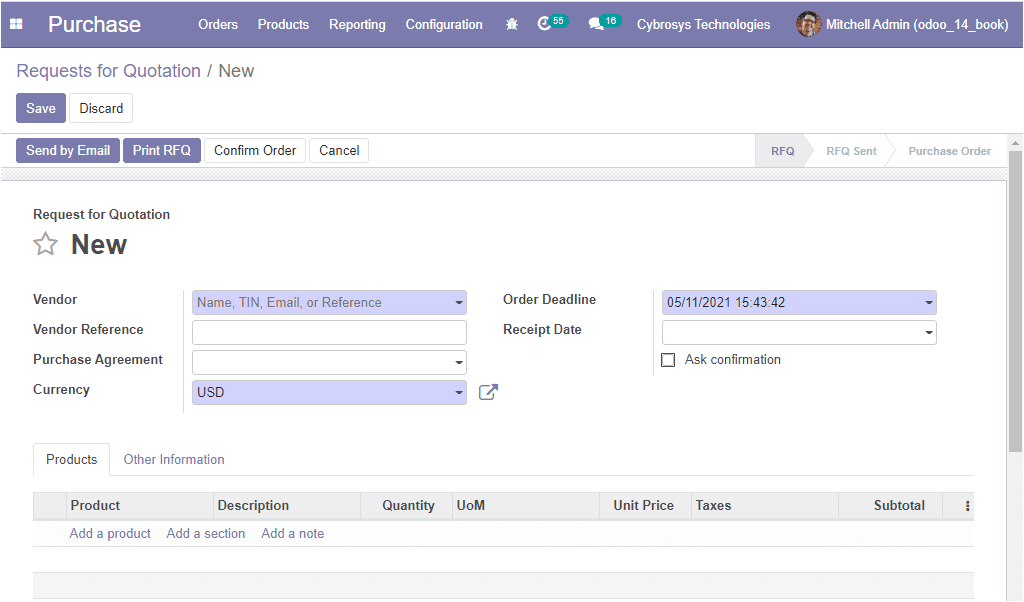
In this RFQ creation window, you can allocate the Vendor first. Then you can provide the Vendor Reference. It is the reference of the sales order or bid sent by the vendor. It is used to do the matching when you receive the products as this reference is usually written on the delivery order sent by your vendor. After allocating the vendor reference you can define the Purchase Agreement, Currency along with the Order Deadline and Receipt Date. Order Deadline depicts the date within which the quotation should be confirmed and converted into a purchase order. Now come to the Receipt Date option. It is the delivery date promised by the vendor. This date is used to determine the expected arrival of products.
Under the Products tab, you can add a product along with the Description, Quantity, unit price, and taxes. You also have the provision to add a section and a note by selecting the respective menu.
In the Other Information tab, you can assign the Purchase Representative, Deliver To, Incoterms, Payment Terms, and Fiscal Position. Additionally, you can enable the Print Variant Grids option. If enabled with this option, the matrix of configurable products will be shown on the report of this order.
After providing all the required data, you can save the details by selecting the Save button available. Now the RFQ can be sent to the vendor via emails and also the platform allows you to take a printout of the RFQ and send it to the vendor.
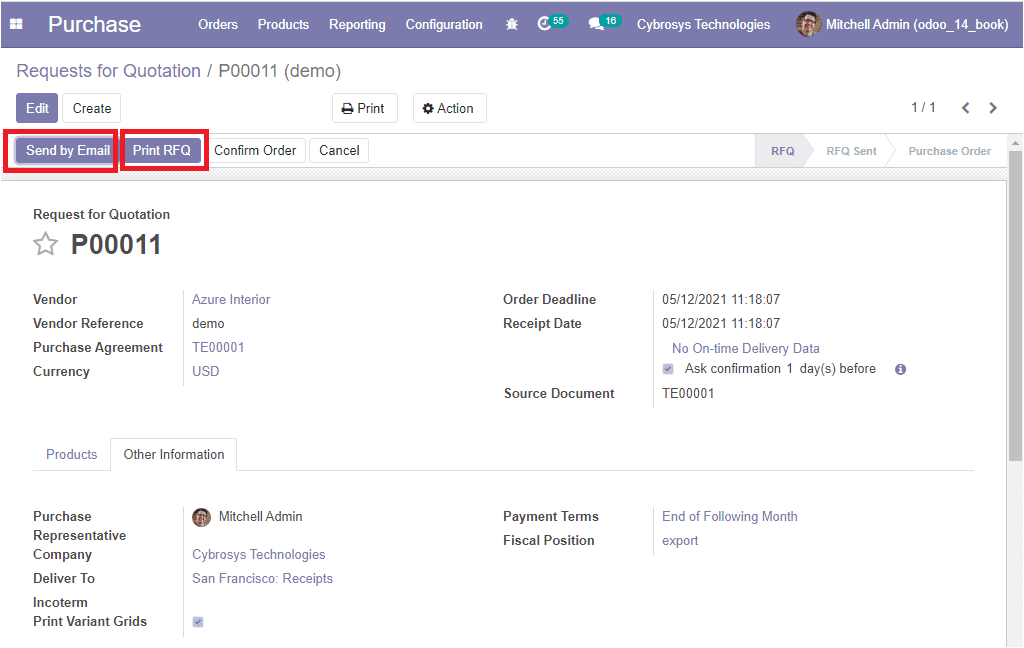
If you click on the Send by Email button, you will be depicted with an email creation window as shown below.
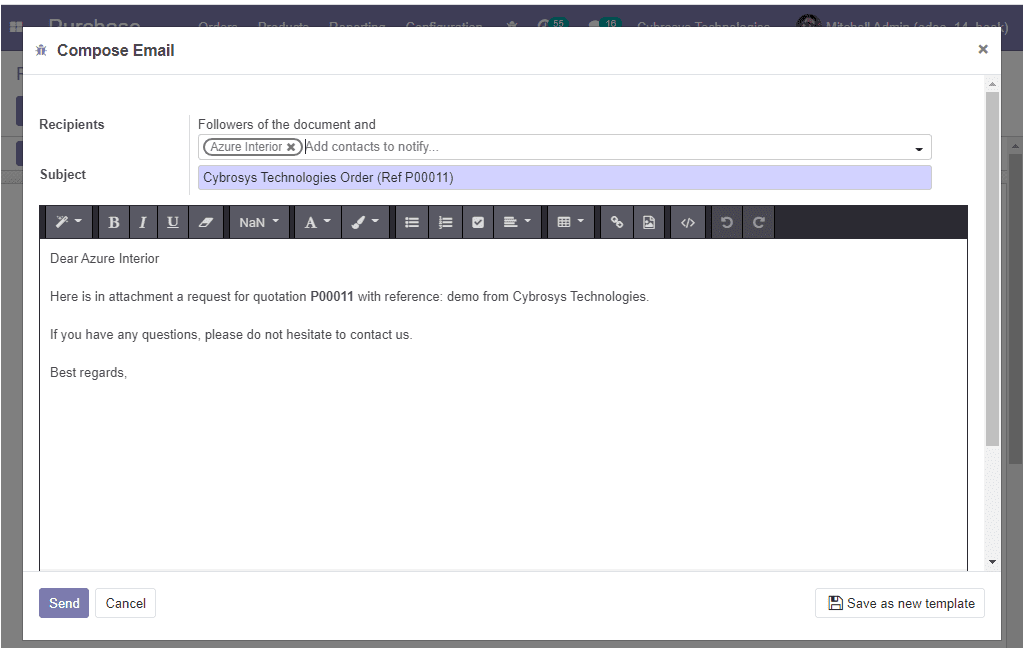
An automated email template is created and you have the provision to make desirable changes in the description details as per your requirements. Then you can send the email by selecting the Send button.
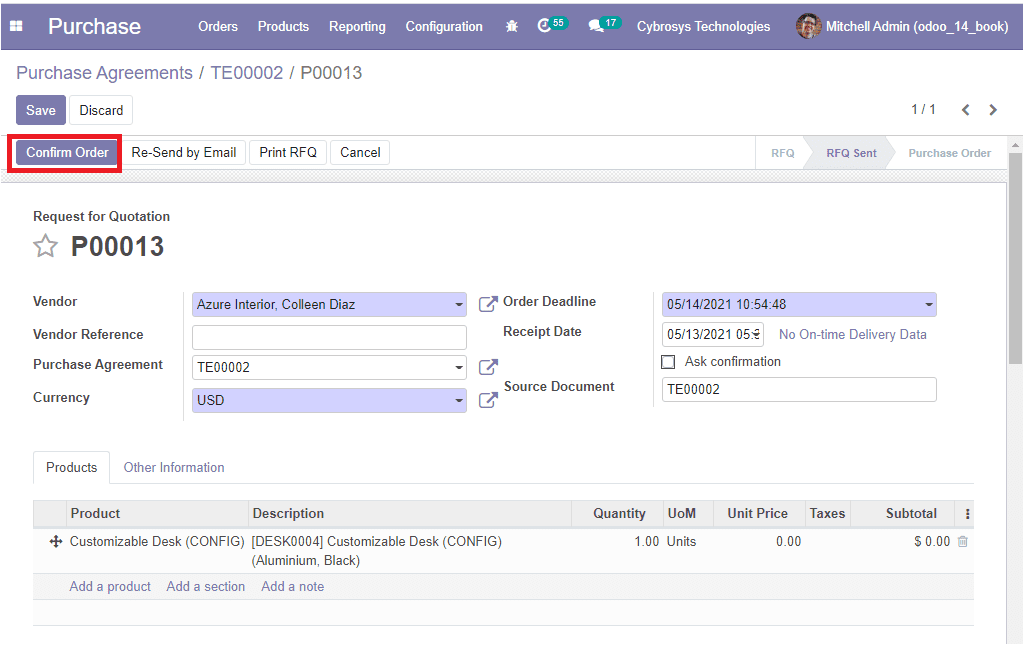
When the RFQ is confirmed, you can confirm the order by selecting the Confirm Order button.
We now understand how to create requests for quotation in the purchase module and now let us discuss the Purchase Agreement aspects of this module.
Purchase Agreements
Purchase Agreements are a type of agreement between the vendor and a customer that defines terms and conditions related to the sale of goods. The Odoo platform allows you to create various purchase agreements with the vendors for the purchase of products. Multiple agreements can also be created with the vendor and it can be possible for multiple products too.
Creating a purchase agreement type
The Purchase Agreement menu in the platform can be accessed from the Orders tab of the Odoo purchase module. To get the advantages of this feature in your dashboard, first, you should enable the Purchase Agreement option available in the Settings menu under the Configuration tab. The image of the settings window is depicted below.
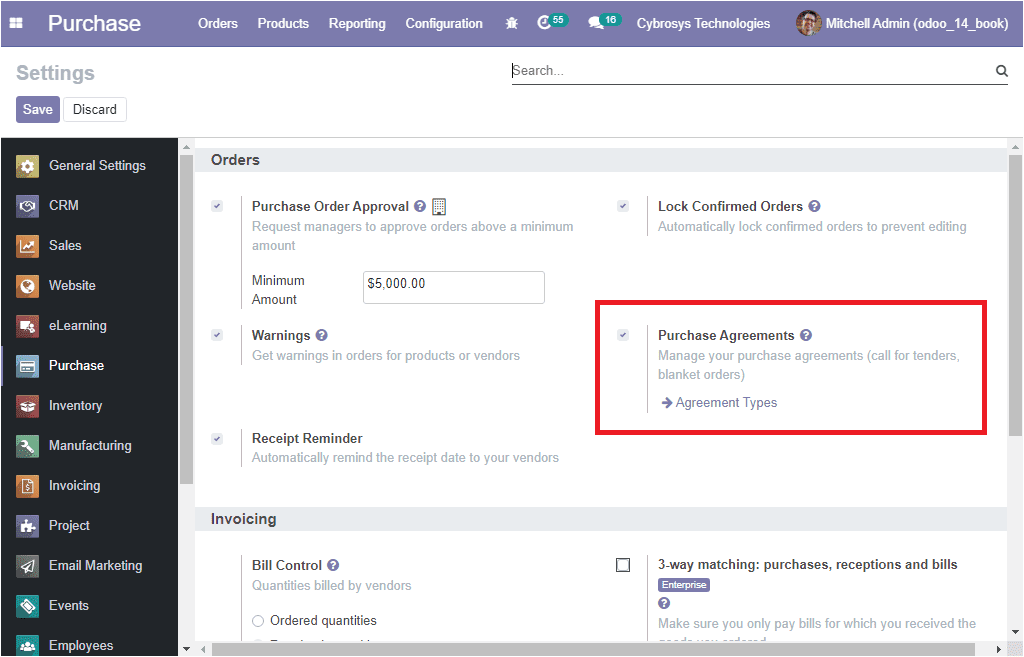
If you are enabling the Purchase Agreements option, the purchase agreement type is also displayed on the settings menu. By selecting this option you will be directed to the Purchase Agreements Type window. Furthermore, it is also possible to access the window from the Configuration tab of the module.
In the Purchase Agreement Type menu, you can view all the purchase agreement types described on the platform. The created agreement type can be edited by selecting the respective one. Moreover, the window can be viewed in List and Kanban view. The various default, as well as customizable options such as filtering, group by, and favorite search, as well as customizable options such as filtering, group by, and favorite search are also possible. The image of the window is depicted below.
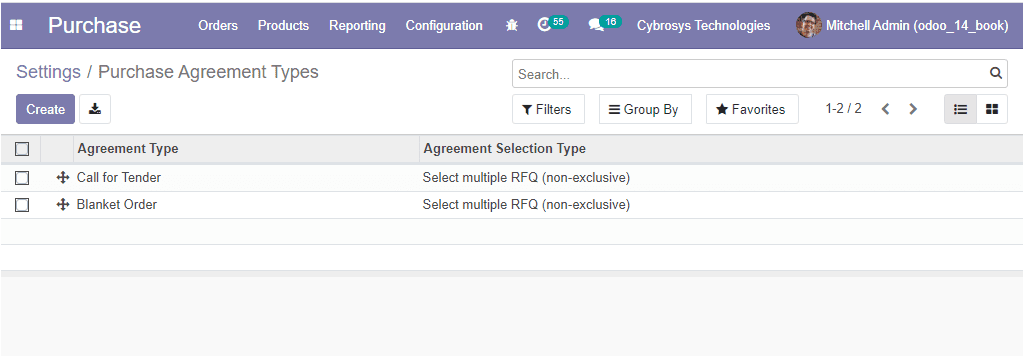
Additionally, you have the provision to create new Purchase Agreement types by selecting the Create icon available. The image of the window is depicted below.
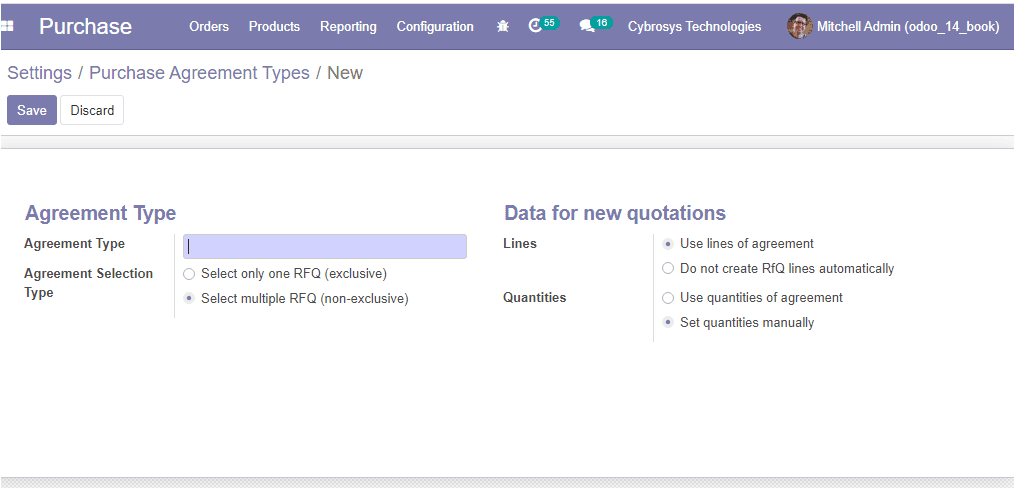
In this purchase agreement type creation window, you can allocate the Agreement Type and the Agreement Selection Type can be made based on a single RFQ( exclusive) or multiple RFQ ( non-exclusive). Under the Data for new quotation define the lines of agreements and the quantities related.
Now let us examine how to create a new purchase agreement.
Creating a new purchase agreement
The Purchase Agreement window in the platform can be accessed by taking the route
Purchase -> Orders -> Purchase Agreements.
The image of the window is depicted below.
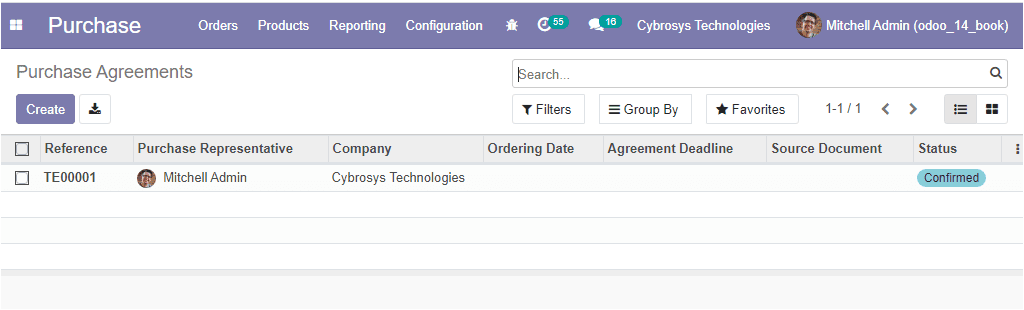
In this Purchase Agreements window, you can view all the purchase agreements described in the platform along with details of Reference, Purchase Representative, Company along with the Ordering date, Agreement Deadline, Source Document, and Status. You can edit the agreements by selecting them. Moreover, the Create icon available on the top left corner of the window allows you to create new purchase agreements. The image of the creation window is depicted below.
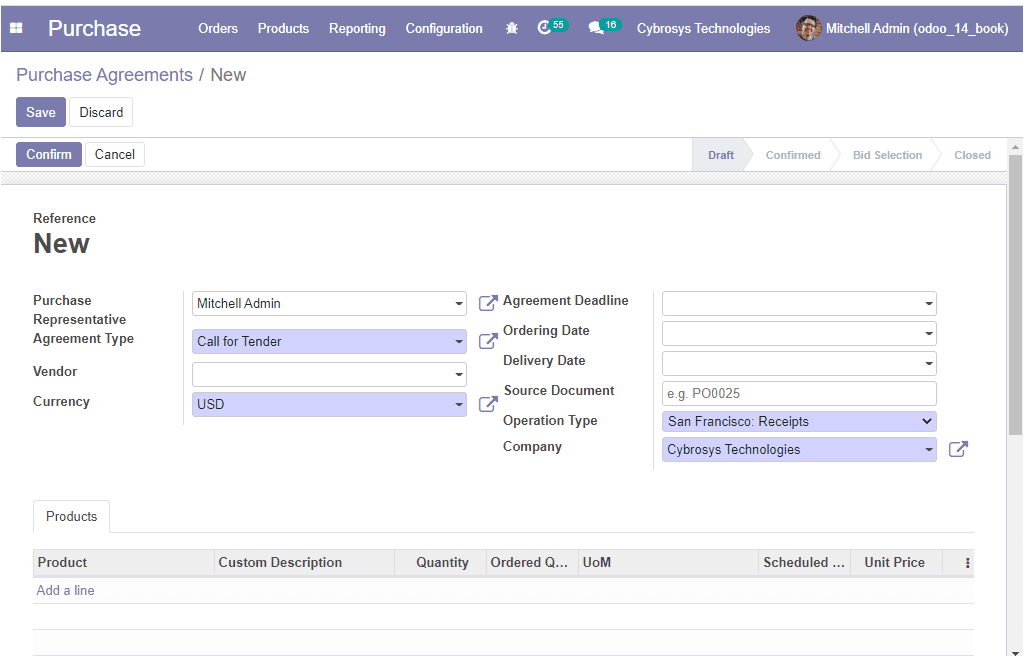
In this creation form, you can specify the Purchase Representative, the Agreement type can be allocated from the ones being defined in the agreement types window. Then you can assign the Vendor to which the agreement is associated. Additionally, you can provide the Currency, Agreement Deadline, Ordering Date, Delivery Date along with the Source Document, Operation Type, and Company of operation if the platform is managing multiple companies.
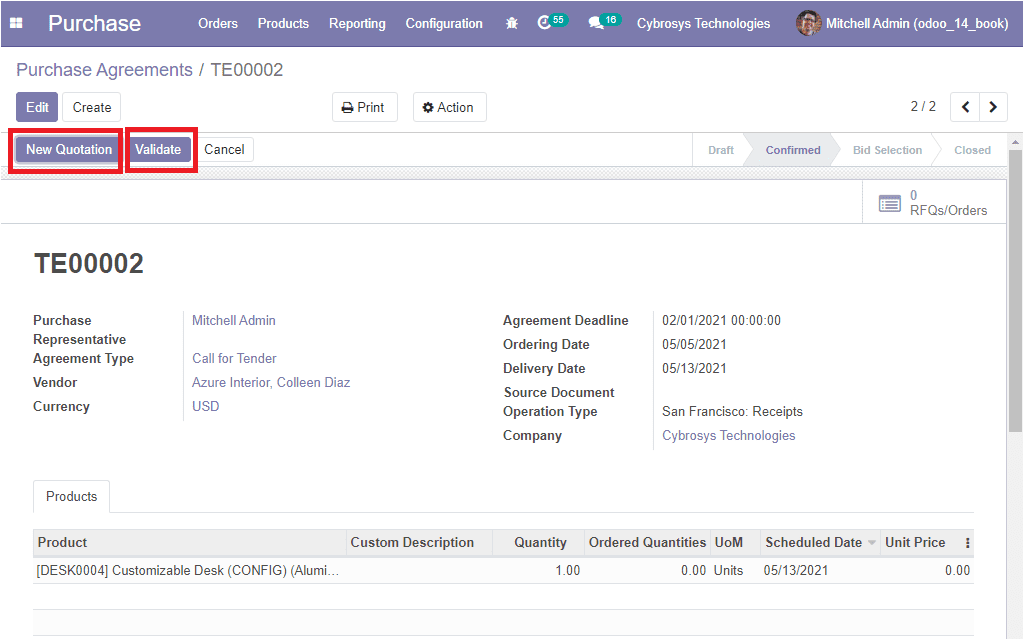
Under the Products tab, you can add the product by selecting the Add a line option available. You can also define the Custom Description, Quantity, Ordered Quantity, Scheduled Date, and Unit Price along with the product description. Additionally, you can add multiple products to an agreement. After giving all the required details, you can save the details by selecting the Save button. If the agreement is confirmed, the status changes to Confirmed. Later it will be changed into Bid Selection and Closed depending on the operations conducted on the platform.

Once the agreement is confirmed, you can also have the options to Validate and New Quotation options on the left side of the window as shown in the below image.
You can generate new quotations by selecting the New Quotation button. The image of the quotation creation window is depicted below.
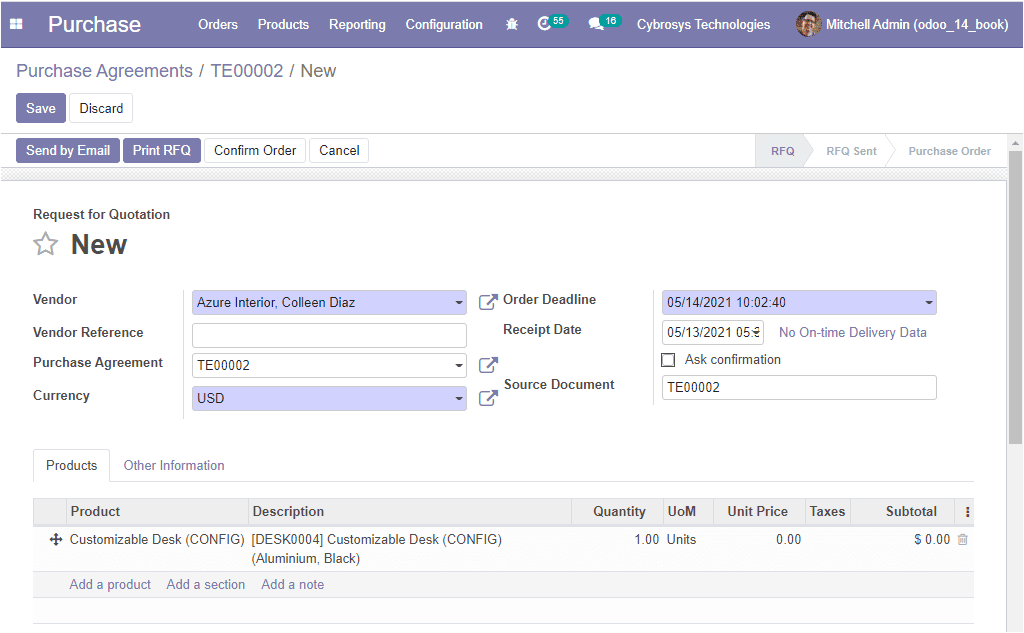
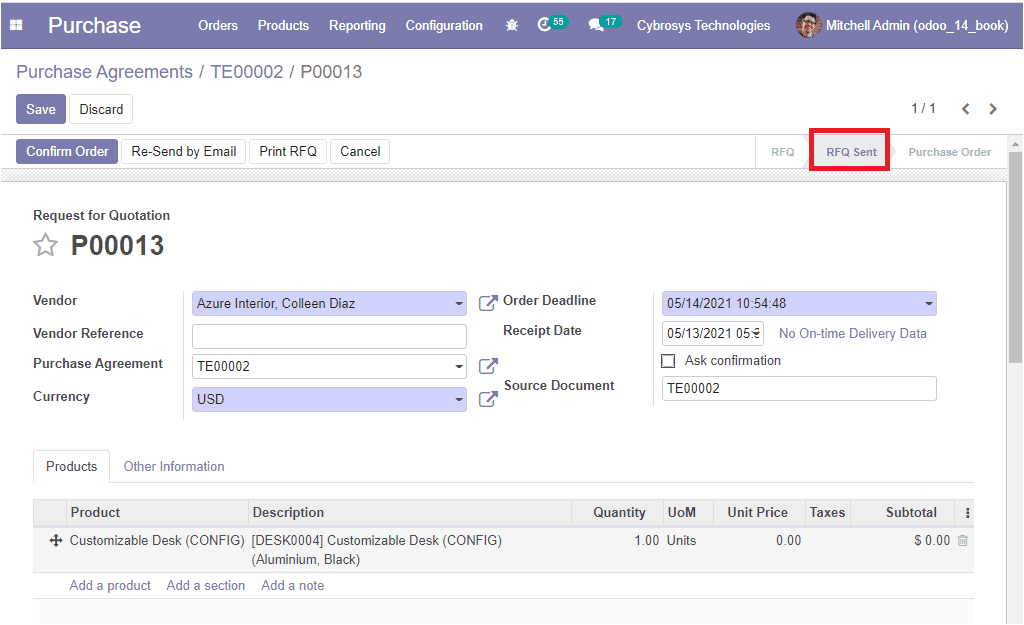
In this window, you can view that the Vendor details, Currency, and Purchase Agreement information are automatically filled in based on the quotation. You can also allocate the Vendor Reference and other details can be allocated. The Product allocation is also auto-filled and you have the provision to modify or add new products to the quotation. Now the Request For Quotation (RFQ) can be sent by email via selecting the Send by Email option and it is also possible to take a printout by selecting the Print RFQ button. Moreover, there are options to create a purchase order by selecting the Confirm Order button. Also, you have the provision to cancel the quotation request by selecting the cancel option available.
If you are selecting the Send by Email option, you will be depicted with the email creation window as shown below.
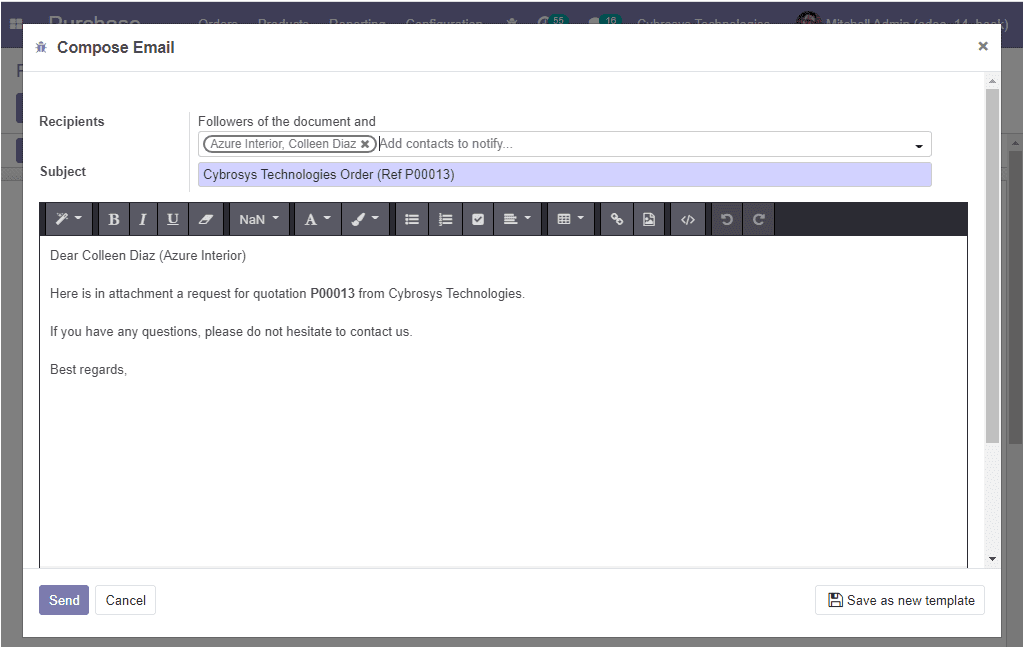
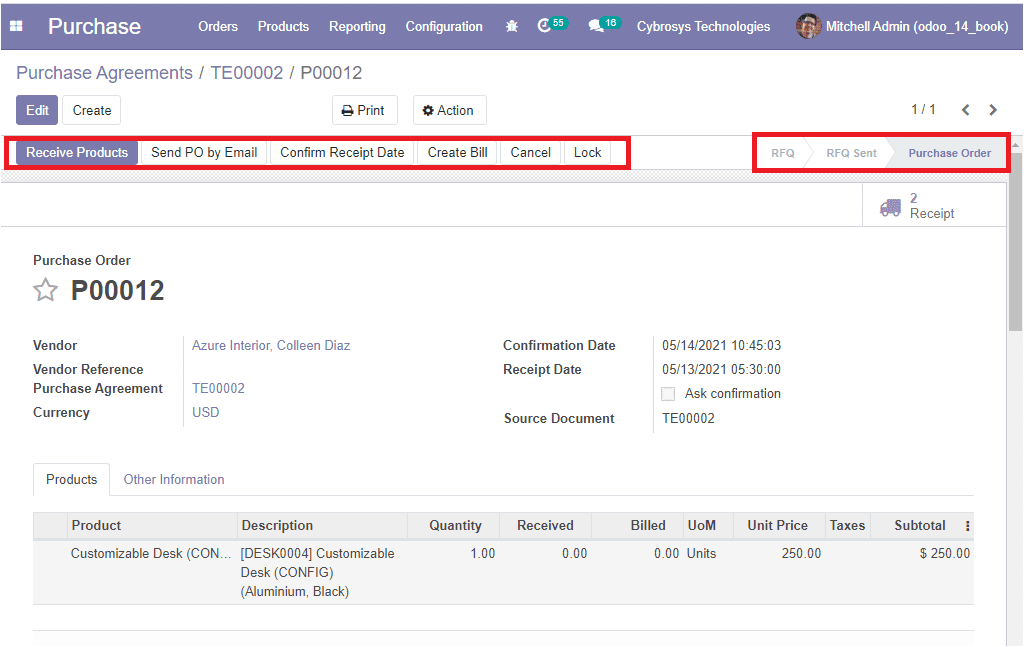
The template for the emails is automatically defined and the window allows you to create, edit the content and the subject being described. Moreover, the edited content can be saved as a template for further use. This can be done by selecting the Save as new templates option available at the right bottom of the window. After that, you can be able to send the email by clicking on the Send icon available. Now the status will be changed to RFQ Sent as depicted in the below image.
So far we were discussing how to create a new purchase agreement in the platform and now let’s discuss the purchase orders aspect of the module.
Purchase Orders
In the Odoo platform, the purchase orders are created based on the sending and creation of RFQs. Also, the platform allows you to create purchase orders directly without sending out the RFQs. This will help the users to handle the regularized purchase operations of the company.
When the RFQ is sent to the vendors, you have the option to create a purchase order straight away from the RFQ window. This can be done by selecting the Confirm Order option.
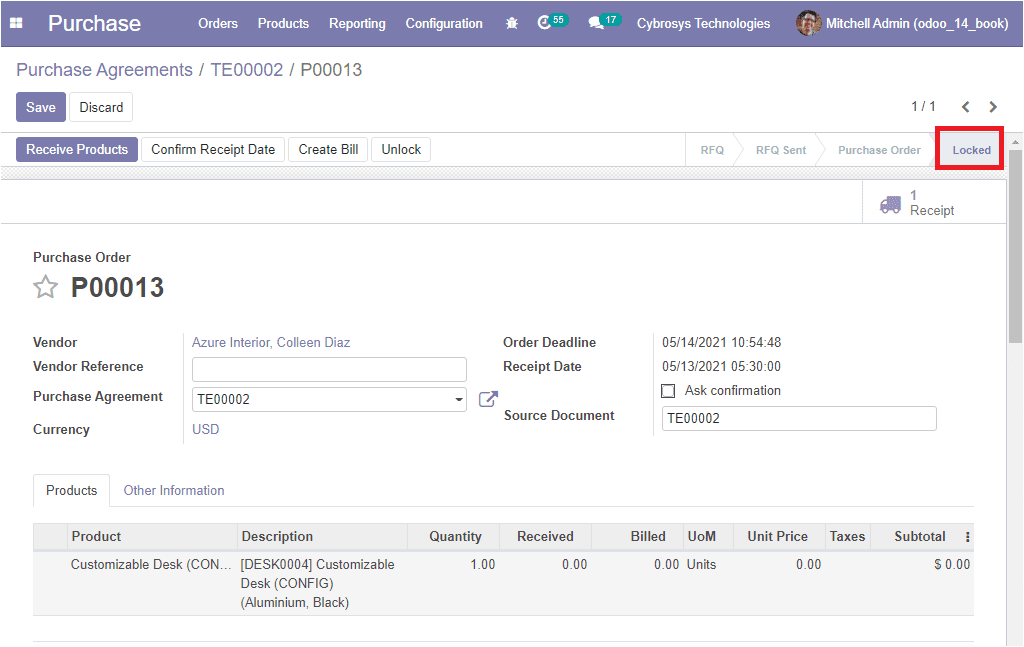
On selecting the Confirm Order button, the confirmed order request will be sent to the vendor. Now the status will be changed to Locked as shown below image.
This is an option offered by Odoo for the users to lock the purchase order which would enable them to avoid any further edits on the purchase order to be made by any other employee or the users of this platform. To make use of this option, first, you should enable the Lock Confirmed Orders option from settings. This can be done by taking the route Purchase -> Configuration -> Settings. In settings, under the Orders tab, you can view the Lock Confirmed Orders option as depicted in the below image.
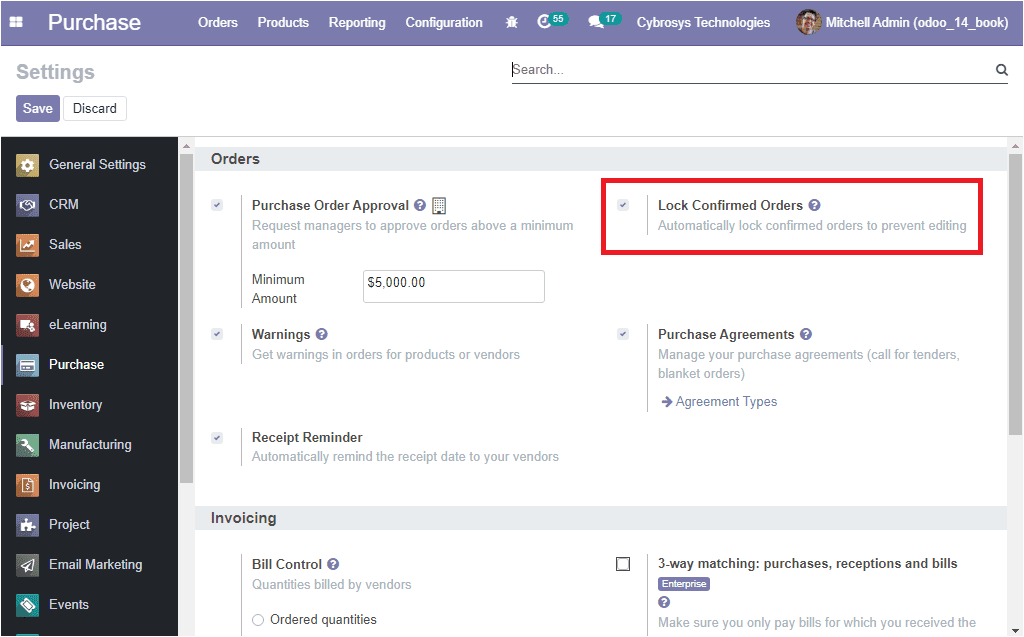
Moreover, you can view the Unlock option and this option can be used to unlock the respective order.
Receiving Products
When the purchase order is confirmed, the products are sent to the company location from the vendor, the user will be showcased with the Receive Product option on the respective purchase orders. Additionally, you can view the option >Confirm Receipt Date 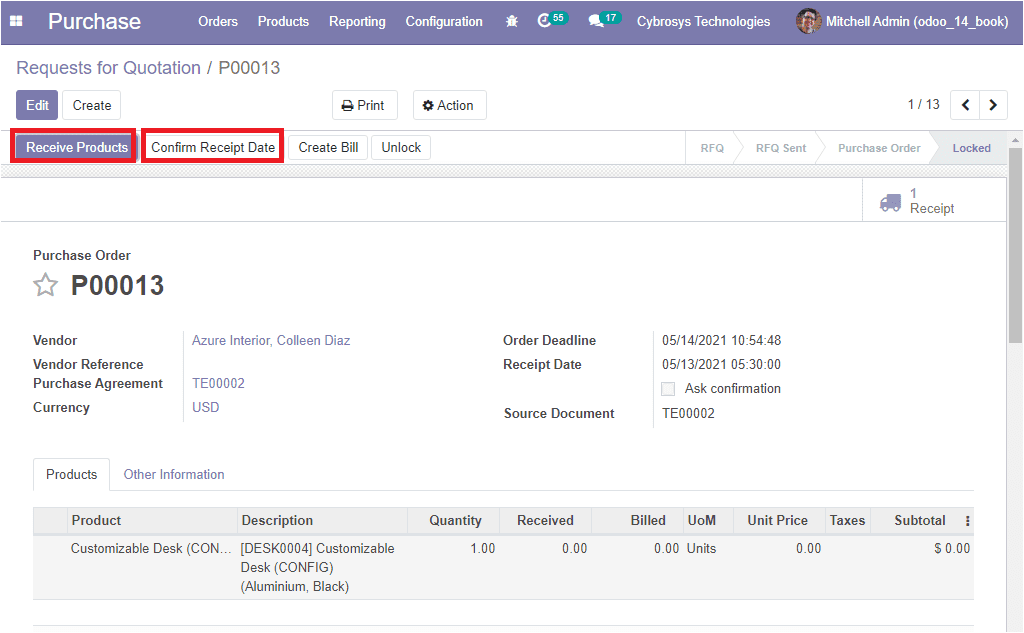
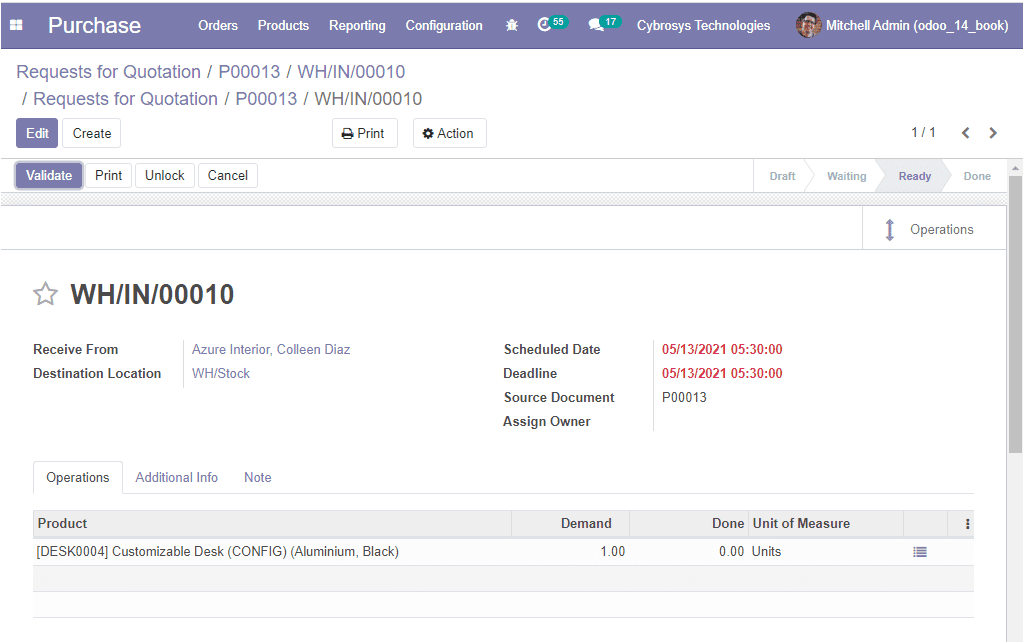
On selecting the Receive Products icon, you will be directed to a new window as shown below where you can view all the details such as product information, product location, receive from, operation type, scheduled date, deadline, and Source document.
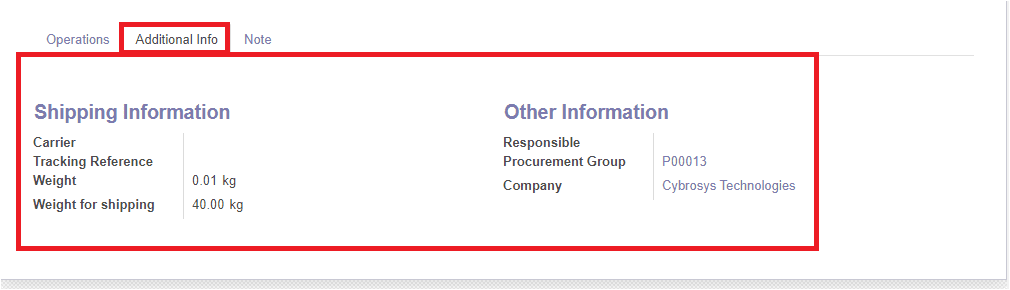
Under the Additional Information tab, you can view the Shipping Information and Other Informations. Under the Shipping Information tab, you can view the details of tracking reference, the total weight of the product in the picking, and weight for shipping option which is the weight used to compute the cost of the shipping. The image of the Additional Information tab is depicted below.
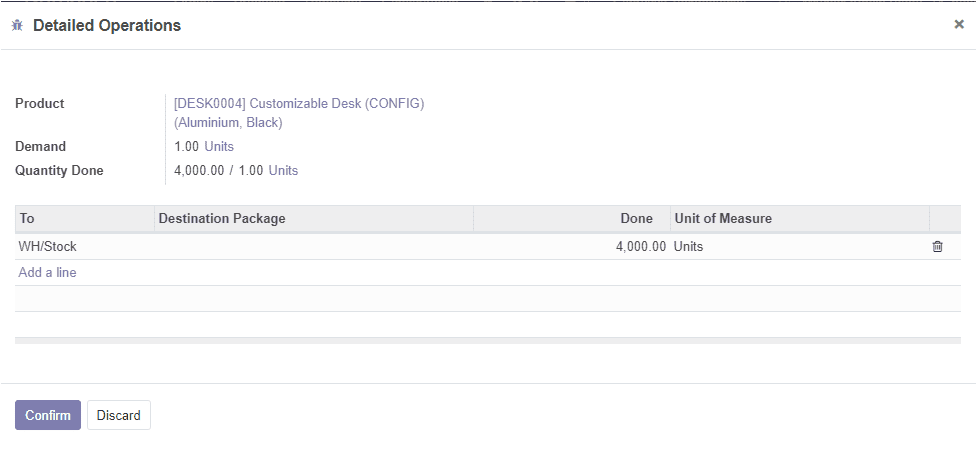
After verifying the details, you can validate the delivery by selecting the Validate icon available. If you are enabled the tracking option of the respective product in the purchase order, you have to allocate the serial or lot numbers for the done quantities. For doing this, you can select the menu available next to the units of measure menu. In the Detailed Operation window, you can assign the Destination package, To, along with the Done quantities and Units of measure. After that, you can select the Confirm icon available. On confirmation, you will be depicted with the validate option on the receipt menu and by selecting it, the purchase order is completed and the status will change to Done. Once the purchase order is completed, the products are added to the inventory and to the respective warehouse location.
Now let us discuss the Warning messages option available in the Odoo purchase module.
Warning messages
In the Odoo platform, you have the provision to generate warning messages. This feature is helpful when the platform has multiple users and employees operating it in a company. Warming messages can be set by the user and this will be visible to other users of the company who are logging into the platform.
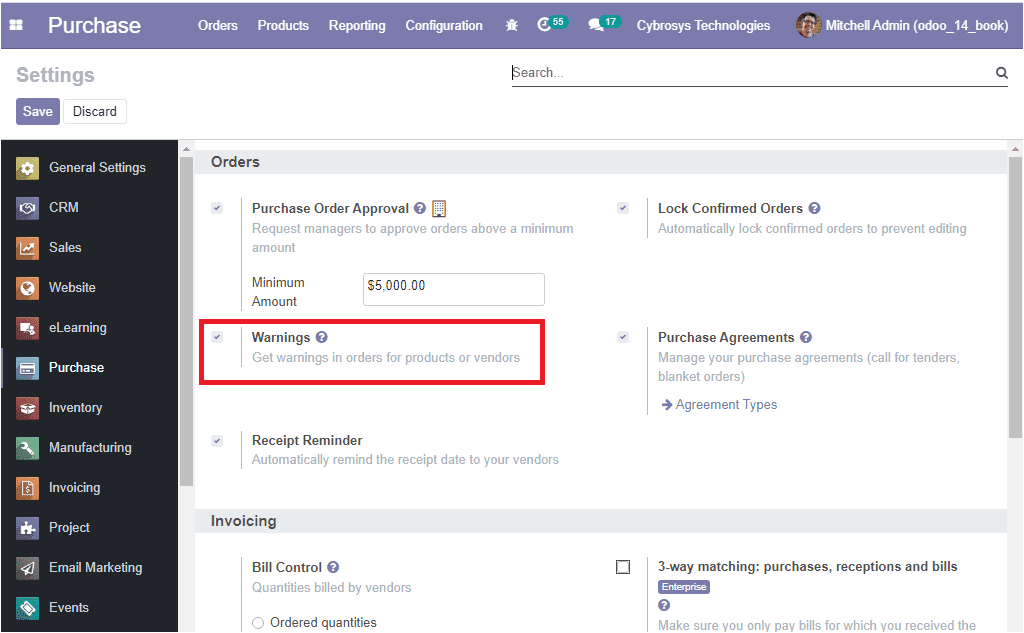
For taking the benefits of this feature, you can enable the Warnings option from settings. In the settings menu, under the Orders tab, you can enable the warning option available. By enabling this option, you will get warnings in orders for products or vendors. For that, you can go to Purchase -> Configuration -> Settings. You can check the box near the option Warnings for activating the option and you can click on the Save button to save changes. When the option is enabled, you can generate your own warning messages for the products and vendors. The image of the window is depicted below.
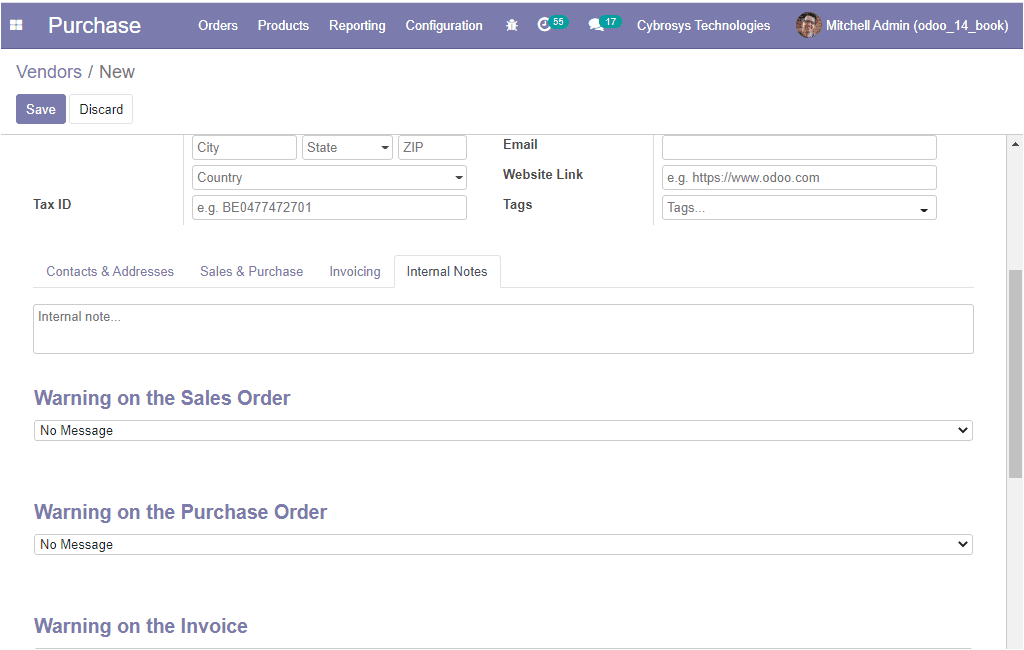
In the case of vendors, under the Internal Notes tab, you can allocate the warning messages. The warnings can be custom-made and be provided as warning messages or blocking messages which can be closed as the warnings.
As we have discussed the Warning messages option available in the module and now let us discuss the Vendor bills aspects of the module.
Vendor bills
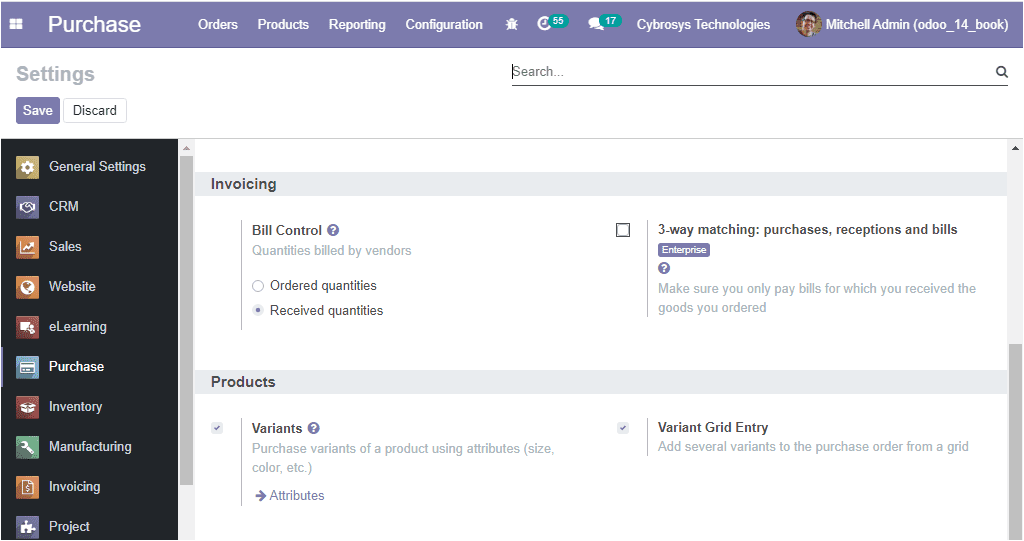
The vendor bills in the Odoo platform can be described based on the Received quantities or the Order quantities. Initially, this can be defined in the settings menu of the purchase module. In the settings menu, under the Invoicing tab, you can view the Bill controls option. Using this menu you can either select the bill control to be based on Ordered quantities or Received quantities.
Now we can discuss the Dropshipping feature available.
Vendor bills
Dropshipping is a form of retail fulfillment method where the user purchases the products but there is no need to keep inventory. In this retailing technique the seller does not keep the product in hand stock. Rather, the seller sells the products using the drop shipping method. Here the seller need not to handle the products directly and the product is exchanged through the sale order to a third party supplier and he/she ships the order to the customer.
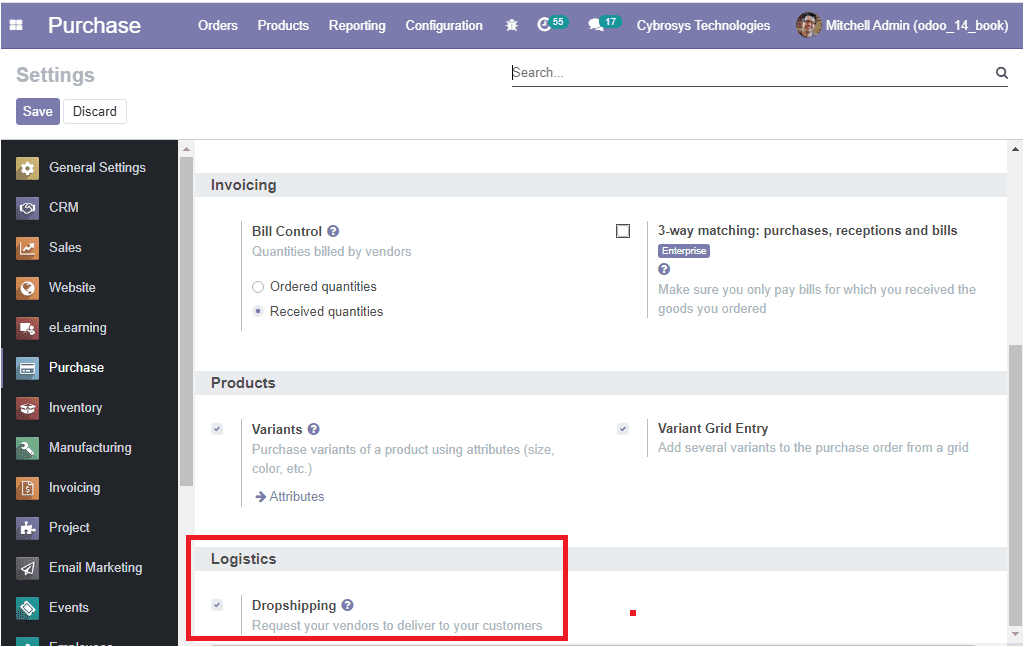
For enabling the option Dropshipping in the Odoo platform, you can go to the settings by taking the route Purchase -> Configuration -> Settings and activate the Dropshipping option available under the Logistics menu.
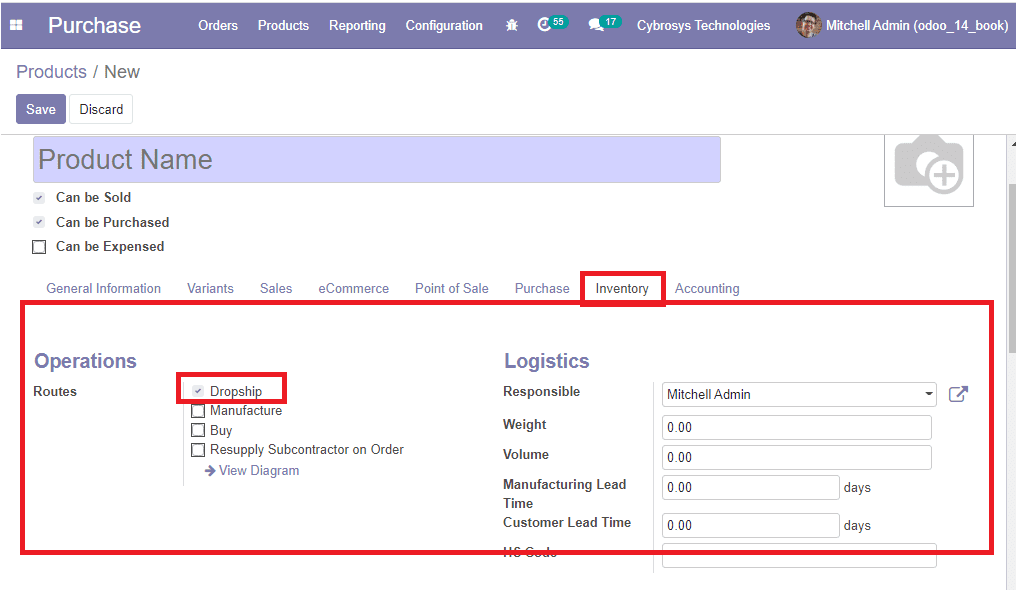
In the product creation window, you can view the option dropship. The products which are needed to be specified with the drop shipping operation can be defined under the Product creation window. If you are opening the product creation window, where you have the Inventory tab. Under the Inventory tab, you can view the Routes operations where you can select the drop-ship option available.
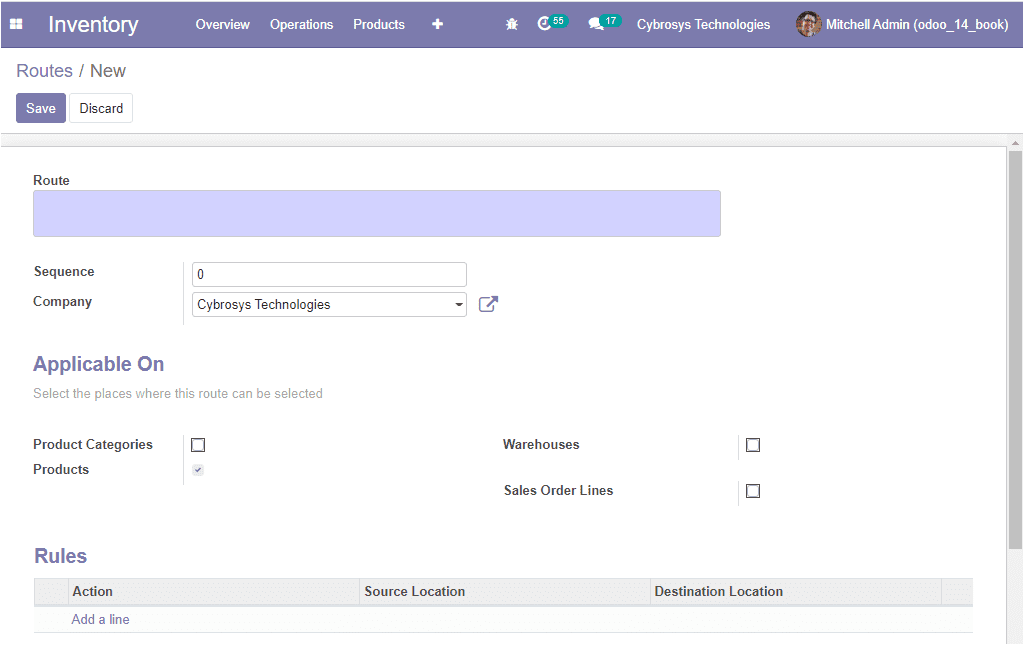
The dropshipping operations are defined based on the routes described in the inventory module. Under the configuration tab of the inventory module, you can view the Routes menu. On selecting the Routes menu you can create a new route or can edit the existing drop shipping route operations which are previously defined.
As we clear on the dropshipping functionality available in the platform and now let us discuss the Unit of measure option available in the Odoo purchase module.
Unit of measure
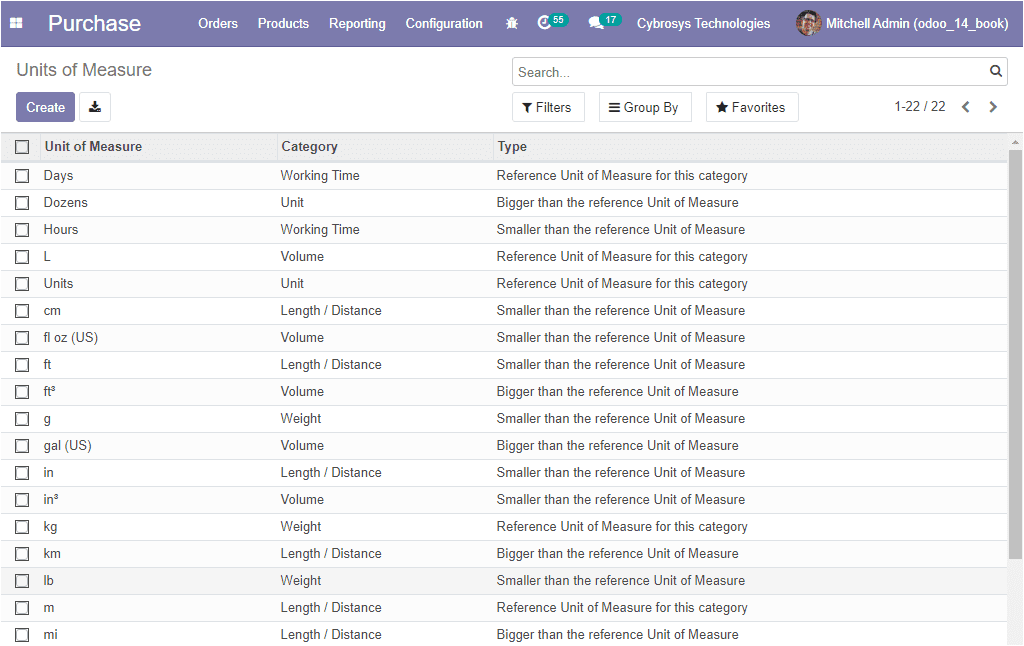
There may be many situations where you need to handle products in different units of measure. For example, if you are buying products from one country and selling to another country, you definitely need to convert the units. Moreover, you have other situations like buying products in large quantities from your supplier and selling them in units to your customers. In the Odoo platform, the product quantity is described based on the unit of measure being described and you also have the provision to set up different units of measure for one product. The unit of measure menu in the platform can be accessed from the configuration tab of the purchase module. This unit of measure can be defined based on the principles and standards of the company.
Purchase -> Configuration -> Units of measure.
The image of the window is depicted below where you can view all the units of measures described in the platform. It is also possible to edit the details if required. This can be done by selecting the respective one available.
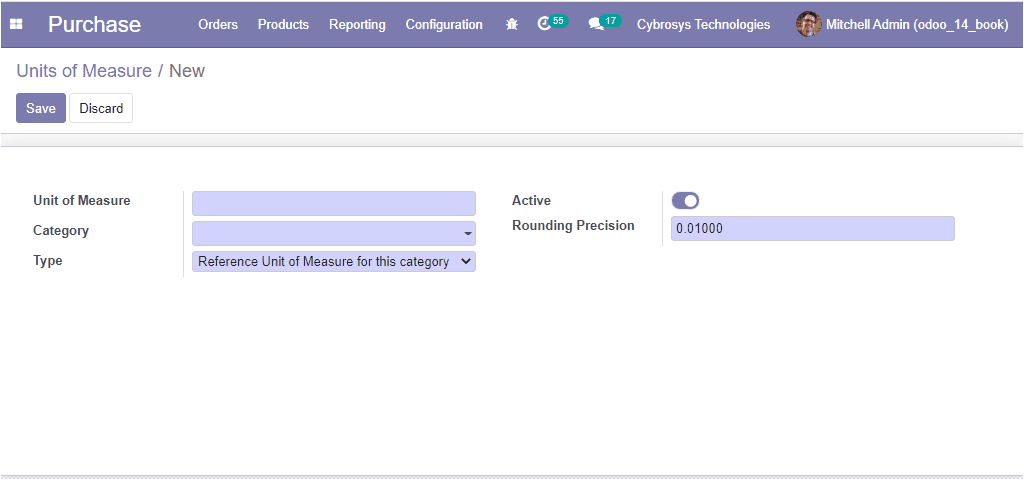
Additionally, you have the provision to create new Units of Measure by selecting the Create icon available on the top left corner of the window. The image of the creation window is depicted below where you can provide the name of the unit of measure along with the Type and the Category of operation. The conversion between the units of measure can only occur if they belong to the same category. The conversion will be made based on the ratios. Additionally, the respective unit of measure can be activated or deactivated by taping the option Active. Finally, the Rounding Precision for the unit of measure can also be defined.
Now let us discuss the unit of measure categories.
Unit of Measure Categories
The Unit of measure categories of operations in the Odoo platform can be based on the user and the company requirements. The unit of measure category can be described under the unit of measure categories menu. This menu can be accessed under the configuration tab of the Odoo purchase module. The image of the window is depicted below.
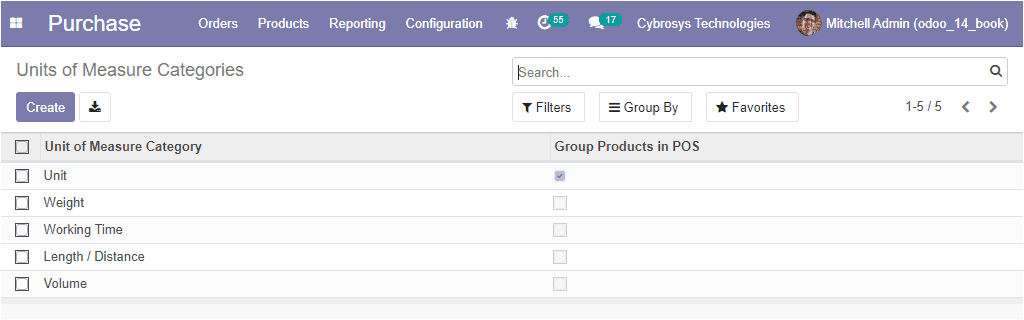
In this window, you can view all the units of measure categories described in the platform along with the Group Product in POS. you can check the respective option if you want to group products of this category in point of sale orders. The new unit of measure category can be created using the Create option available and you can define it in the same window.
As we clear on the unit of measure categories option in the module and now let us have a look at the Reporting aspect of the purchase module.
Unit of Measure Categories
Like any other modules in the Odoo platform, the purchase management module also offers you a platform for creating various analytical as well as graphical reports on the purchase operations being conducted. The reporting window can be accessed by selecting the Reporting menu available in the purchase dashboard. The image of the Purchase analysis window is depicted below.
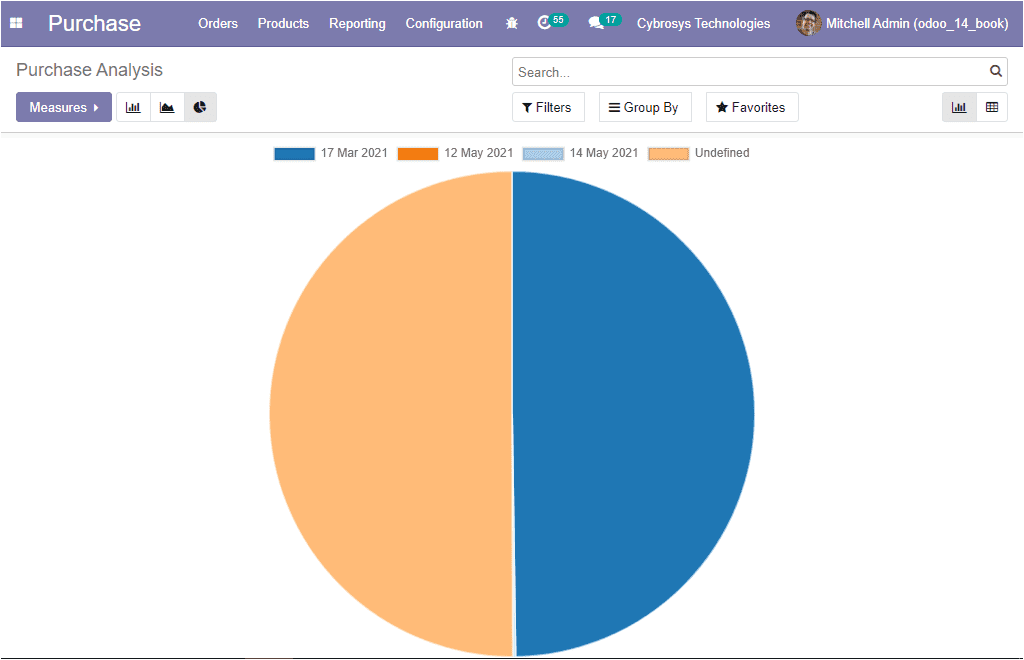
This is the image of the Purchase report window depicted in the form of a Pie chart. Moreover, the reports can also be viewed in the form of Bar and Line charts. Using this purchase reporting option, you can evaluate all the appropriate advancements and dealings in your business operations. Additionally, you can customize the reports as per your requirements. The search bar available on the top right side of your window will allow you to highlight only selected data on your reports, also the Filters and group-by option are the added advantages. Apart from these options, the reports of the purchasing aspect of the company can be viewed in both pivot and graphical view.
Now we discussed all the important aspects regarding the Odoo purchase module. It is clear that the module will help you to track all the purchase aspects of your business in a smooth way. This module is suitable for all forms of organizations and industries.