Accounting and Finance Management
Finance management of any company operations will be trickier as numerous parameters involved in the management as it revolves around the entire company operations. An efficient management tool for the accounting and the financial aspect of the company will provide the accountants in the finance managers with a release of burden from then shoulders. Odoo provides the user with an excellent, efficient and reliable finance and accounts management for the company.
Odoo accounting and finance management operates with numerous main modules as well as supporting modules which will add up to the management features. In addition, these modules are interconnected with other modules of the platform to be indulged with the entire company operations. The reliability and the real time data operations and management are the key aspects of the Odoo platform which can be well executed in the financial aspects of the company with Odoo.
The salient features of Odoo accounts and financial management are:
- Quick reconciliation.
- Automated synchronization
- Batch operations
- Third party device and software integration
- Follow ups operations on payments
- Payment automation
- Automated alerts and warnings
- Business intelligence integration
- External payment gateway integration
- Analytical and quantitative reporting
- Data exporting and import functionality.
And many more which makes the Odoo platform stand high among its competitors.
The methodology of the Odoo accounting modules operation is sophisticated and it provides a full supervision over all the accounting aspects of the company. The following are the terminologies on which Odoo manages to operate.
Double entry bookkeeping
Maintain record of every financial operation on journal and maintains double entry bookkeeping for the company financial data.
Accrual and cash basis method
This allows the users to keep the record of income and the coast at the instance of the transactions exchange operations takes place in Odoo
Multi-company operation
This allows the user to manage multiple companies in the platform which have separated financial terminologies of operations, ledgers, chart of accounts and other accounting aspects.
Multi-currencies
Odoo being an internationally used management software supports more than fifty currencies of the world. In addition, the user can define a new one in the platform with the help of an expert developer and as per the standard and regulations.
Accounts receivable and payable
The Odoo platform allows the users to manage the operations of accounts receivable and payable which can be defined under the cart of accounts section of the platform. In addition, the payment for each customer, vendor and even product can be configured based on the operation
Generate budgetary reports
- Performance reports (Profit and loss, budget variants etc.)
- Position report (Balance sheet, aged reports etc.)
- Cash report (Bank summary)
- Detailed report (Trial balance, ledger reporting etc.)
- Management reports (Budget, executive summary etc.)
Reconciliation
Bank reconciliation feature of Odoo will allow the users to import bank statements of the company directly into the platform.
Inventory valuation
The inventory valuation of the feature of the Odoo can be configured to be operated automatically or can be done manually.
Easy retained earnings
The earnings of the company can be automatically ascertained by the Odoo automatically in real time for the present year. This is achieved by the constant report generation of the profit and loss operations of the company by Odoo.
Accounting dashboard
The Odoo platform provides the user with an efficient and reliable accounting dashboard to deal with the accounting aspects of the company. The user can create invoices, vendor bills, other miscellaneous operations and the bank operations from this dashboard.
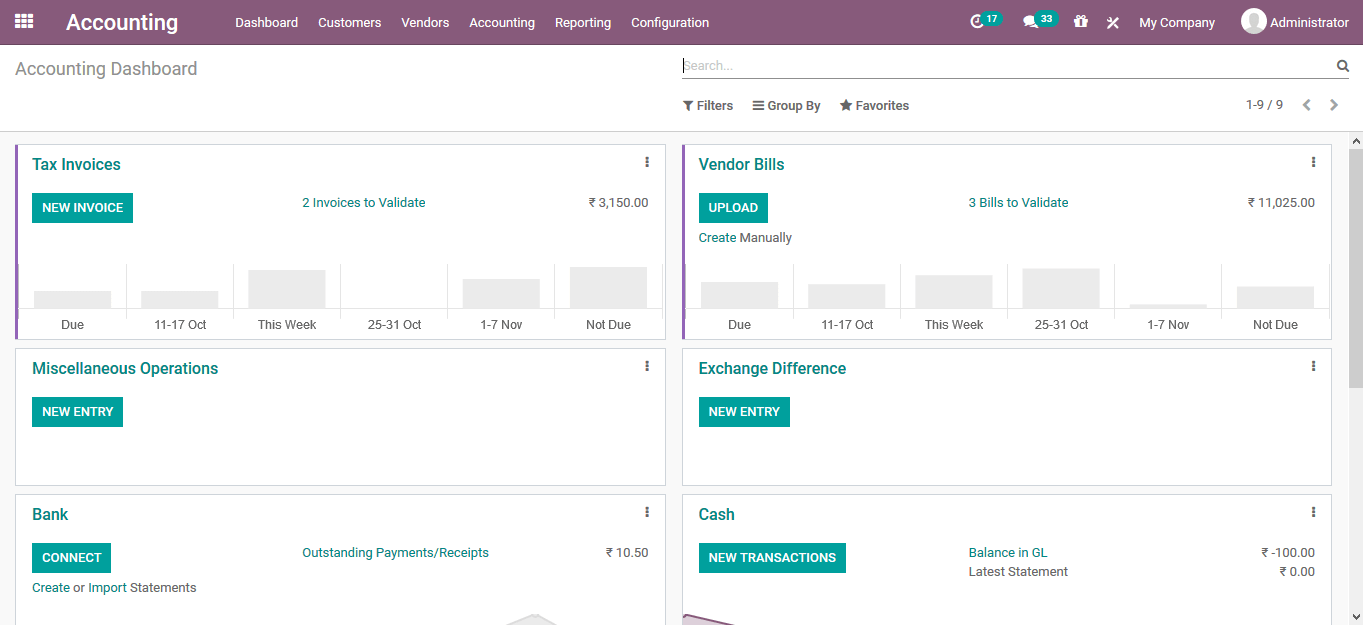
On Selecting the menu icon available in the respective tabs described in the dashboard.
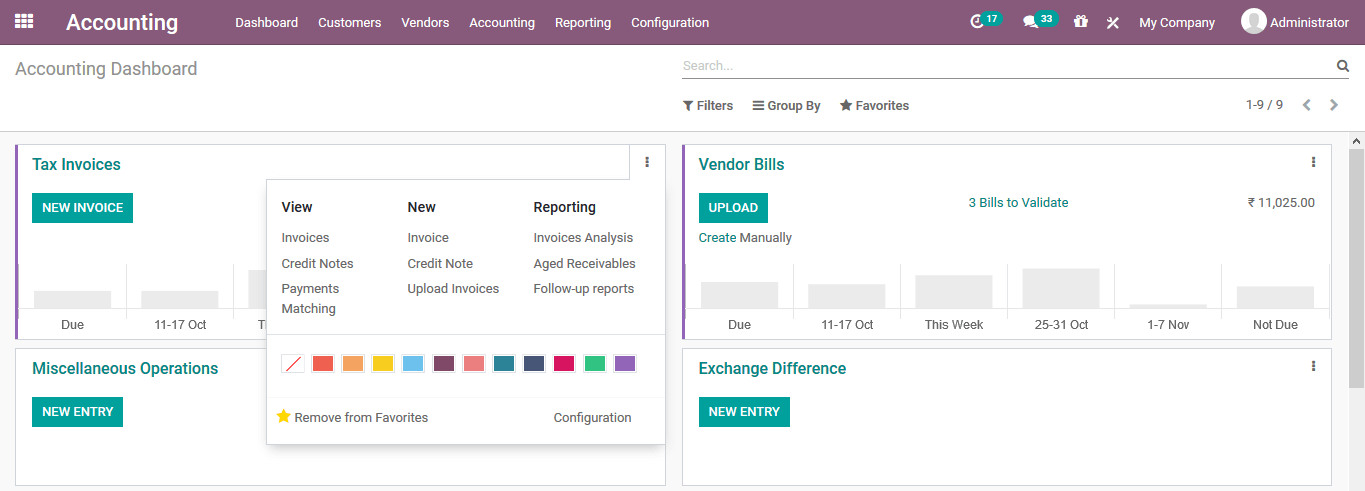
The user can select to add new invoices, bills, miscellaneous entries, exchange differences etc. using the create new options available with respect to each tab. Under the view tab the user can view the invoice menu, credit notes and payment matchings. Additionally, under the new tab the user can create the invoices, credit notes and upload invoices to the platform.
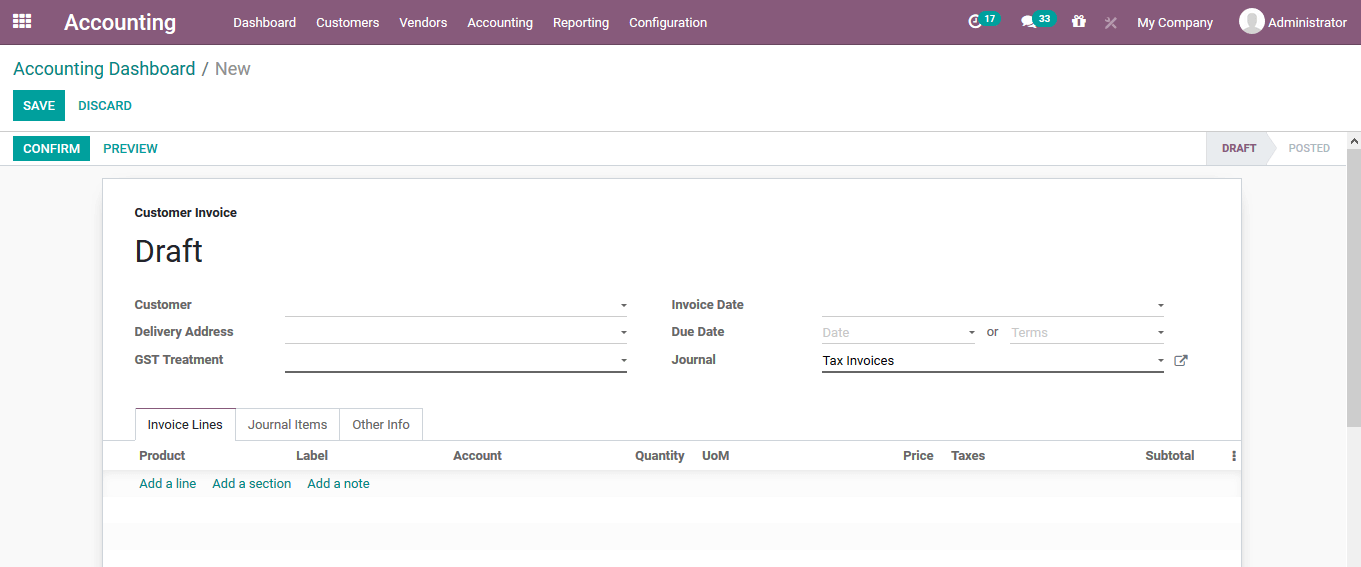
To generate a new invoice, the user can select the create option. Provide customer details, delivery address, taxation allocated, date, due date and journal entry. The user can add products with respect to the sales to the invoice by selecting the add a line option available under the product lines menu. A note and the section can be also added under the invoice lines.
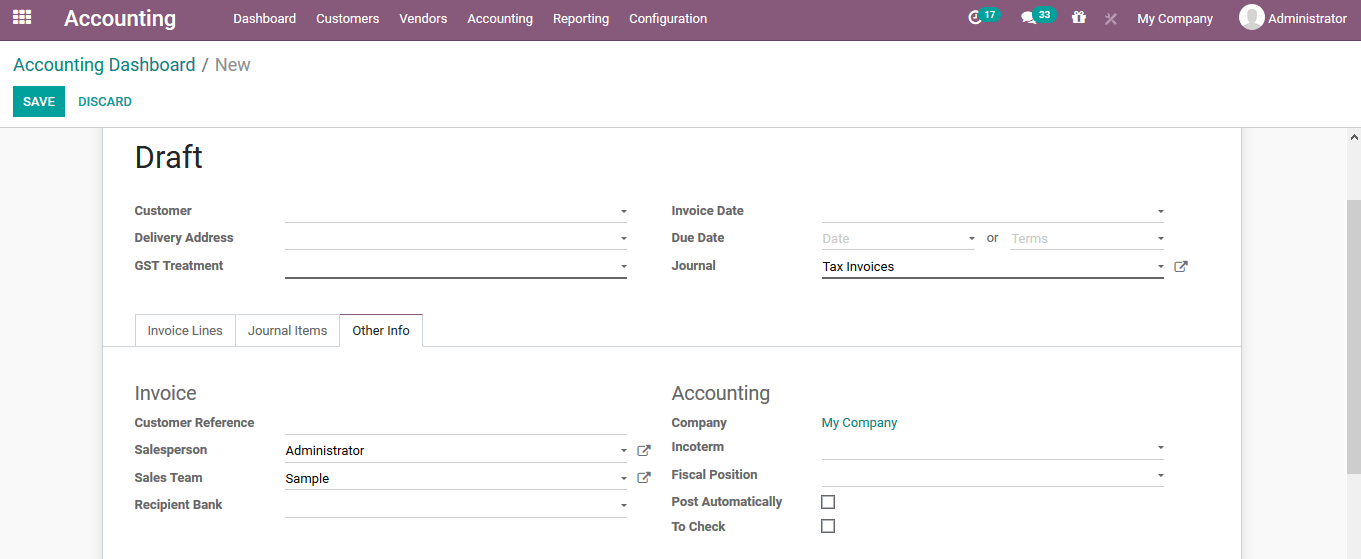
Under the other info tab, the user can define the customer references, sales person, sales team, bank details, accounting details and fiscal position.
The various reporting aspects of the dashboard will allow the user to generate reports on invoice analyst, aged reports and follow up reports.
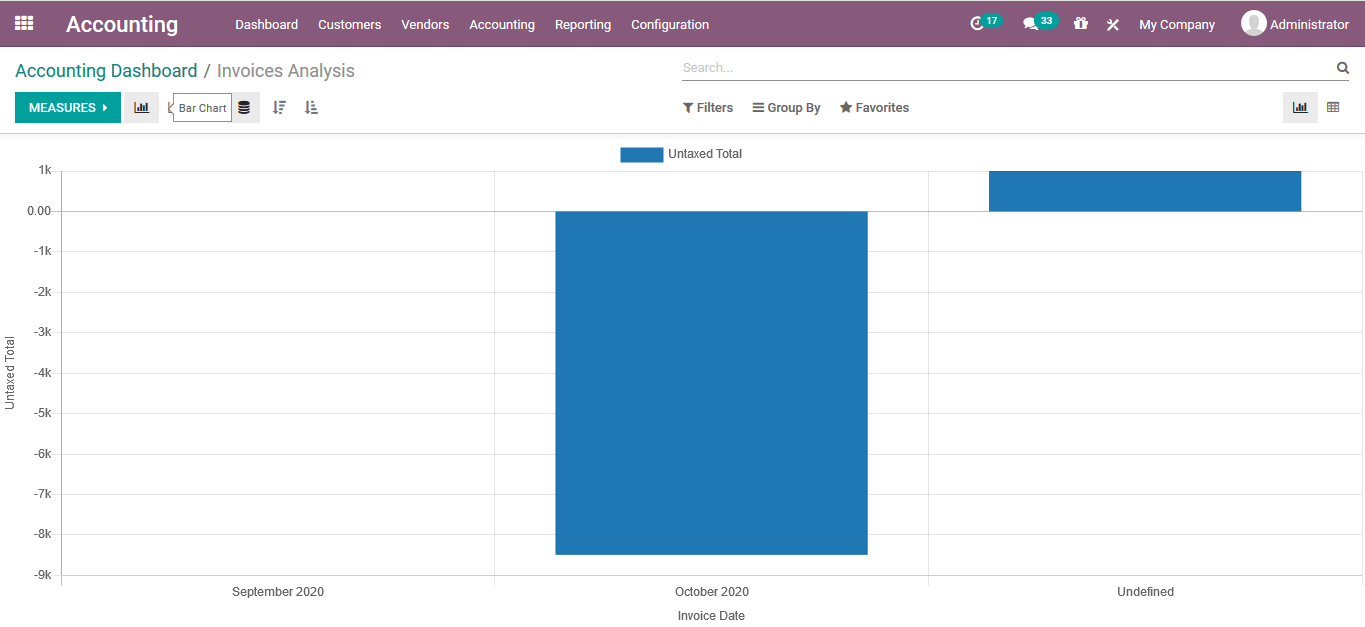
Additionally, in the accounting dashboard the data available can be filtered and grouped by for sorting out the specific required data using the various default as well as customizable options available.
Configurations
There are various default configuration options and menus available in the accounting module which will help the users with the financial aspects of the company for the users.
Bank accounts
The user can add a bank account by selecting the add a bank account option that can be accessed from the configuration tab of the module.
Here the user can choose from the bank accounts available and connect with it, if not the user can select the create option available
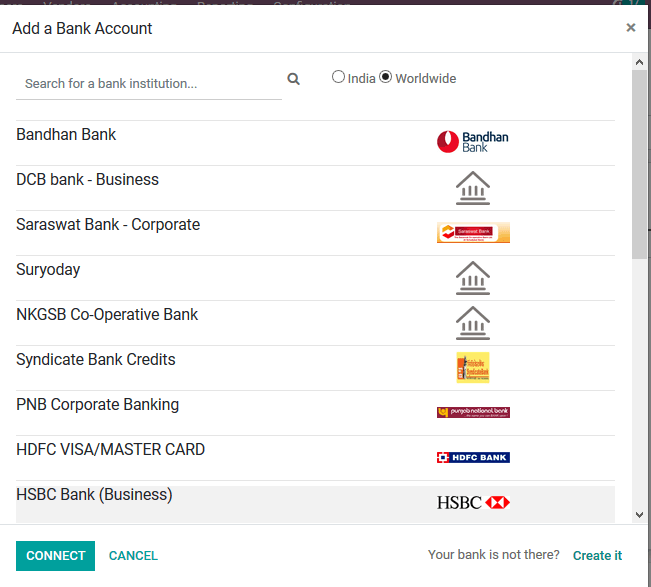
Chart of accounts
The carts are accounts information which are described to be used in the various business operations of the company. The chart of accounts operation will help the user with the description of the various financial operations conducted in the company based on the ledgers defined. These charts of accounts can be viewed from the menu accessible from the configuration tab. All the charts of accounts described in the platform can be viewed from the menu and the user can select to add the new ones using the create option available.
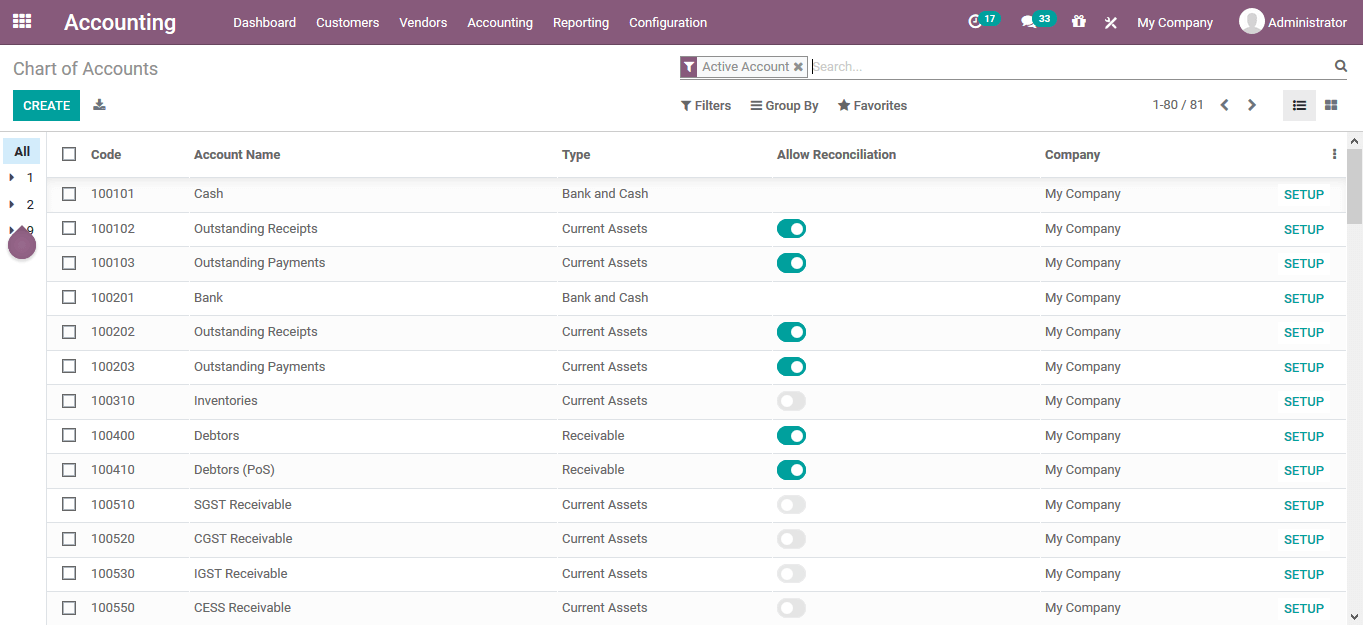
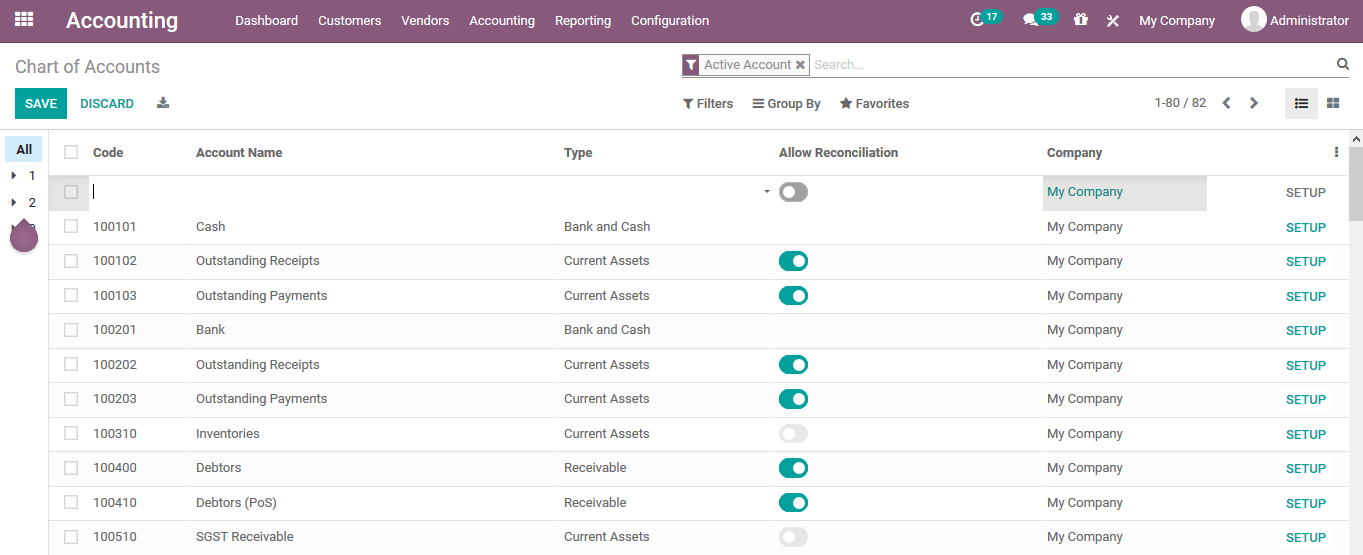
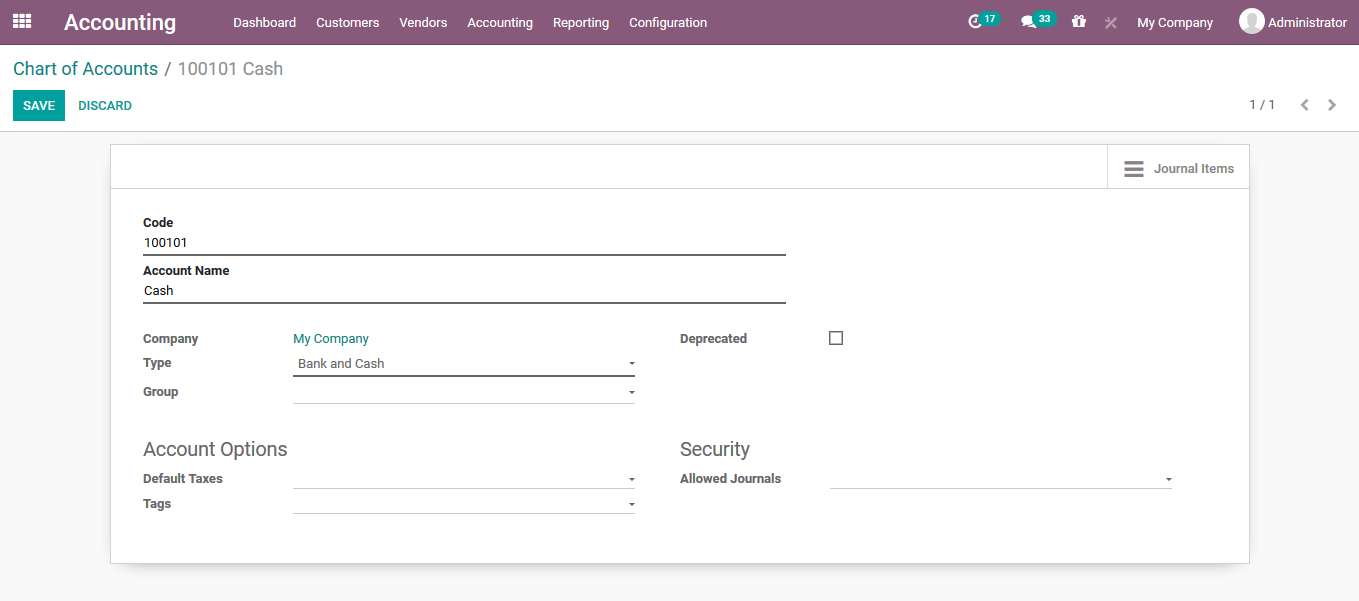
On selecting to create a new chart of account the user can define it in the menu itself providing the code, account name, type, enable or disable reconciliation, and allocate a company of operation.
Under the setup window available under each of the chart of accounts the users will be provided with the various operations to describe the accounting aspects of the respective chart of account.
Taxes
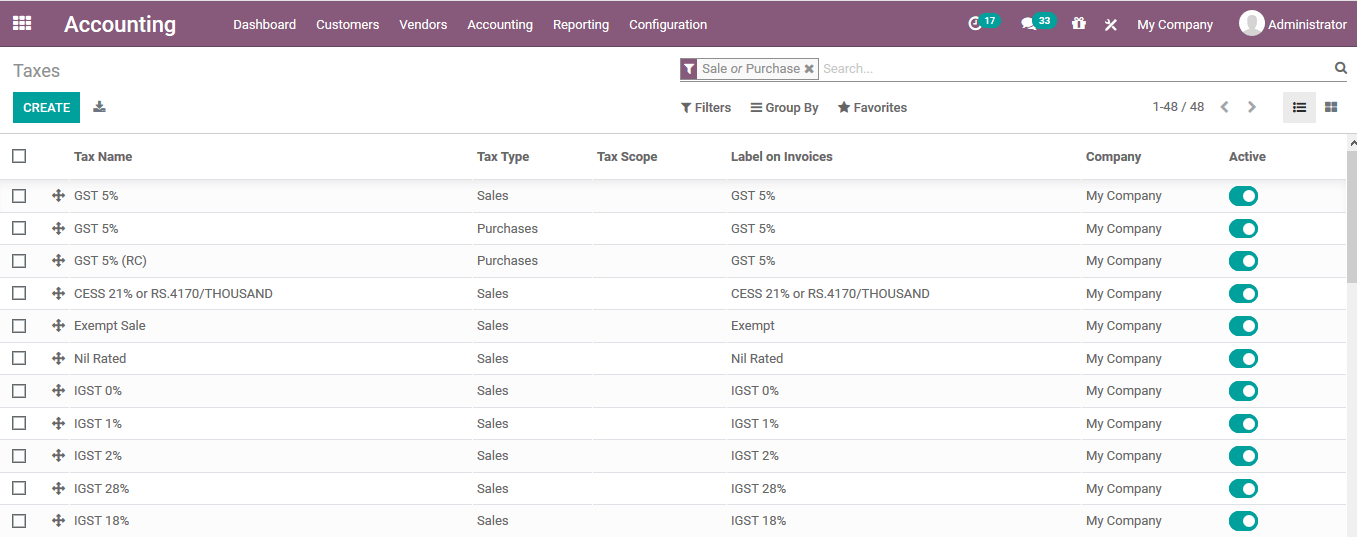
The taxes of the company operations are an aspect which is unavoidable as it would allow the companies to stick to the authoritarian rules imposed by the governments of the operational regions. The Odoo platform allows the users to create and configure various taxes for the company operations under the taxes menu accessed from the configuration tab of the module.
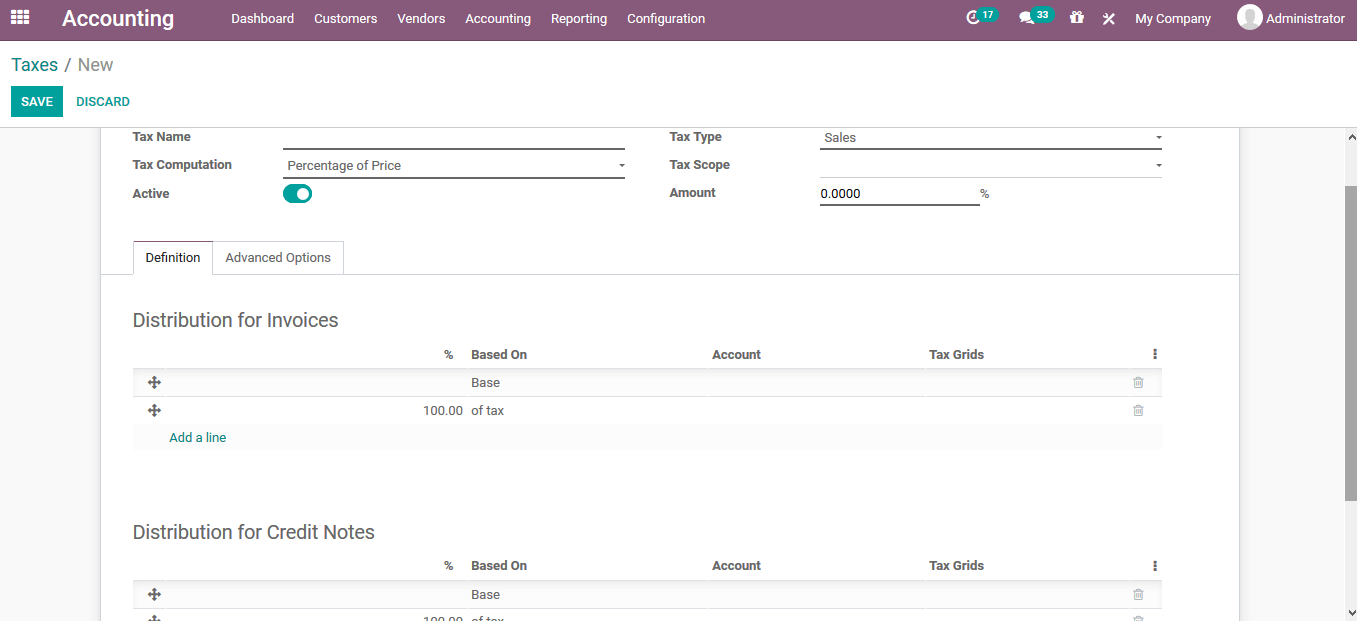
The user can create a new tax using the creation window available. In the creation window the user can provide the tax name, tax computation, tax type, tax scope and amount. The user can activate the tax to operate by enabling the activate option. The taxing rule for the distribution of invoices and credit notes can be configured under the definitions tab.
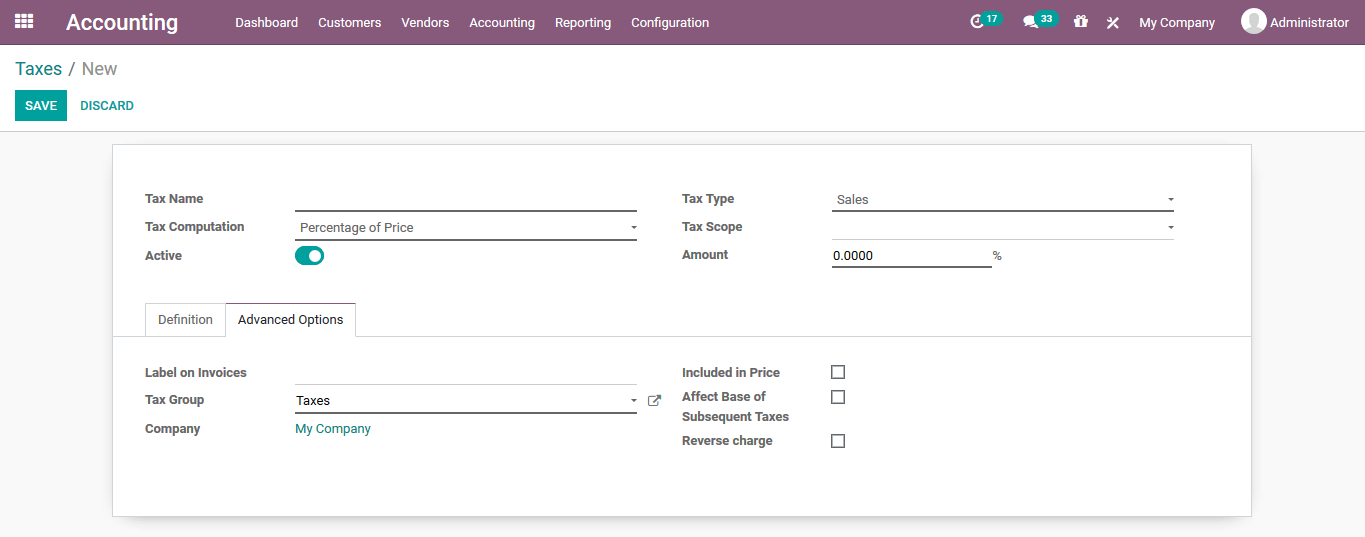
Under the advanced options menu, the user can assign the label on invoices, tax group, and company to which the tax is allocated. The options such as including the taxes in the price, affect the base of subsequent taxes and the reverse charges can be enabled or disabled.
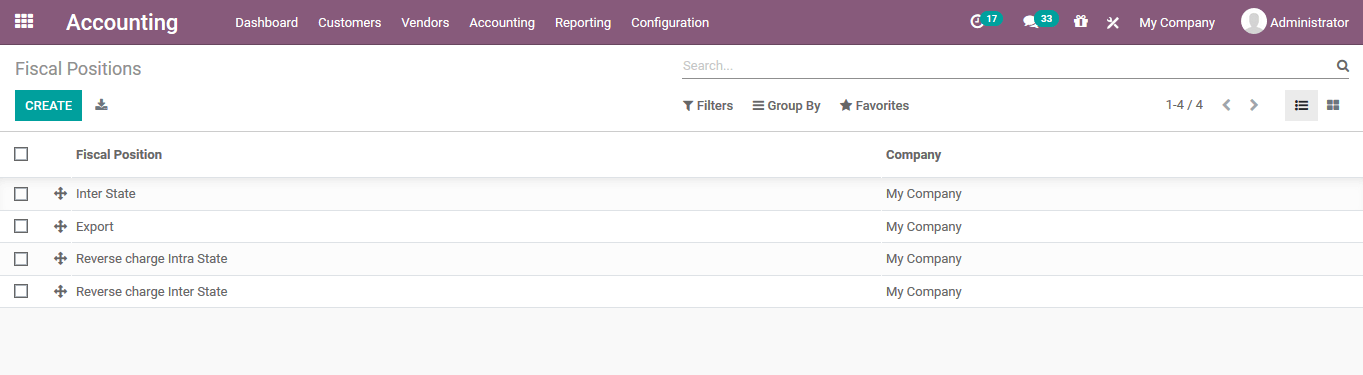
Fiscal positions
The fiscal position of the accounting operations will help the users operating with multiple currency and company operations. The fiscal position will help the users to configure the taxes and accounts specific to the country or region of operations. The fiscal positions of the platform are defined under the fiscal position menu accessible from the configuration tab. In the menu the user will be depicted with all the fiscal positions defined and the user can edit the details by selecting the respective one and the user can also create a new one using the creation window available.
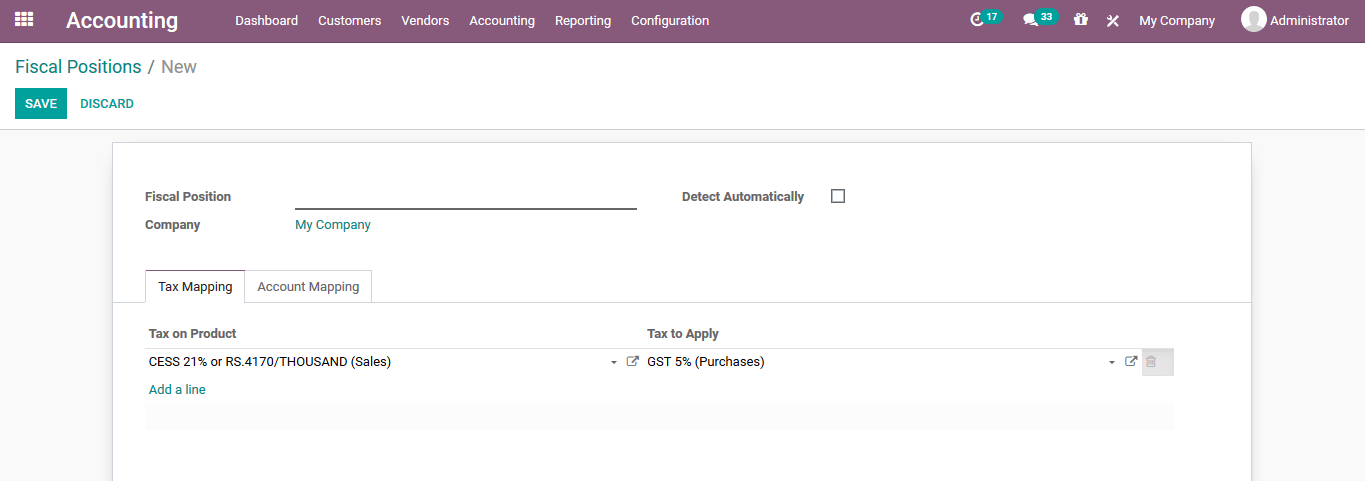
In the fiscal position creation window the user can provide a name for the fiscal positions. Under the tax mapping the user can allocate a mapping by selecting the add a line option available. Provide a tax on product and a tax to apply for the fiscal position. Additionally, the account mapping can also be provided under the respective menu.
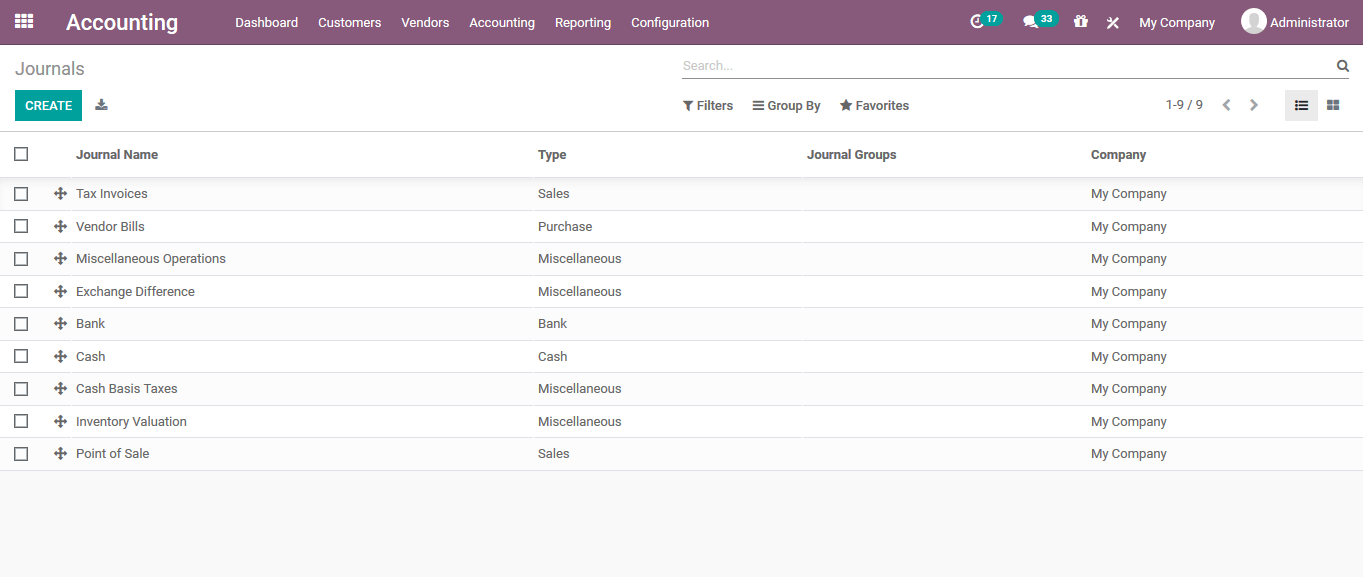
Journals
The book keeping is an important aspect while dealing with the accounting operations of the company. The journals are an efficient data recording aspect of the accounting operations with respect to the transactions conducted. The journals menu can be accessed from the configuration tab of the accounting module. Under the journals menu all the journals described in the platform are listed out and the user can create new ones.
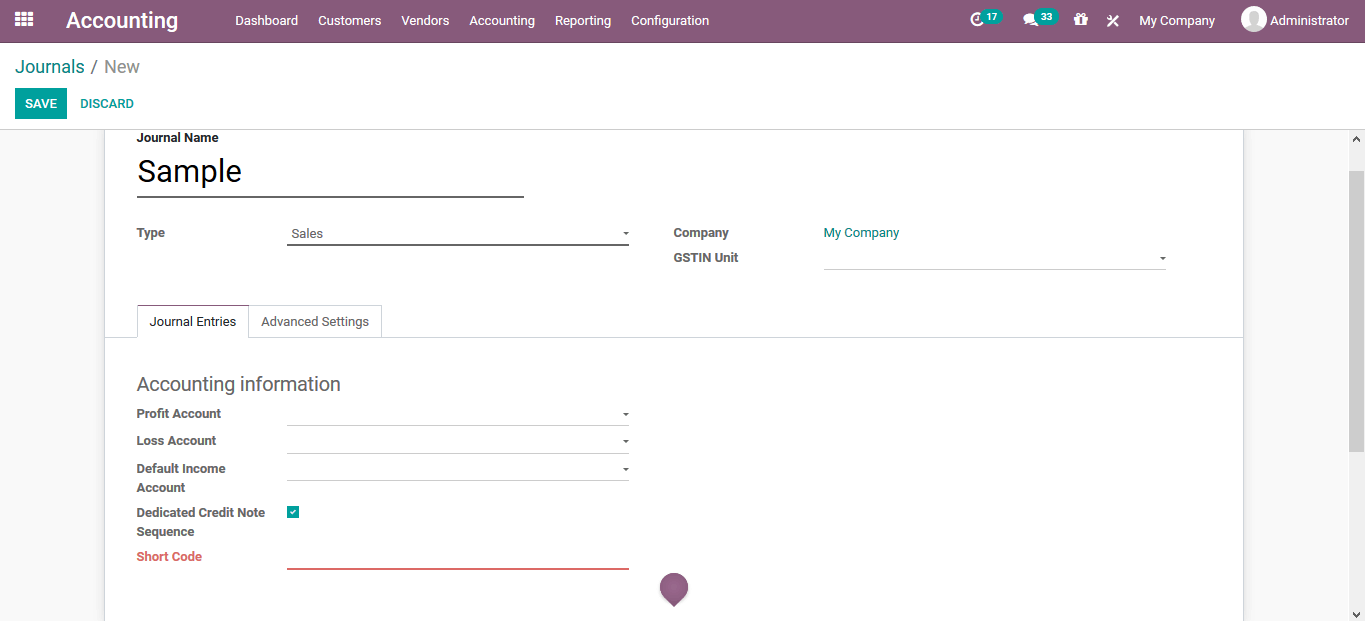
In the journal creation window the user can provide a journal name, allocate type and the taxing information. Under the journal entries the various accounting information of the journal can be defined such as profit account, loss account, default income account, dedicated credit note sequence can be enabled or disabled and the short code for the journal can be assigned.
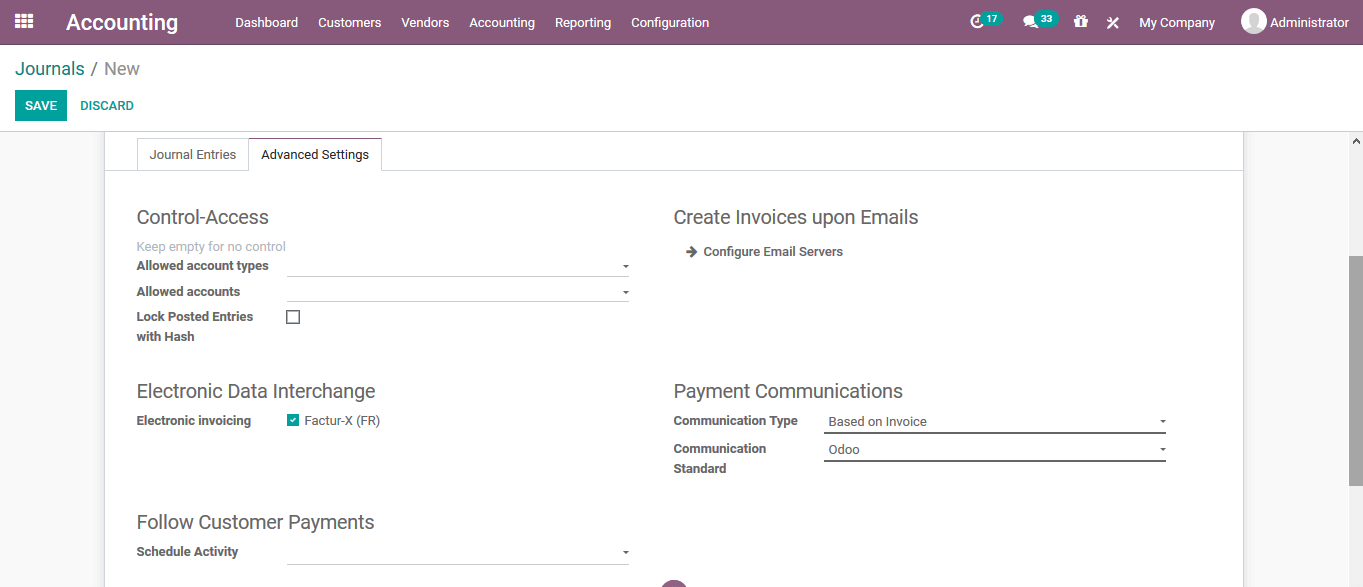
Under the advanced settings the control access information such as allowed account types, allowed accounts and icon posted entries can be enabled. There are also various options for electronic data interchange and follow customer payments can be configured. Additionally the payment communications for the communications type and the communications standard can be configured.
Journal types
The journal entries of the platform should be configured for the operation under the journal types defined. The journal types for the platform can be defined under the journal types menu accessible from the configuration tab. Under the journal types the user can view all the enlisted ones and can create new one using the create option.
Intercoms
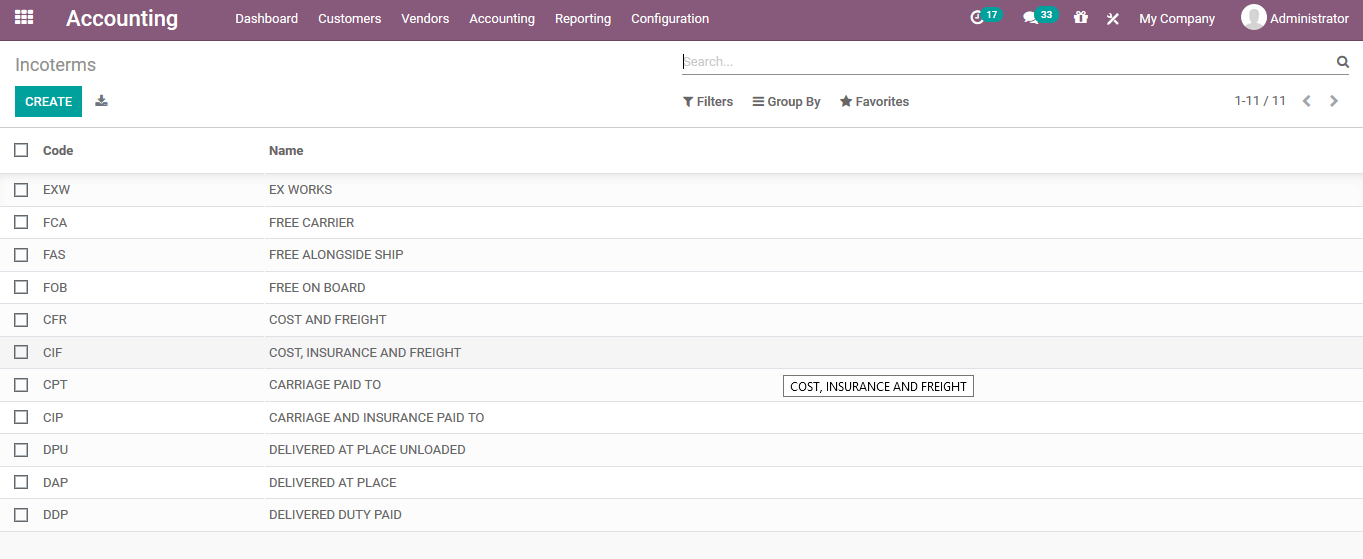
The Intercoms is the abbreviation for the international commercial terms. There are fifteen terms of business terminologies accepted between the seller and the purchaser. Intercoms are trade terms described by the International Chamber of Commerce(ICC) which are globally accepted in the international and domestic business operations.
The intercoms menu can be accessed from the configuration tab of the module and the user can view all the intercoms described in the platform which are enlisted. The user can create a new one using the create option available.
On selecting to create a new one the user can do it in the same menu itself. The created intercoms should be acceptable for all the businesses operations of the company.
Payment terms
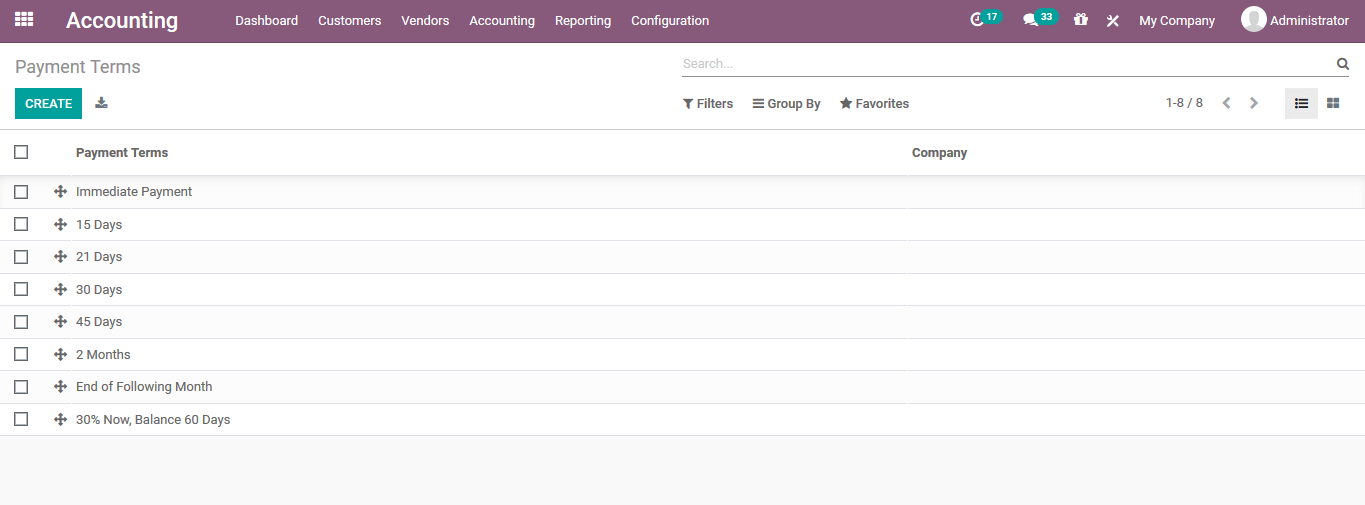
The payment terms are the ways in which the customers and the company are supposed to make the payments of the products and services. The Odoo platform allows the user to describe the various payment terminologies of the company operations. The payment terms can be described in the payment term menu accessible form the configuration menu of the module.
Under the payment terms creation window the user can provide a name for it, assign the company where this payment terminology should be used and describe details that should be mentioned on the invoice can be provided. Under the terms menu the user can define the terminologies of the respective payment terms operation.
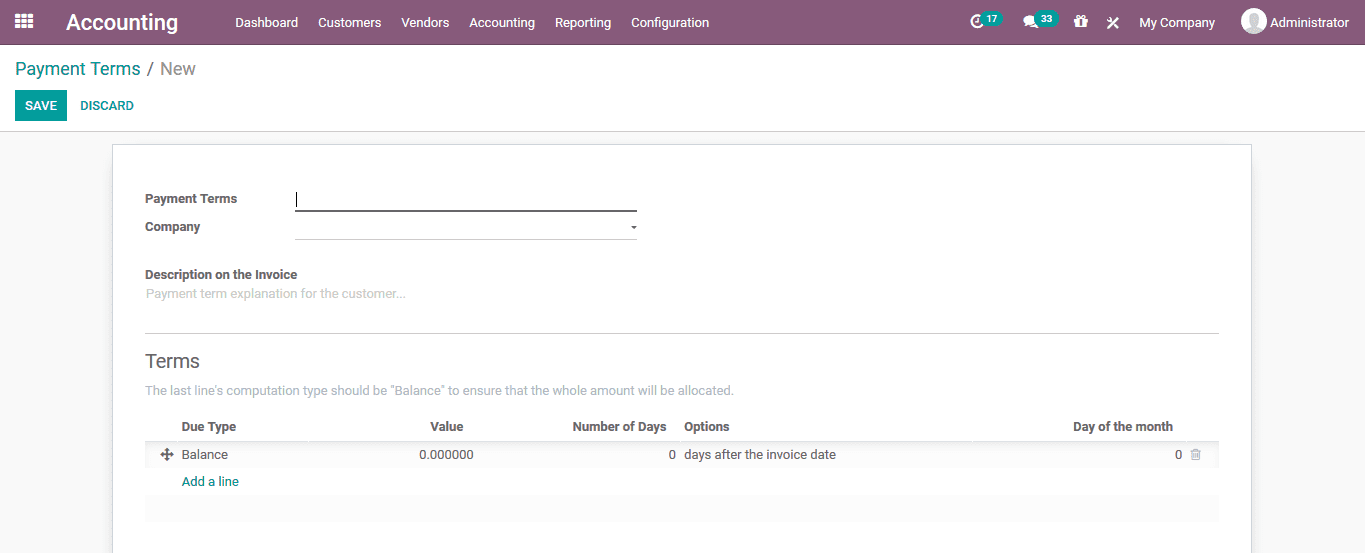
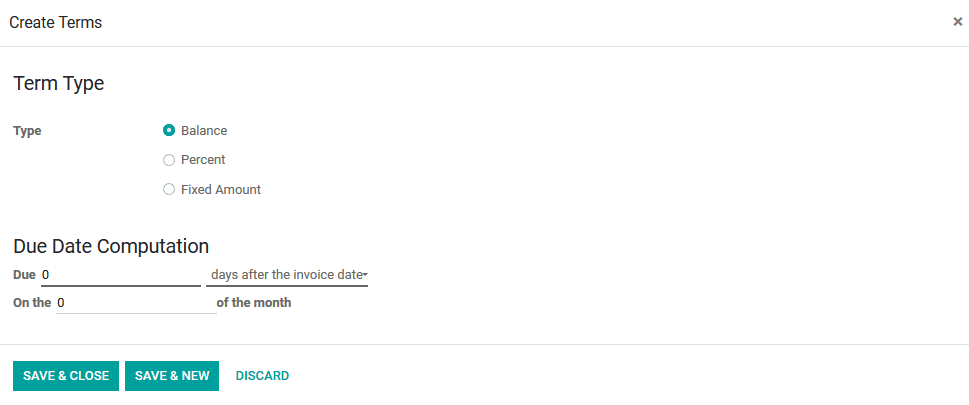
If the user wants to add payment terms he/she can choose the add a line option available and will be depicted with the following window as shown below. Here the terms type can be mentioned and the due date of the operation can be described. The terms type can be assigned as balanced, percentage or fixed amount. Additionally, the due date computation can be made based on the days after the invoice date, last day of the following month or the last day of the current month.
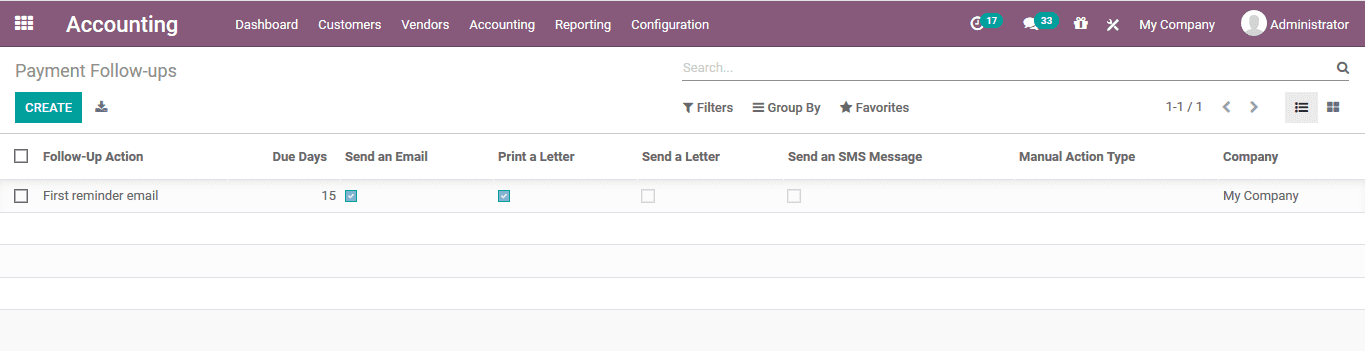
Payment follow ups
It’s essential for any company operations when there is a due payment and the customer has not yet been paid. The Odoo platform allows the users to create and configure various follow up operations for the payments under the payment follow up menu accessible from the configuration tab of the module. In the payment follow ups menu all the follow up operations are defined and the user can create a new one using the create window available.
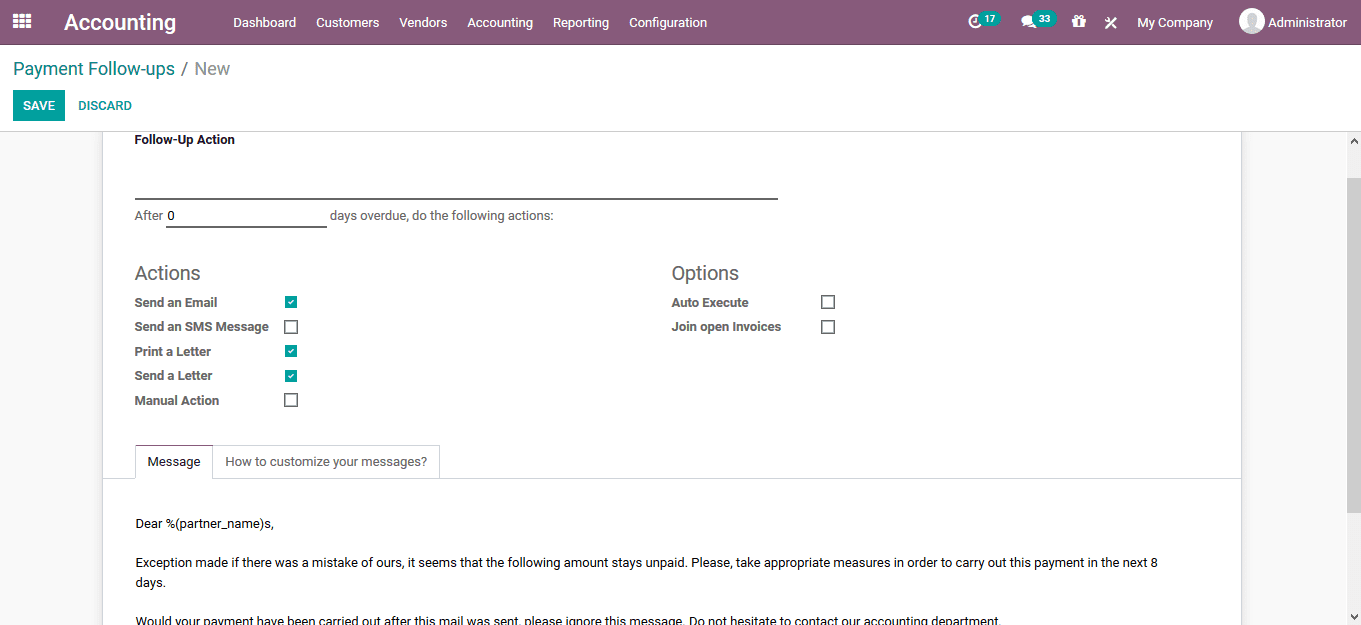
Under the follow up description menu the user can select the name for the follow ups action and the due date of the action. The various actions of the follow up provider can be configured. The follow ups actions such as emails, SMS, letter or a manual action can be triggered by enabling it under the accounting tab. Under the options tab the auto execute and the join open invoices can also be provided.
Under the message tab the user can customize it by editing the description and suiting it as per the company demands.
Fiscal year
The fiscal year is a distinctive operational period allocation of the company operations which will allow the users with the book keeping aspects of the company along within the budget summaries and the tax filings. The fiscal year is usually configured with the financial year described by the governmental organizations as it will help the users to describe and file the tax returns of the company.
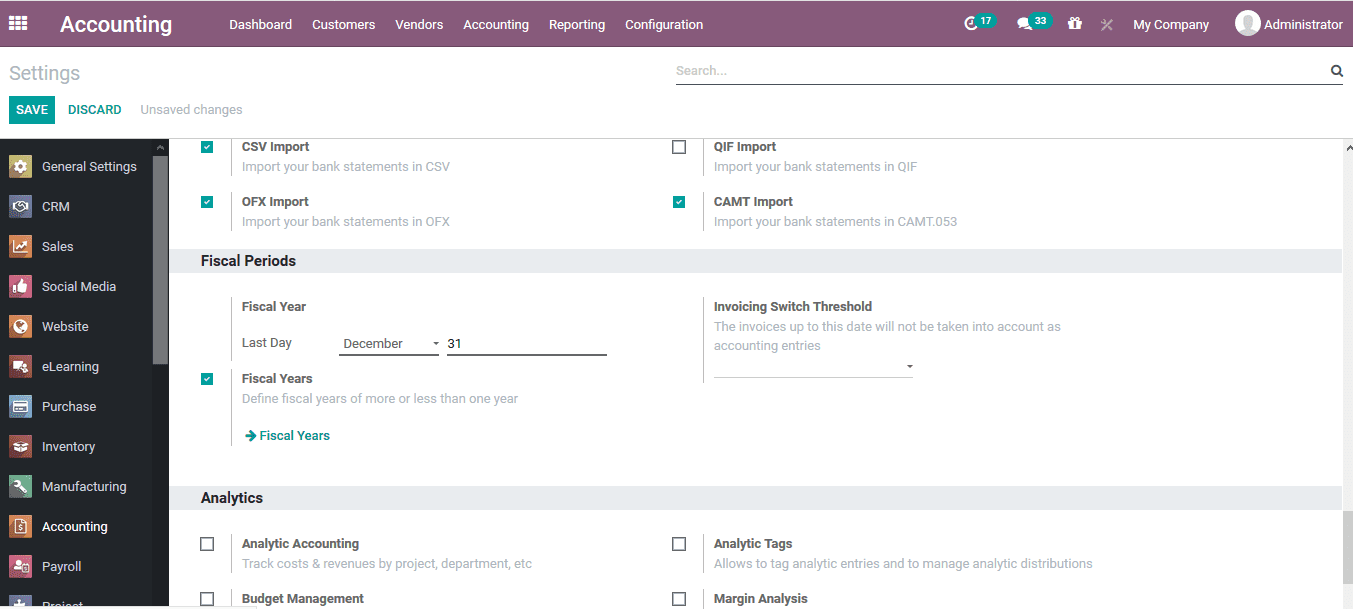
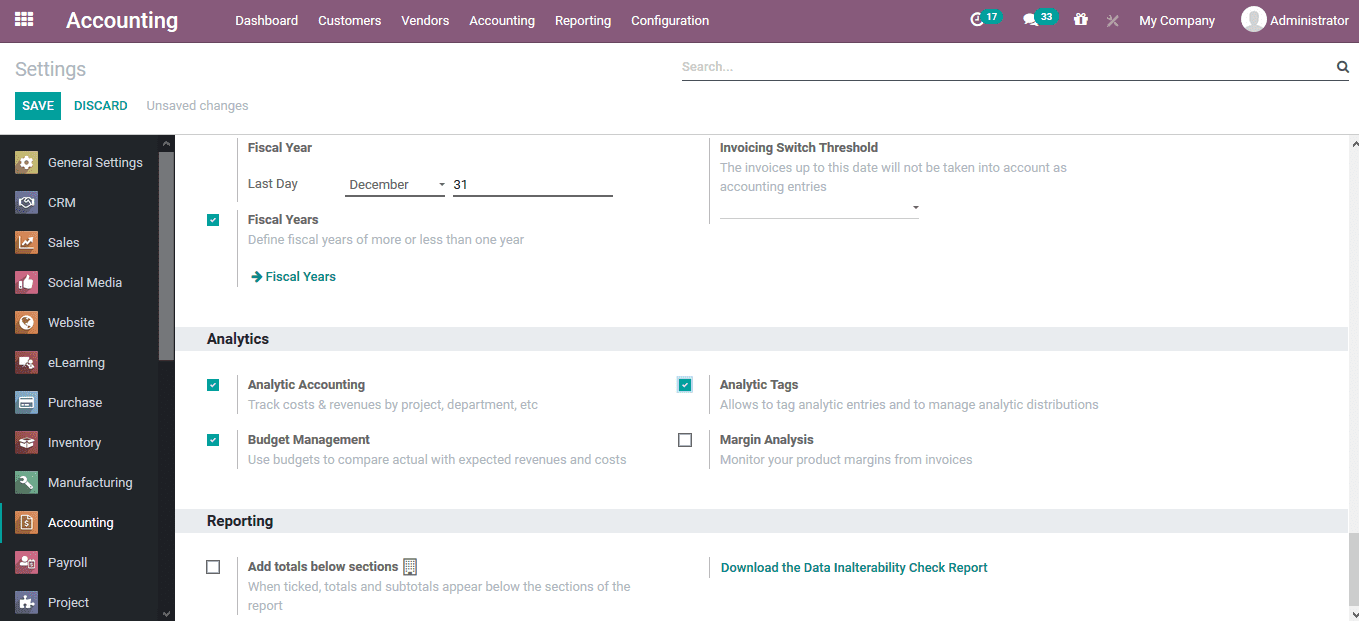
The fiscal year option can be provided in the settings menu of the accounting module accessible from the configuration tab. Under the fiscal periods menu the user can enable the fiscal year option, describe the fiscal year and the invoice switching threshold.
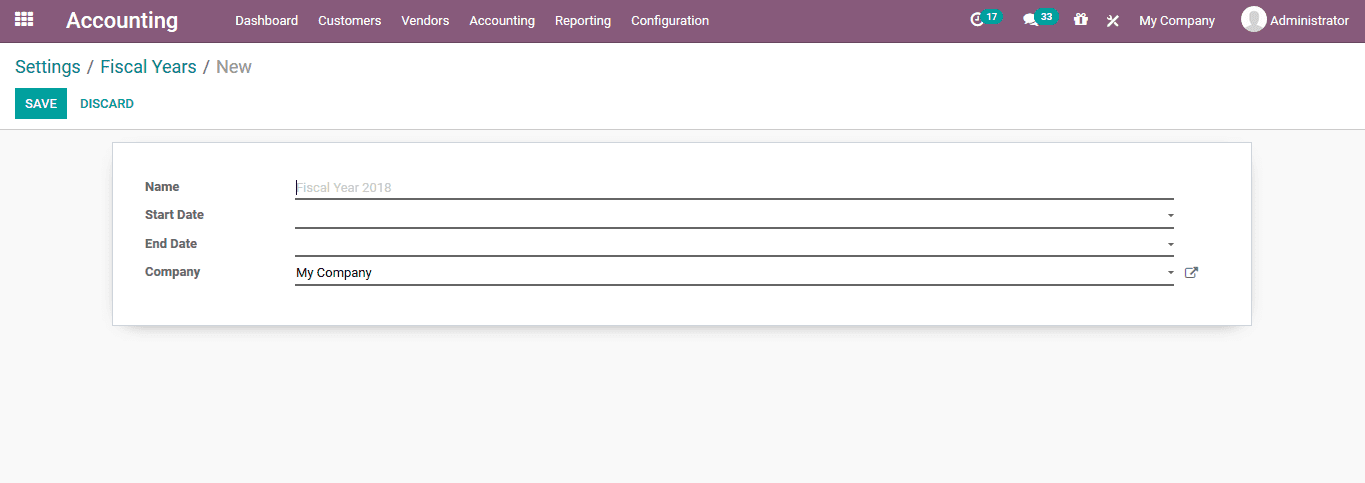
All the fiscal years can be viewed in the fiscal year menu accessible from the settings menu itself under the fiscal periods menu. In the menu all the fiscal years are defined and the user can create a new one using the create option available. In the fiscal year creation window the user can assign a name, duration of operations including the start date and the end date of the fiscal year and the company allocation for the same.
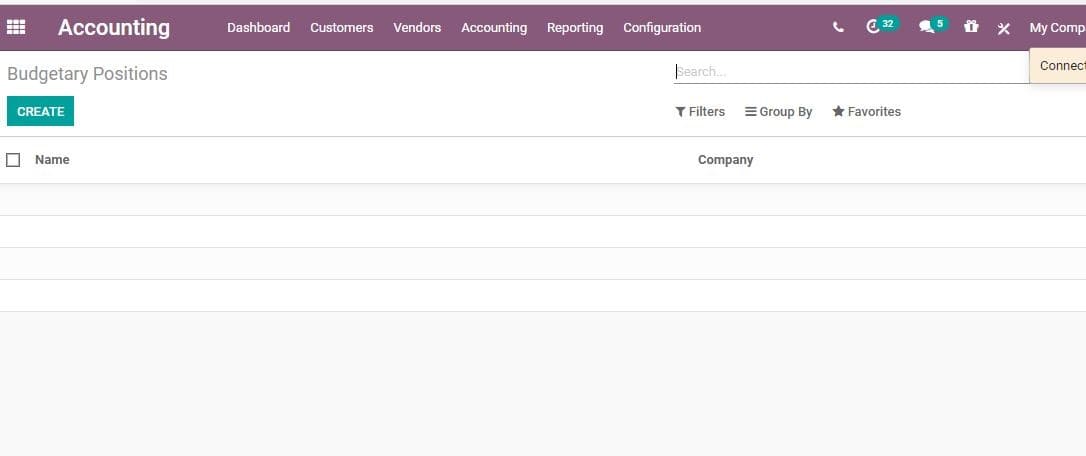
Budgetary positions
The budgetary positions allow the user to create spending plans for the specified chart of accounts. This will help the users in the aspect of budget allocations in the company. The budgetary positions can only be assigned if the budget management option of the accounting module is enabled. Under the analytics menu of the settings module the user should enable the budget management options and save it. Therefore, under the configuration tab the user can view the new option budgetary position.

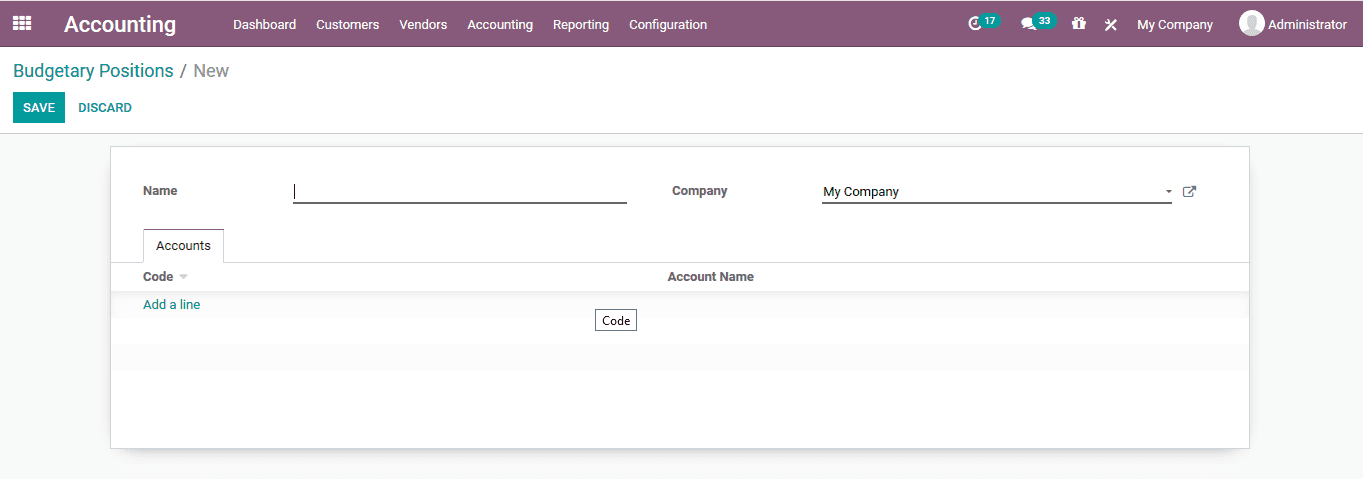
On selecting the budgetary position option the user will be depicted with the menu containing the budgetary listing and the user can create new ones by selecting the create option available. In the budgetary creations window the user can provide a name and allocate the company of operations.
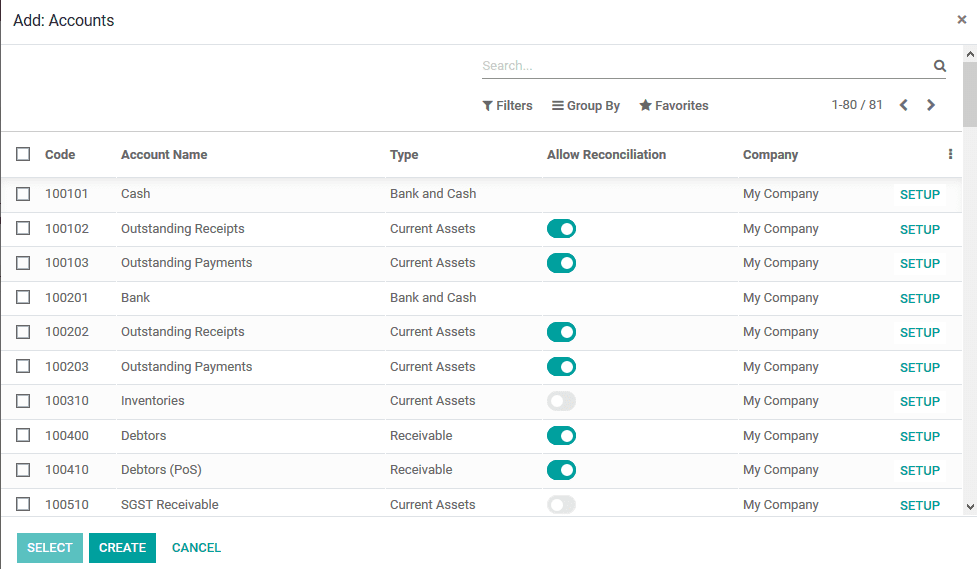
Under the accounts may the user can allocate the various charts of accounts to deal with the budgetary operations by selecting the add a line option available. On selecting the add a line option the user will be depicted with the following window to choose the respective chart of accounts for the budgetary position.
Asset management
The asset management of the accounting aspects of a company are the financial operations of the sales, purchase, inventory operations, repairs and many more which are involved with the business concerning the financial operations. All the financial operations on these aspects can be planned, executed and monitored. In addition the physical assets such as land, vehicle, equipment etc. can be configured and subjected to a strict financial operations concerning the funds spent on them.
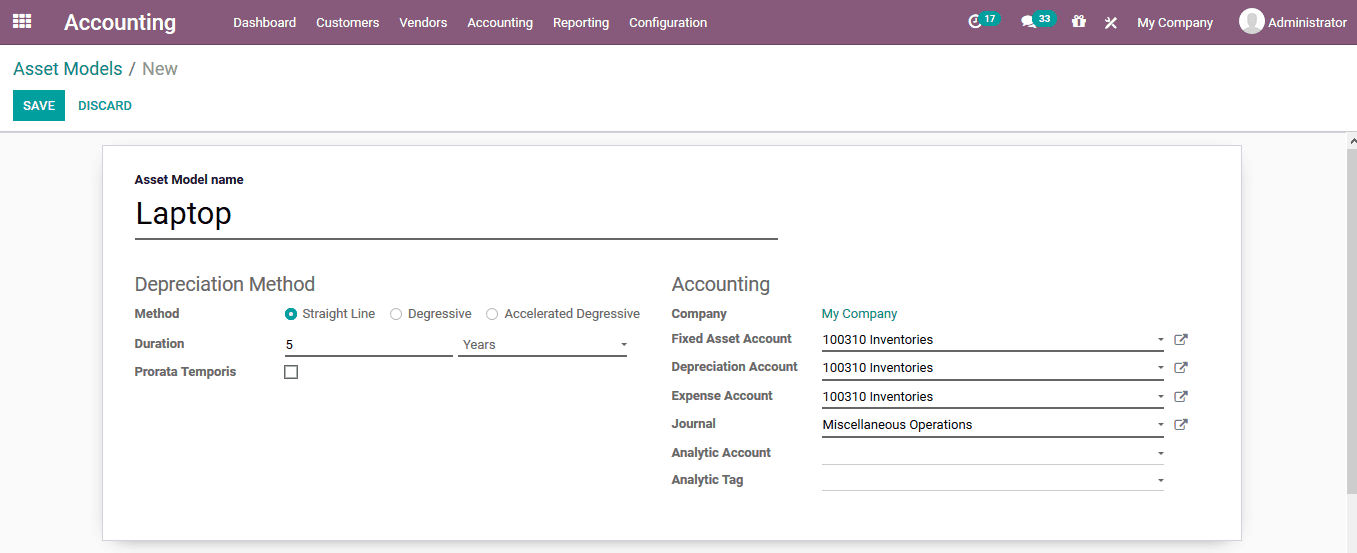
The asset model menu can be accessed from the configuration tab of the accounting module. In the menu all the asset models described will be listed out and the user can create a new one.
In the new asset creation window the user can assign an asset model, allocate the depreciation method to be a straight line, digressive or accelerated degradation. Additionally, allocate the duration and the prorata temporis. Under the accounting menu the user can describe the accounting aspect of the asset such as fixed asset account, depreciation account, expense account, journal, analytical account and analytical tab.
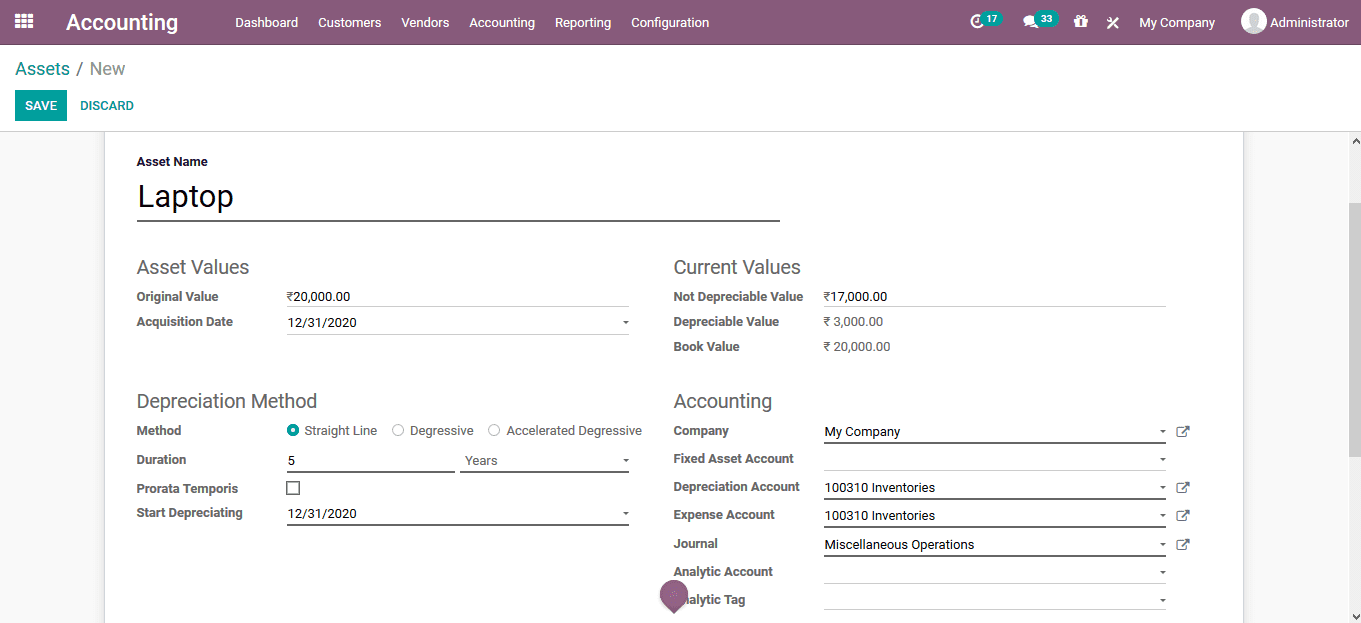
As the asset models are created the user can now create the various assets to be described in the company operations in the Odoo platform. To allocate an asset to the company the user can select the asset menu accessible from the accounting tab. Here all the assets of the model are being described and the user can select to get a new one.
In the asset creation window the user should initially provide a name, allocate the asset value of the acquisition price and the date of it. Additionally, the current values can be described by the asset.
Furthermore, the depreciation method can be allocated and the duration of the depreciation and the start date of the depreciation can also be allocated. Moreover, the accounting aspects of the asset can be described under the menu such as depreciation account, expense account, journal of entry, analytical account and the analytical tab can be described.
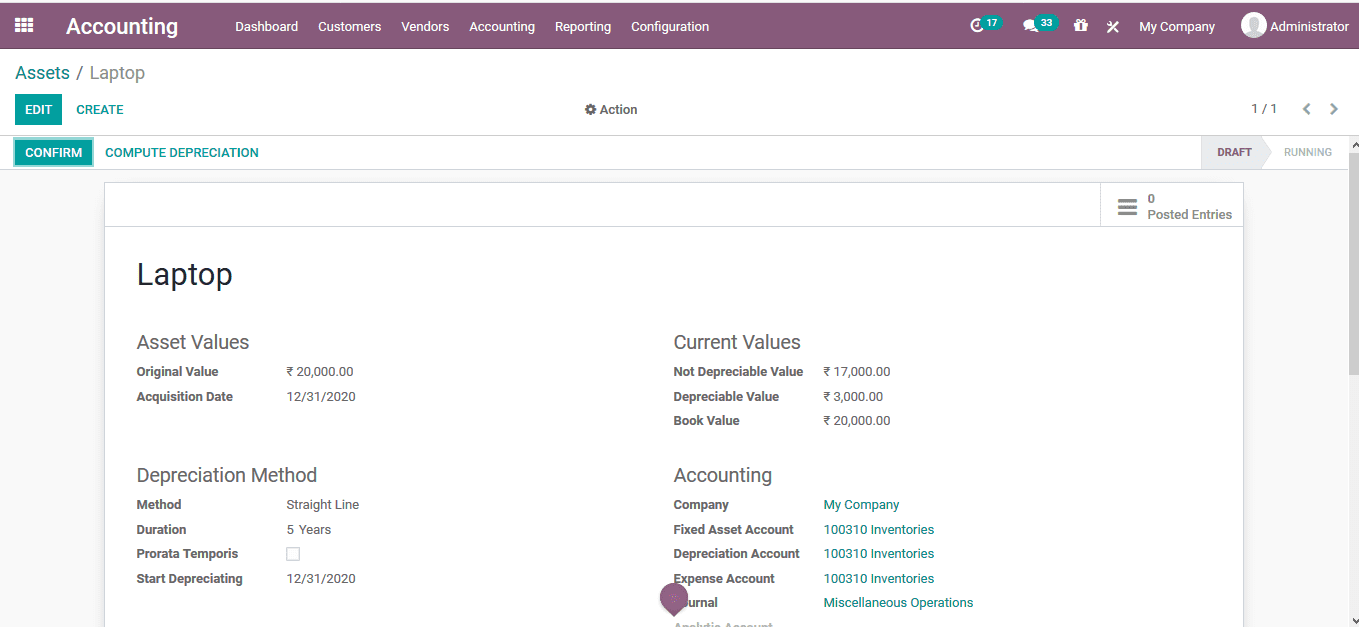
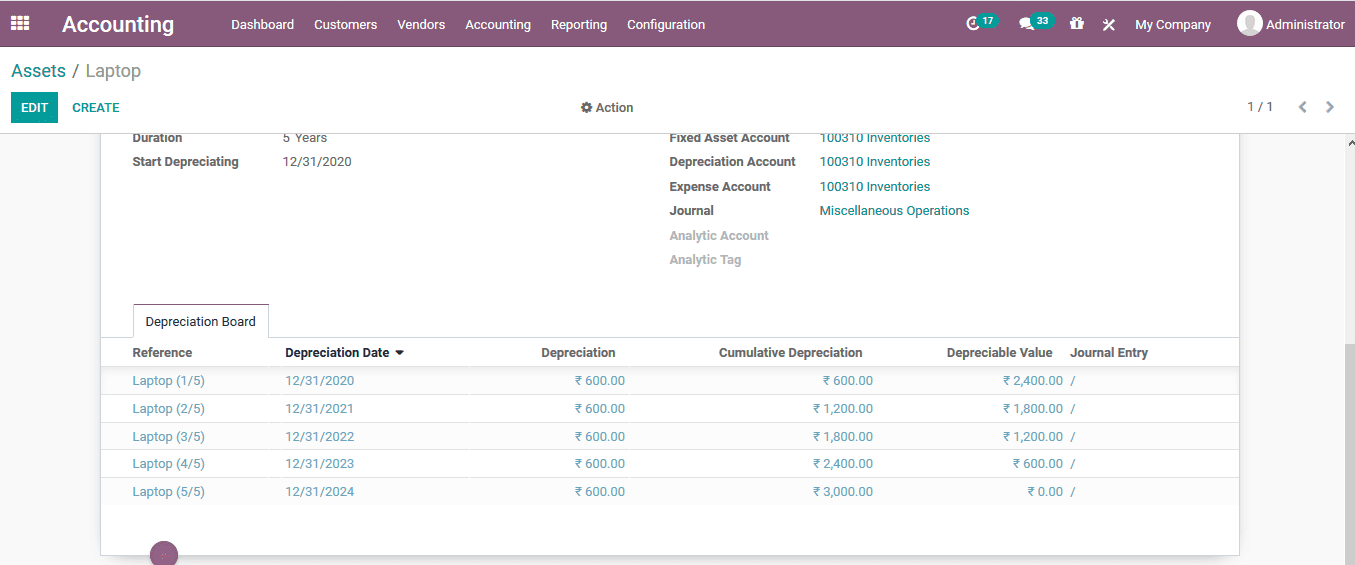
As the asset is being described and this is saved upon verification the user can view the option to confirm the asset to be described in the platform.
On confirming the asset the user can view the options sell or dispose, set as draft, pause depreciation, modify depreciation, and save the model.
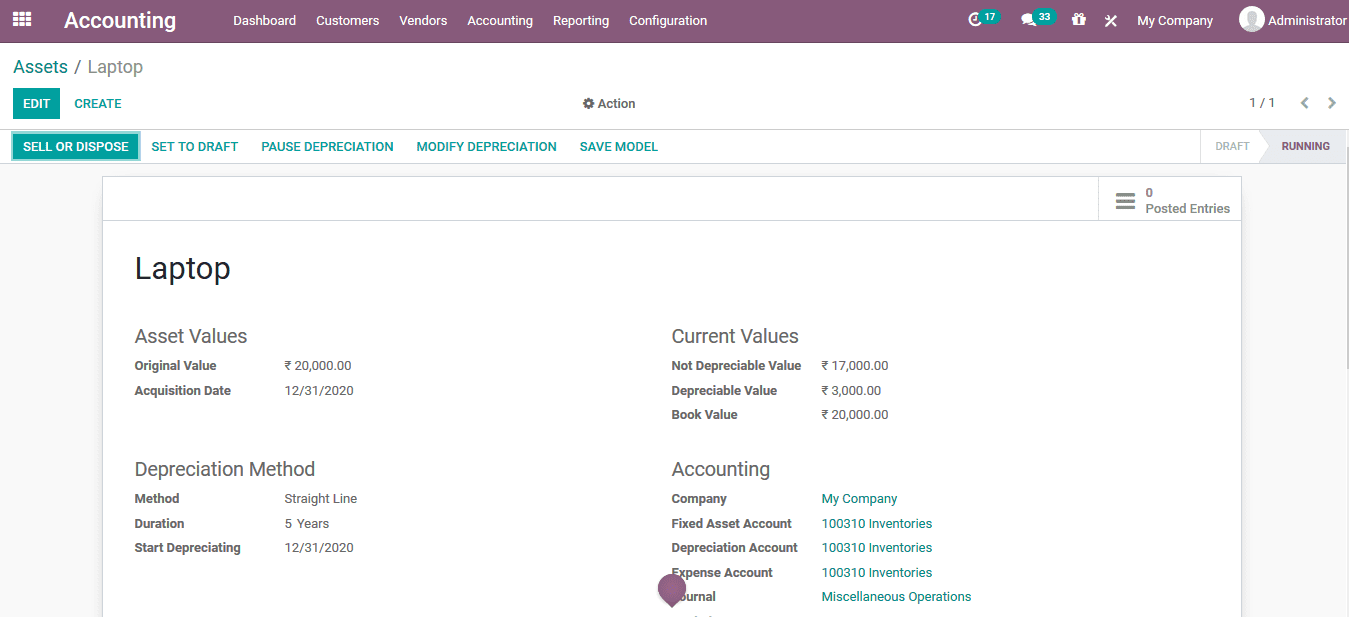
The depreciation board will be depicted down the depreciation board. Here all the reference of the asset and the details will be described.
Analytical accounting
The analytical accounting aspect of the Odoo platform can be used to determine the financial aspects of invoicing, sales, purchase and the various financial aspects involved to determine where the funds of the company are being spent and are retained. The Odoo platform allows the users to care for the analytical accounts and tags which do not interfere with the chart of accounts of the company.
The Odoo analytical accounting can be used for the various financial operations such as analysing the cost of the company, reinvoicing the products and services to the customers. Additionally these can be used to determine the financial aspects of the projects and therefore determining the performance and the productivity.
The analytical accounting aspects can be enabled to be operational in the Odoo platform by enabling the analytical accounting option under the settings menu of the accounting tab. In addition, the analytical tags can be enabled for the operation in the platform.
The analytical accounts of the platform are defined in the analytical accounts menu which can be accessed from the configuration tab of the module. Here all the analytical accounts are listed out and the user can edit them and create new ones.
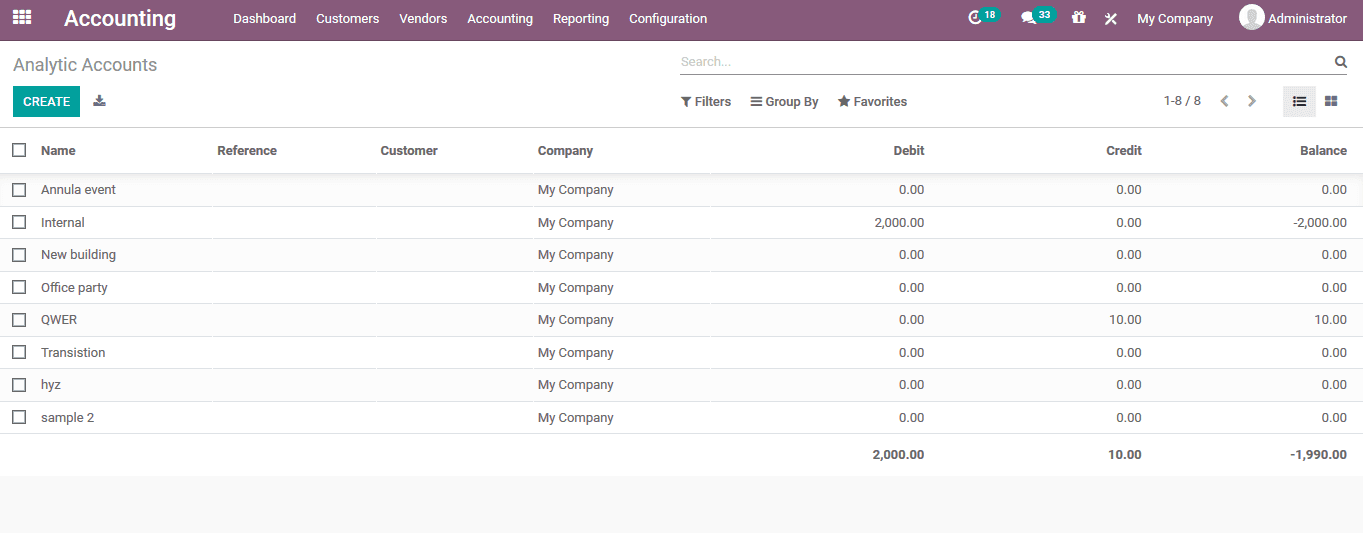
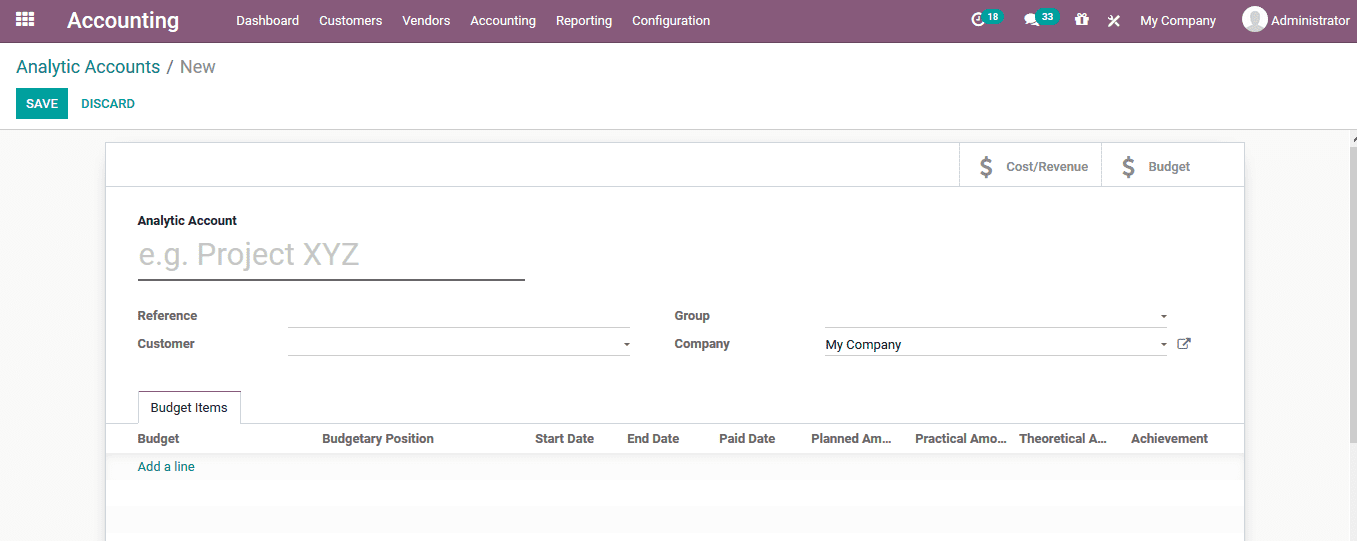
The analytical accounts for the platform can be created by selecting the create option available. The user can provide a name for the analytical account, reference number, customer details, allocate a group and the budget lines can be defined under the budget items.
Analytical account groups
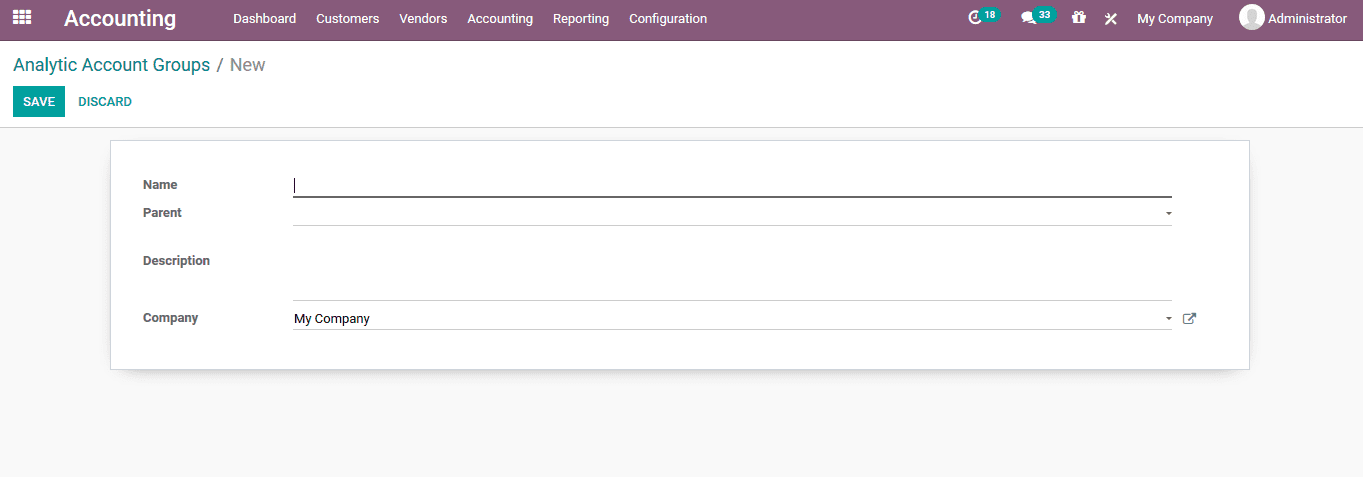
The user can create and assign groups of analytical accounts for the analytical account option to be conducted in Odoo. These analytical account groups can be defined from the analytical group menu accessible from the configuration tab. In the menu all the analytical groups are listed out and the user can select to create a new one using the creation window. In the groups creation window the user can define the name, parent group, provide the company and have a custom made description for the group being defined.
Analytical tags
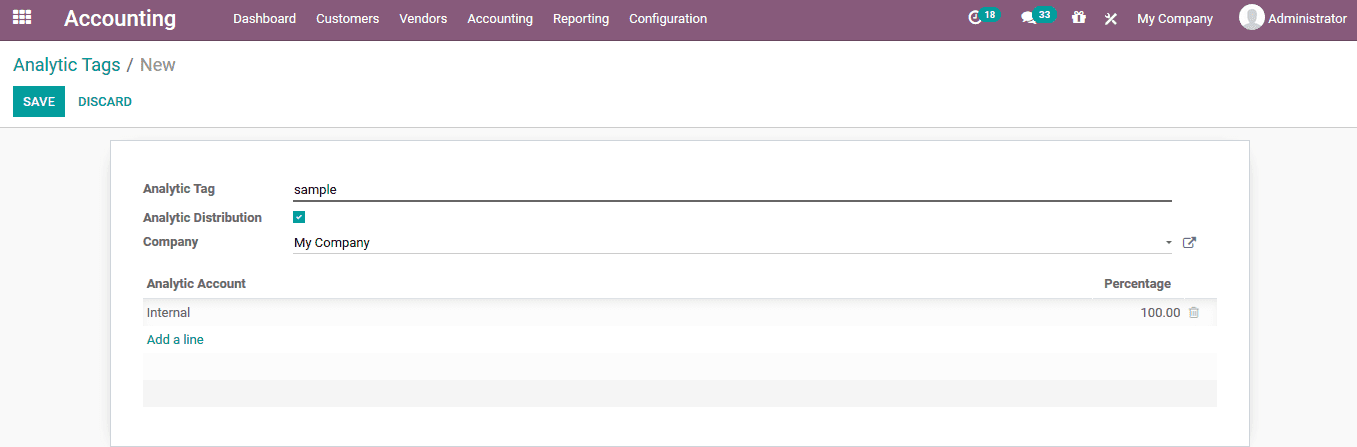
The analytical tags of the Odoo platform can be described for classification of the analytical accounts available. The analytical tags of the can be defined under the analytical tag menu accessible from the configuration tab of the module.
Here all the analytical tags will be listed out and the user can create new ones using the creation window accessible. In the new analytical tag creation window the user can provide the name of the tag, enable the analytical distribution, allocate the company and describe the analytical accounts coming under the respective tag by selecting the add a line option.
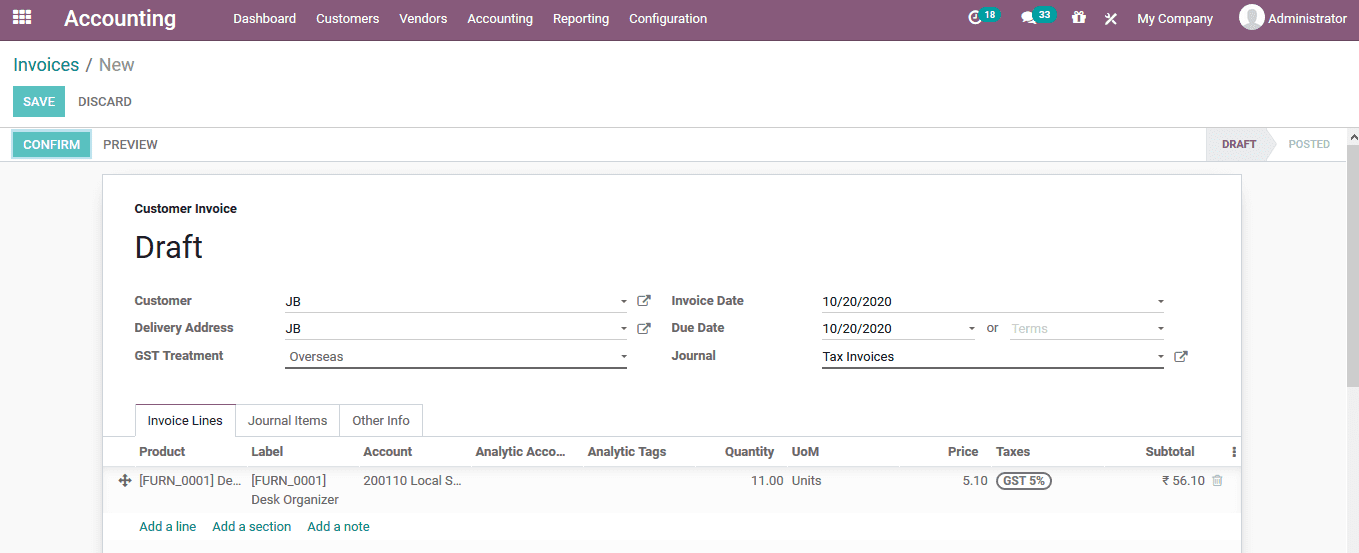
Let’s create an invoice to demonstrate the analytical account operation. The new invoices can be created from the customer tab and selecting the invoices. Where the user will be depicted with all the invoices generated from the platform and can create new ones.
Create an invoice and confirm the operation on providing and verifying the details.
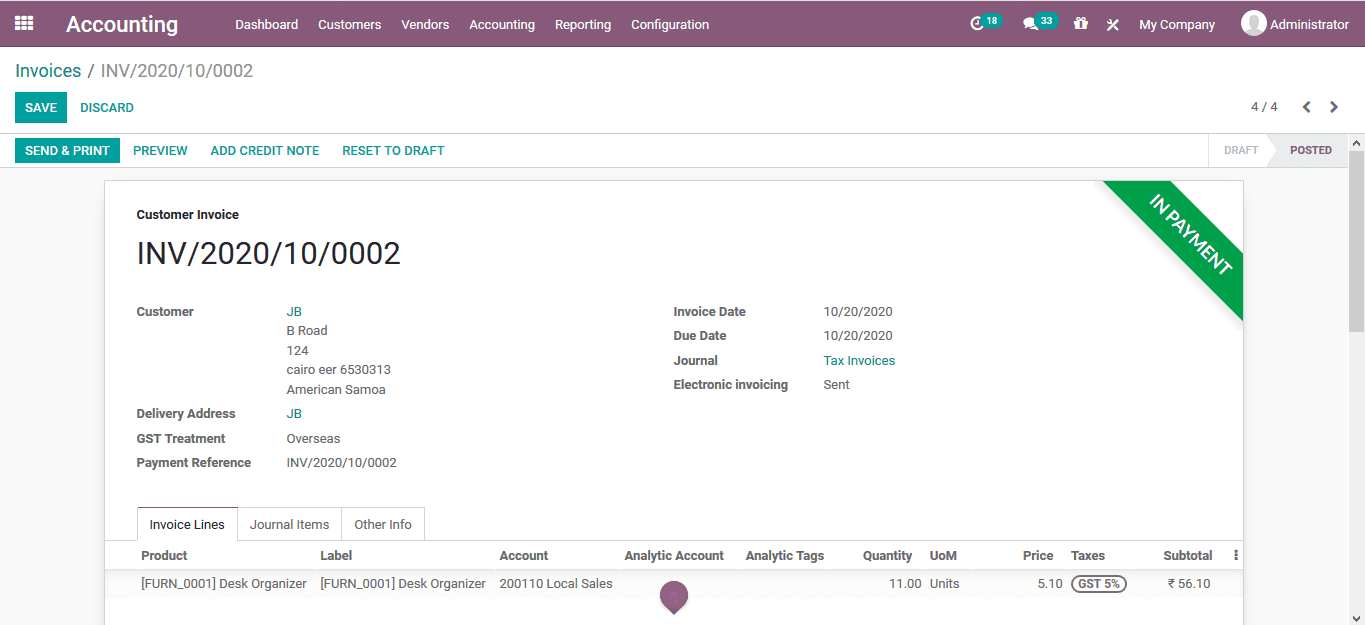
If the payment is validated, then the process is indicated with a label.
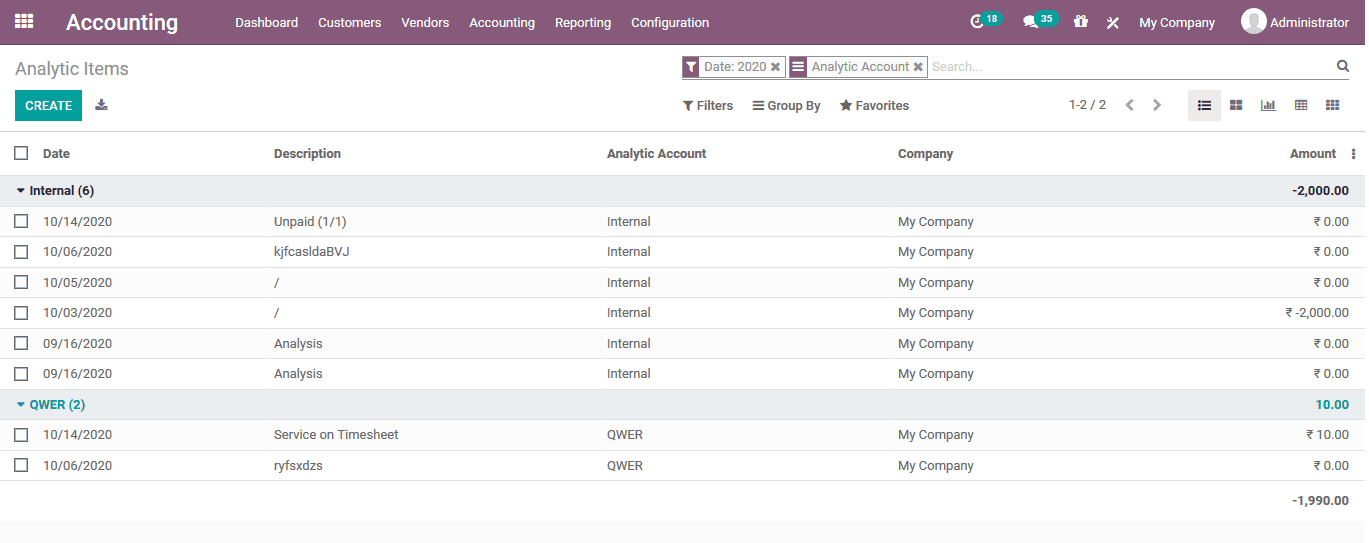
Now back in the analytical items menu accessible from the configuration menu of the module the user will be depicted with all the accounting aspects of the company.
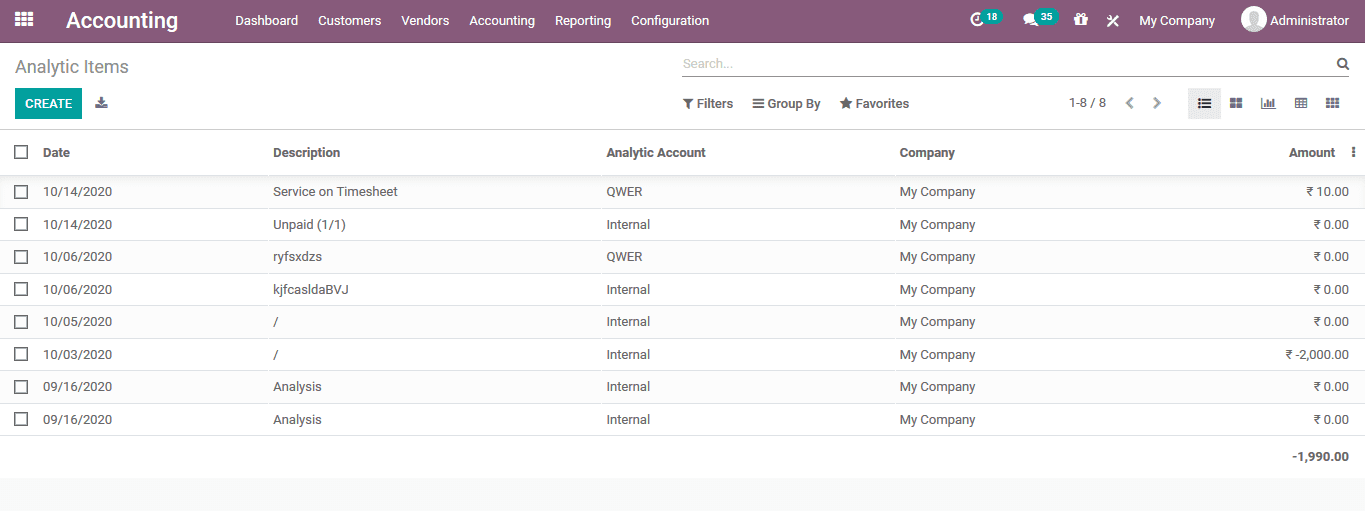
The user can filter out the accounts based on the date of operations and add an additional filter of analytical accounts.
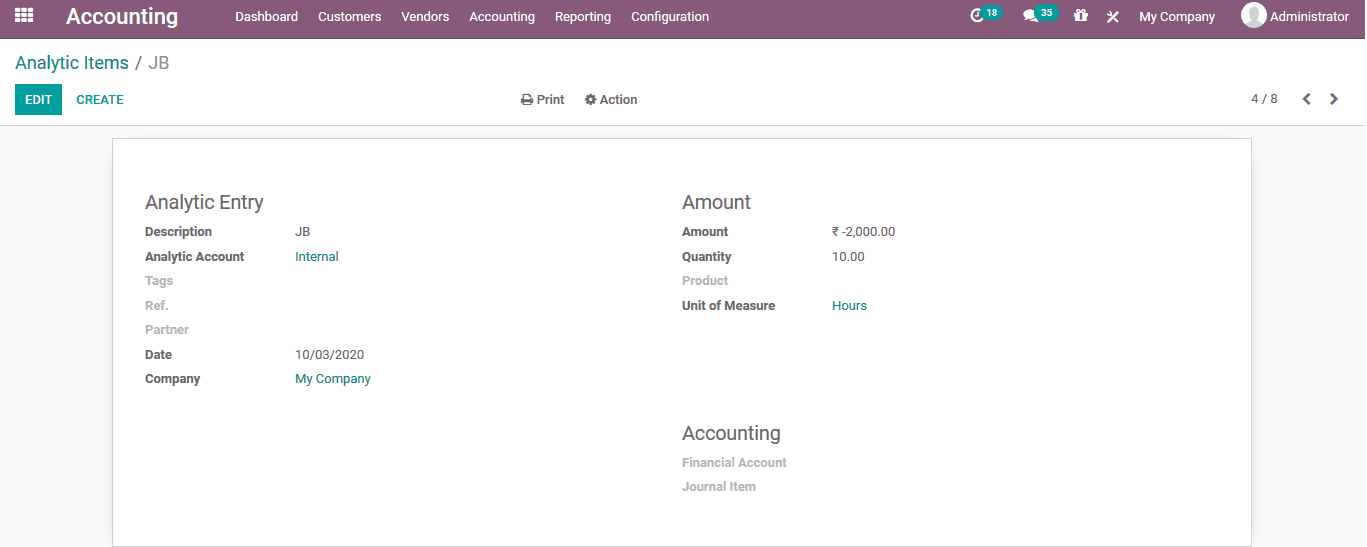
On selecting an respective entry the user can view all the details of the same analytical account operation and the invoice details allocated with the respective account.
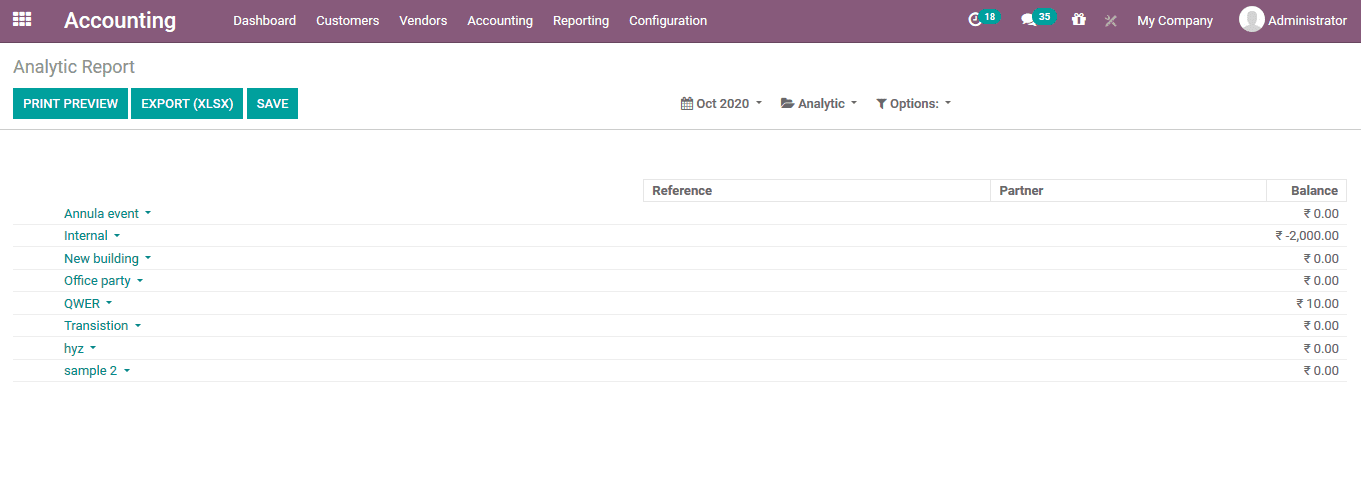
Analytical reports
As reporting is one of the major aspects of the Odoo platform the user can also generate the various analytical reports on the operations.
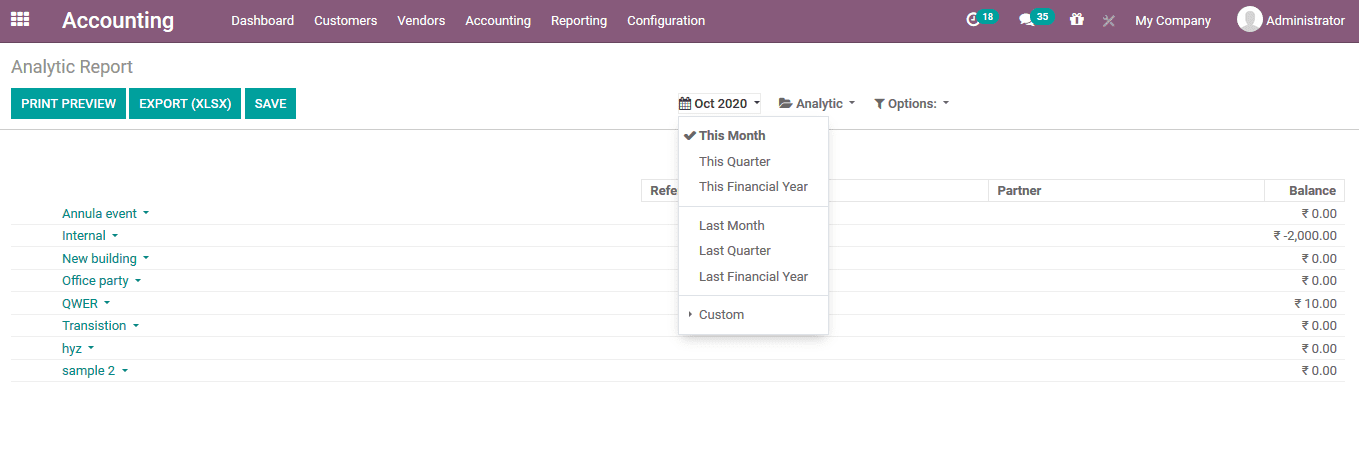
The Odoo provides the use with various default as well as customizable filtering as well as grouping option to sort out the required data.
The filtering can be done based on the dates by selecting the option where there are default as well as customizable options available.
To view the balance of the group under the hierarchy and subtotals the user can select the option under the options. In addition, the user can select the unfold option to view the analytical accounts unfolded.
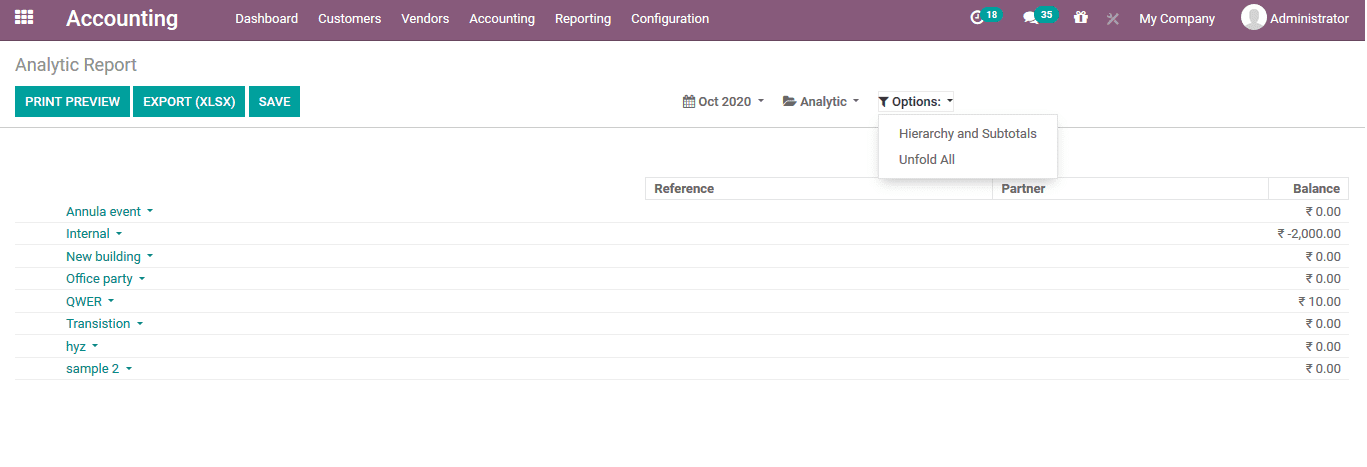
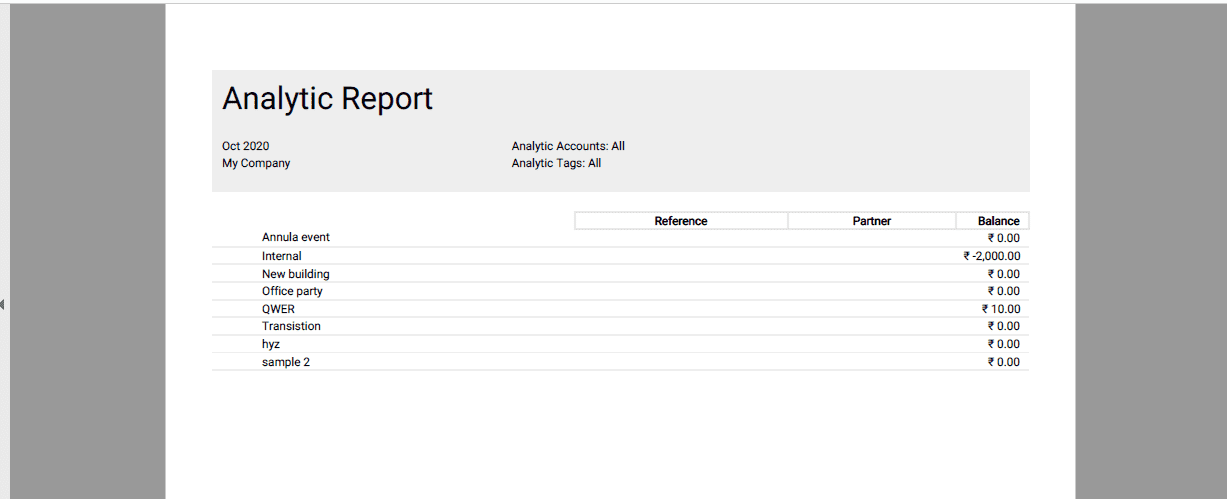
The user can export the analytical reports to an external source using the export option which can be done on XLSX file. In addition, the user can select the print preview option to view the preview of the report which we generated if subjected to be printed
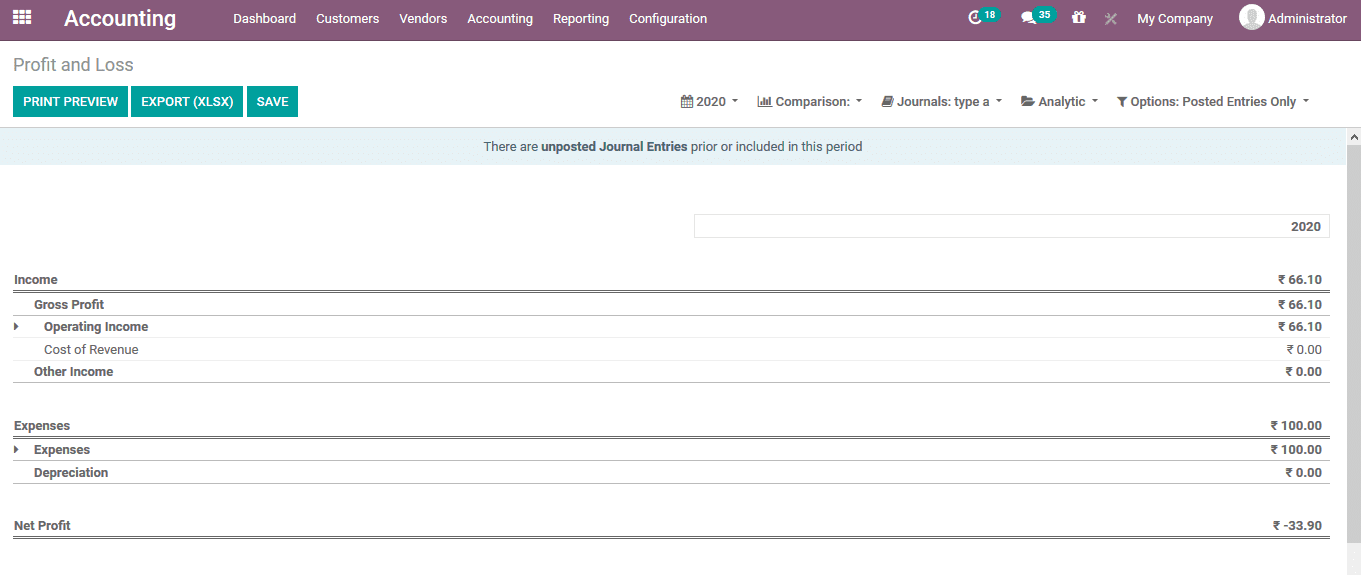
Profit and loss report of analytical account
To obtain the profits and loss report of the analytical accounts the user can select the profit and loss report accessible from the reporting tab.
Here the profit and loss aspects of the platform and the company operations are described.
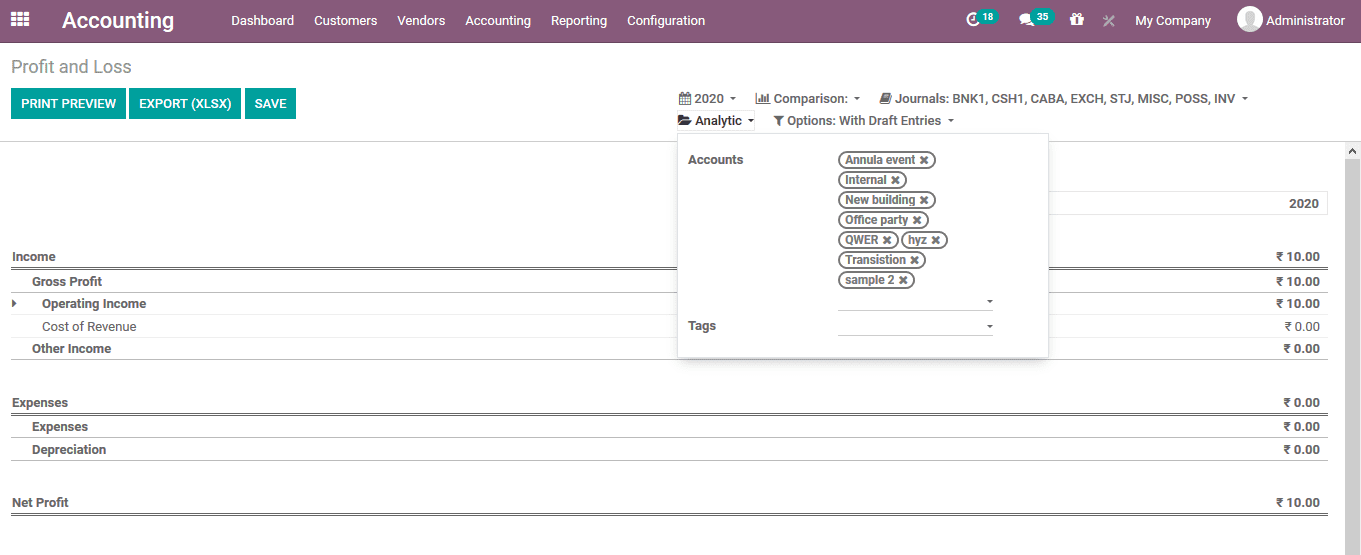
The user can filter out the analytical account aspects of the company operations using the smart filtering option available in the profit and loss reporting menu. The required analytical accounts should be added and the user can also add the tags of operation.
Budget management
Budget management is the stepping stone to success for any business. Odoo has developed an accounting module aiming to equip a business for efficient budget management. The persons using Odoo Accounts can efficiently track and monitor the financial status of the business along with the plans. Odoo makes use of the general and analytic accounting for ensuring efficient budget management.
For making use of Odoo budget planning, a user has to configure three of the following features.
Budgetary Positions
Analytic Accounts
Budget
Budgetary positions can be explained as a kind of mapping of the general accounts with budgets. For creating a budgetary position, a user has to go to
Accounting>Configuration>Accounting >Budgetary Position
Here, the user can define all accounts linked to the budget.
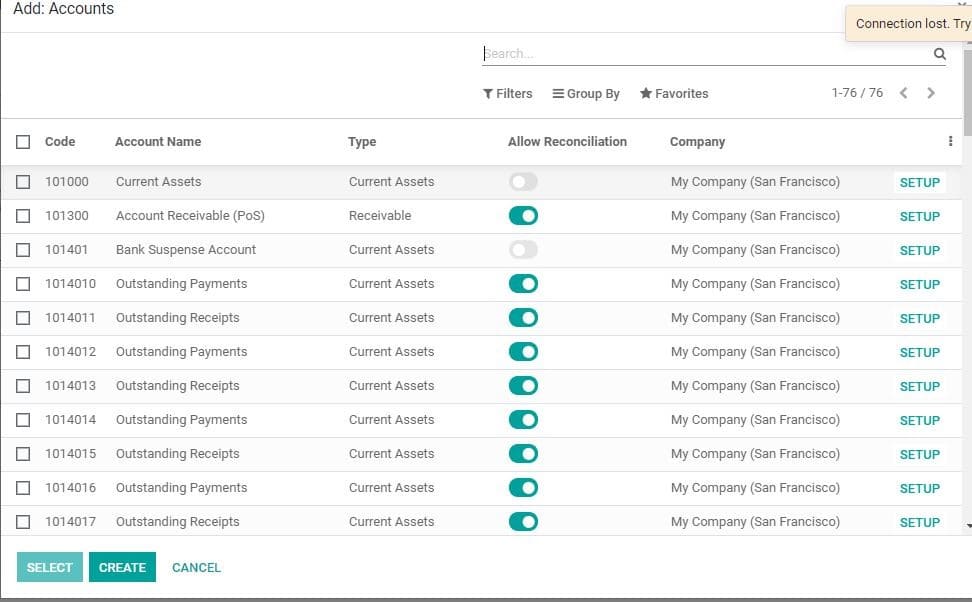
Then Click on Select button
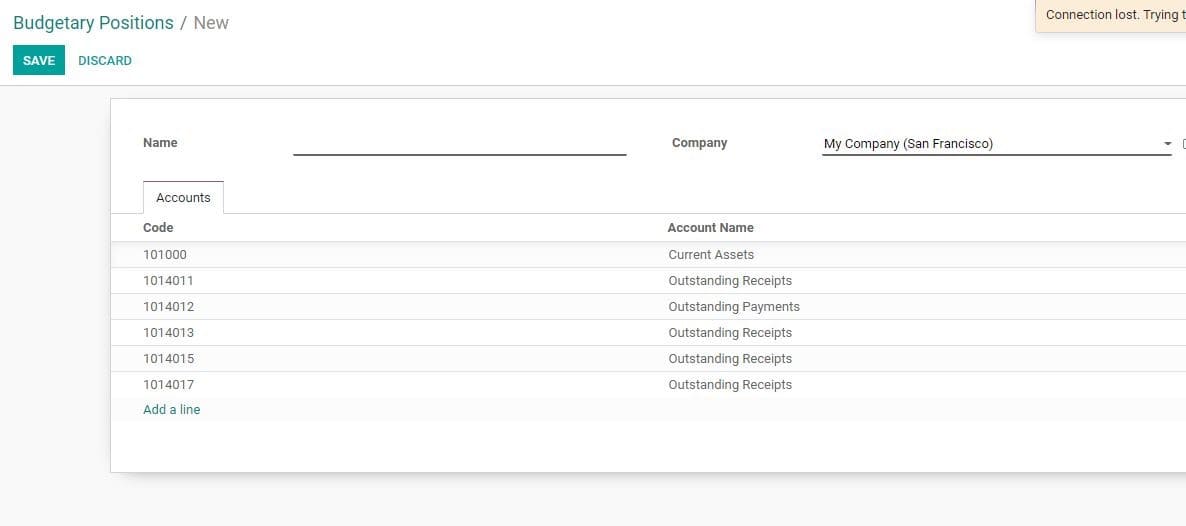
The user has to Save the changes to confirm the Budgetary position of the company.
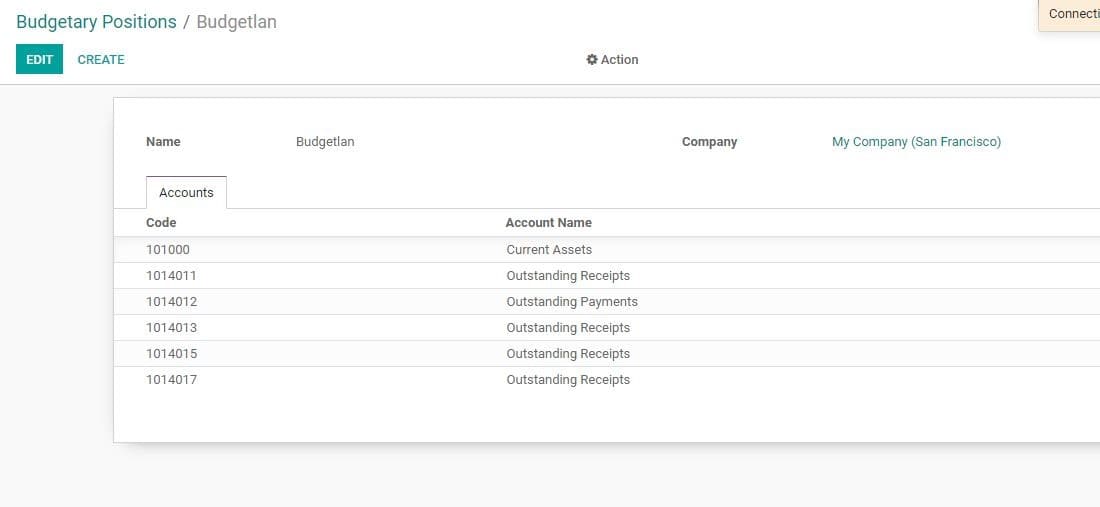
The user can follow the same steps to make a revenue budgetary position. The only difference is that for revenue budgetary position one has to select relevant income accounts.
Customer Invoice to Payments
Depending the business and the applications used by the user you can take different approaches to automate customer invoice creation in Odoo. Usually, draft invoices are made by the framework (with data originating from different reports like sales order or contracts). In these cases, accountants will only have to approve/validate the draft invoices and send the solicitations in batch (by customary mail or email).
A user can create a customer invoice directly from the dashboard by clicking on NEW INVOICE button. The user can also go to the CUSTOMERS section in the accounting tab and select INVOICE option

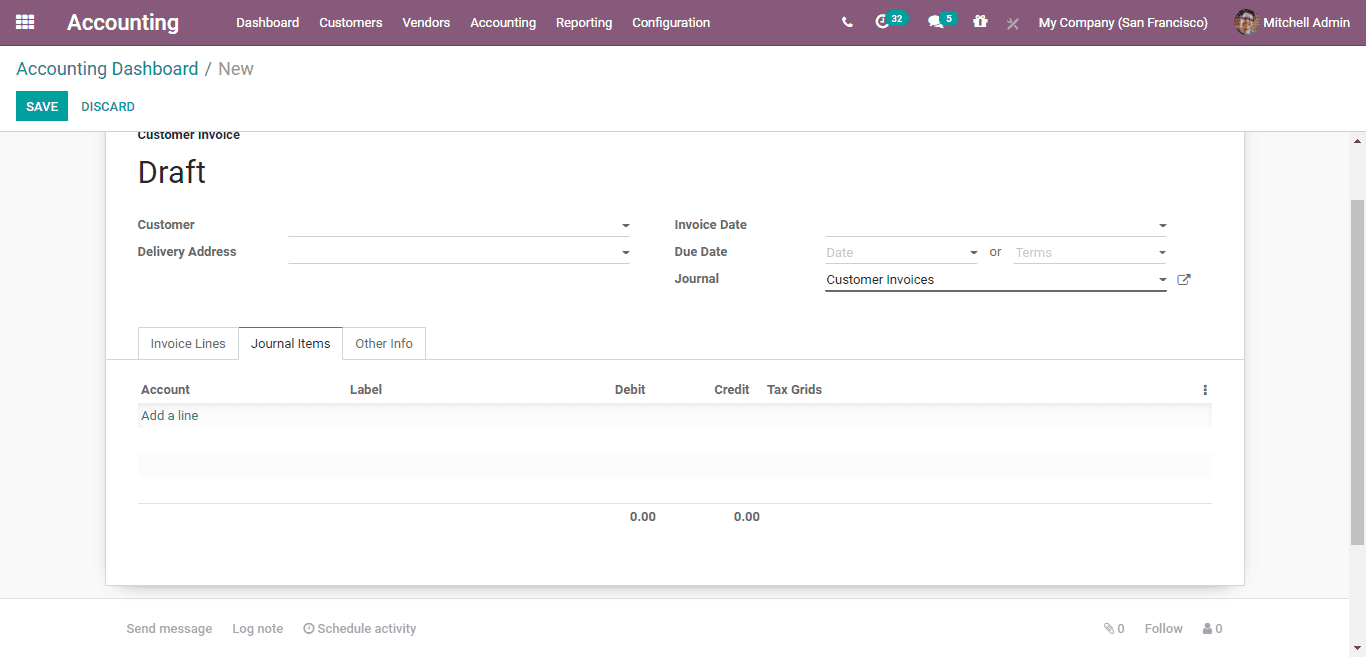
The user can click on the NEW INVOICE button first. Then the user will be navigated to a new window with a creation form like below.

The field comprises of the following attributes:
Customer: The contact of the customer by name, TIN, Email or Internal Reference.
Delivery Address: Delivery Address for the Current Invoice
Payment Due Date or Terms: If the user is using payment terms, then the due date will be automatically computed at the generation of accounting entries. On keeping the payment terms and the due date empty the payment can be made directly. The payment terms will enable the computation of several due dates, for example 50%now,50%in one month.
The user can also set the Payment terms via defining a date.
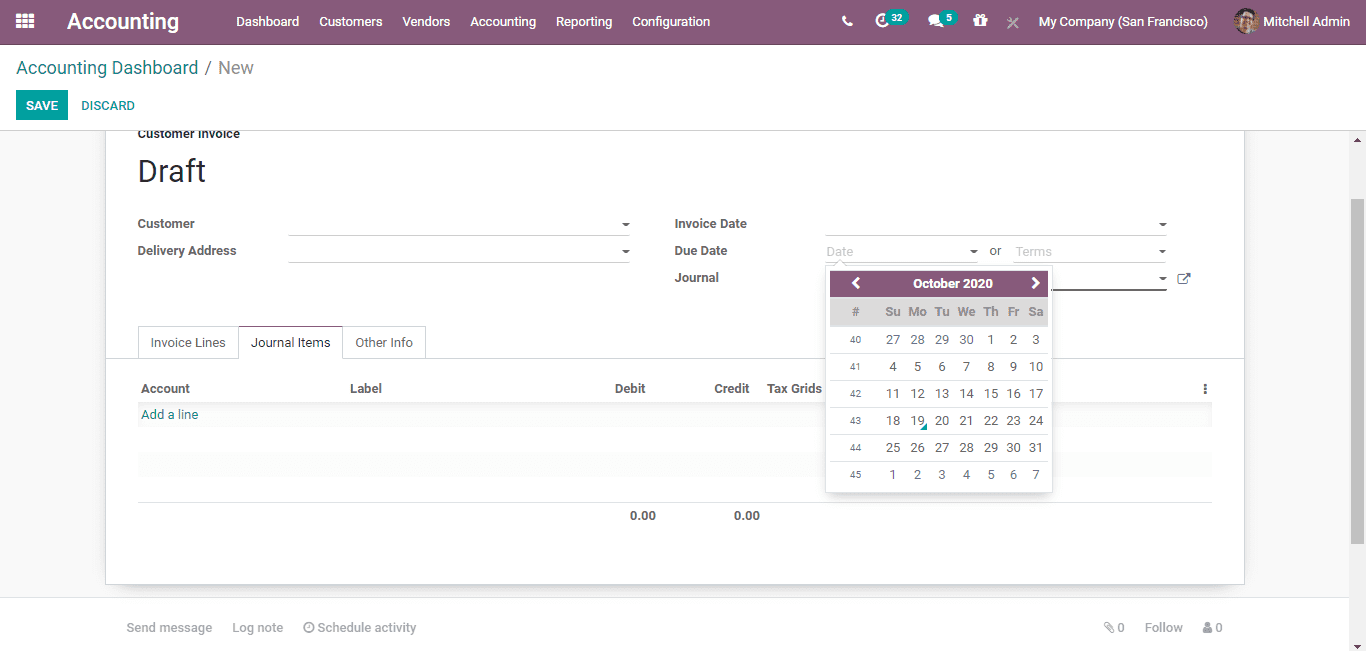
Invoice date: The user can keep it empty if you want to use the current date.
Sales Person: Assign the sales person authorized for deal.
Journal: Here you can define the Journal authorized for the deal.
Company: Company relevant to this Journal.
Currency: Currency used for the transaction.
Under Invoice Lines Tab, a user can add the products the customer desires to buy. The user can also add a description if any under the label section and the account you configured for the deal.
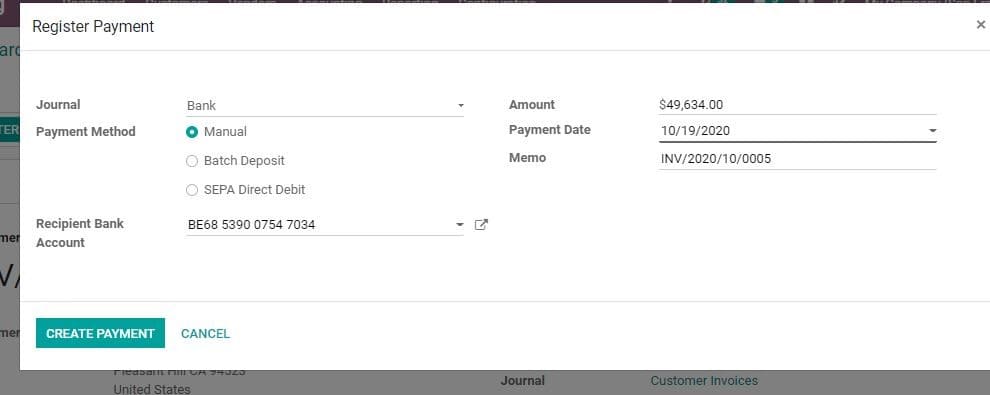
After entering all the details,
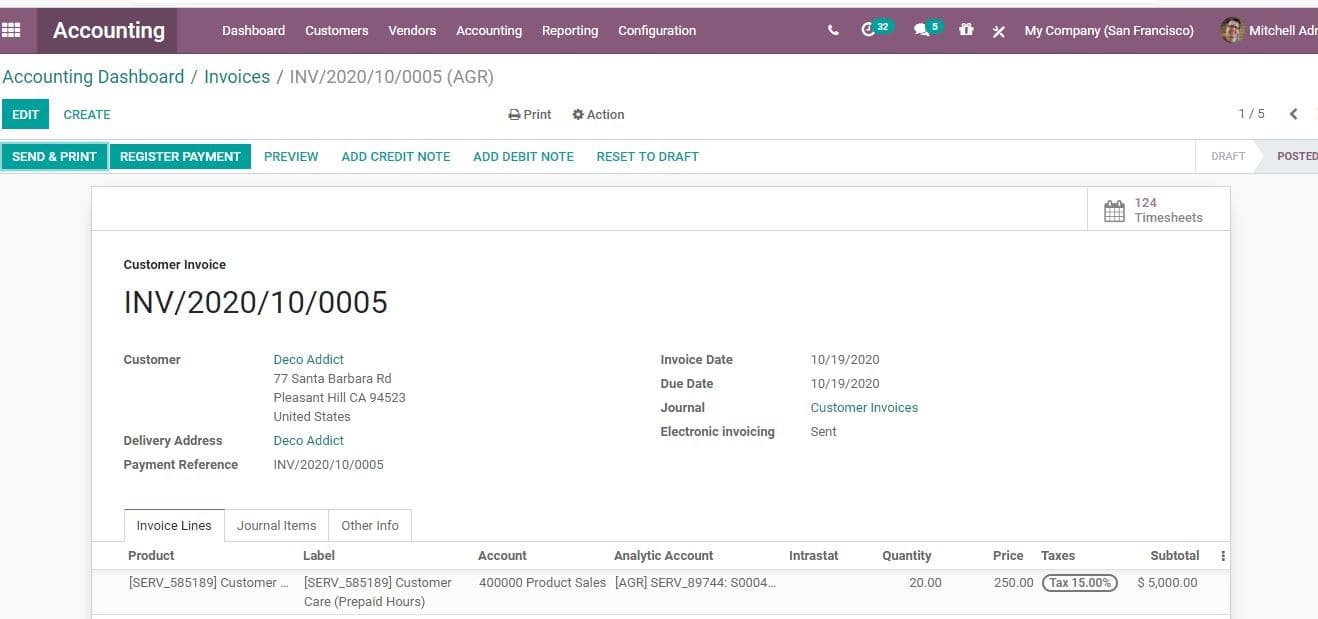
Now, the user can register payment send create payment.
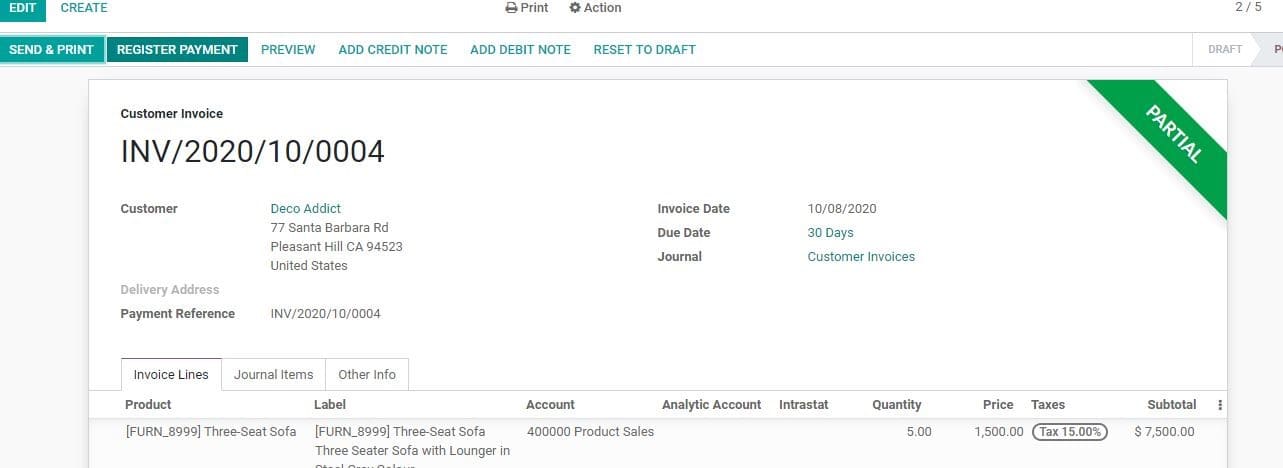
After completing this, click VALIDATES. Now you can see that the invoice has been paid for.
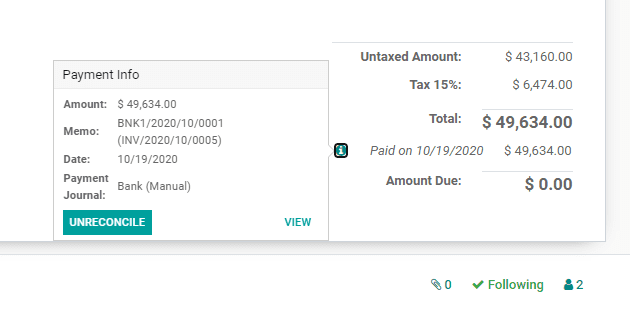
Near the paid on date, you can find a small green icon. Now click on this icon and then you will get acquainted with more information about the payment. The user can see that the payment invoice has been reconciled together. If the user wants to unreconcile, they can do it by clicking UNRECONCILE.

In case, the invoice payment is partial, you get the payment information citing the amount due.
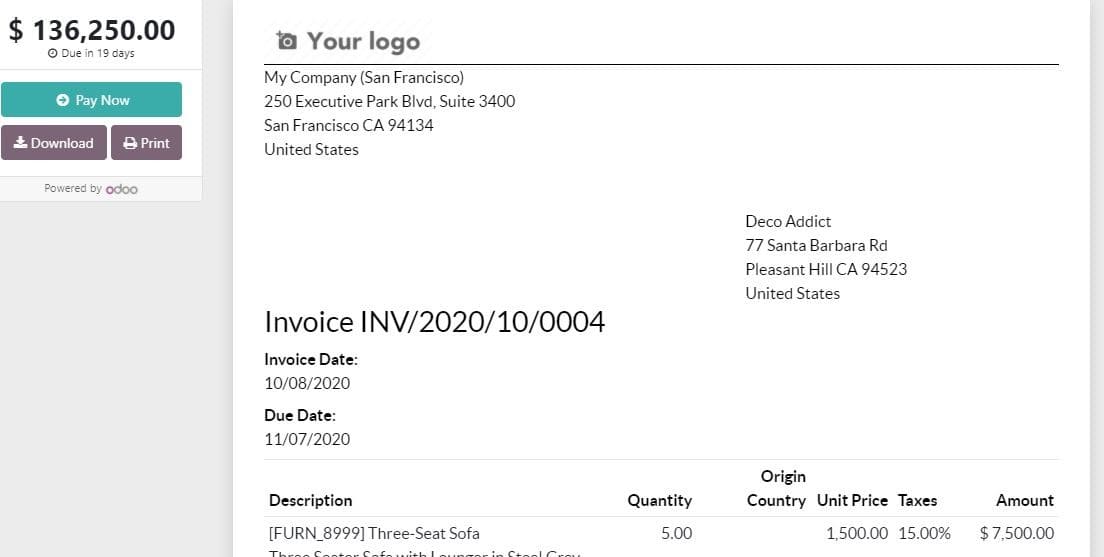
Now, click the PREVIEW button on top to get the website view of the invoice.
In the next step, go to Accounting> Journals> Sales. Here, you can see the journal entry that was automatically created for the invoice.
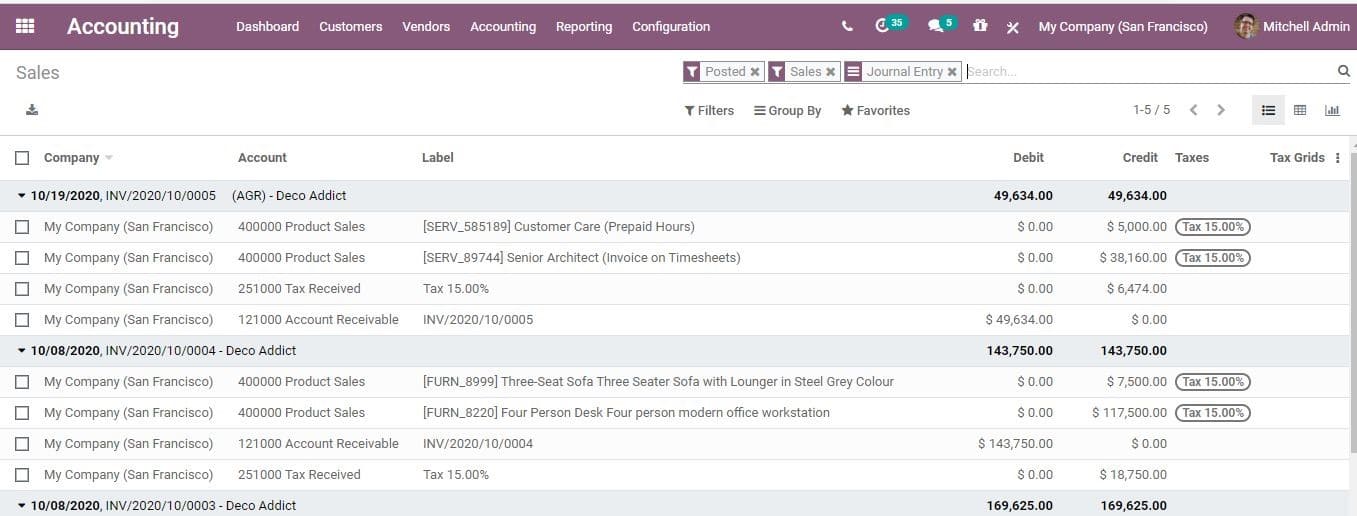
Then, click on it to get journal entry with debit and credit balanced.

Now, go to Customers> Payments
Here, the user can see the Invoice Payment details including date, invoice name, journal, payment method, customer, amount, status and the company.
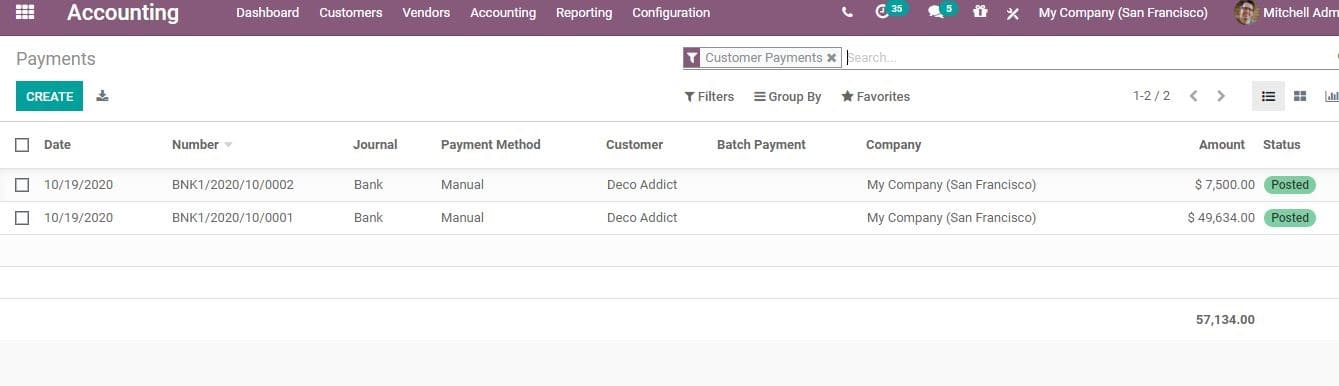
It is from here that you can access the corresponding journal items and also the invoices.
On clicking the journal item, a user can find the details of the client payment. The debited about and the credited amount can be viewed. Amount receivable can also be viewed from here.

The balance between the CREDIT and DEBIT is also there.
Reporting
Aged Receivable Balance
To get a rundown of invoices, a user will have to go for Aged Receivable report, under the reporting menu.
Configuration
Reporting > Partner Reports > Aged receivable.
You can print this straightforwardly to Excel or PDF anytime to get a precise idea of what you see on the screen.
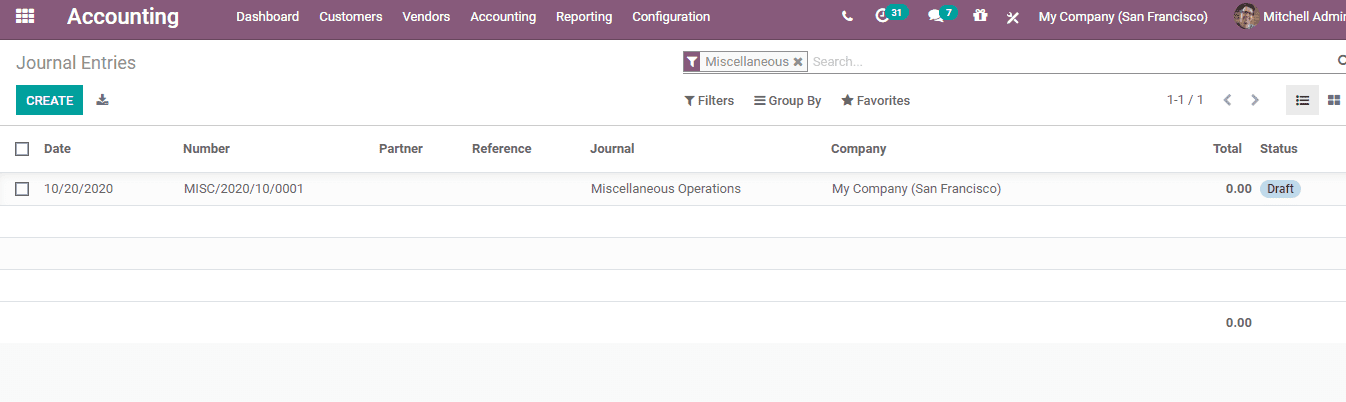
To view all Journal Entries,
Configuration
Got to Accounting-> Accounting->Journal Entries
You can create the journal entries manually here.
AS seen above the filters by default would be MISSCELENEOUS OPERATIONS.
Now create a new journal entry by clicking the button CREATE.